Seams are an essential part of sewing. If you are a beginner looking to sew, this quick and easy sewing tutorial provides step-by-step instructions on creating a plain and open seam using your sewing machine. These simple seams are an excellent starting point for beginners.
What Is A Seam?
A seam is a line of stitching used to join two pieces of fabric together. It’s an essential part of sewing and can be achieved by following many methods.
Some common types of seams include flat-felled seams, French seams, and overlock seams. The type of seam you choose will depend on the fabric you’re working with and the garment you’re making. In this tutorial, we will cover a plain and open seam which is the simplest of them all.
When sewing a seam, it’s important to ensure that the edges of the fabric are aligned properly and that the stitching is straight and secure.
As an Amazon Associate, I earn from qualifying purchases. Read my full disclosure here.
If you are new to sewing, read my ultimate guide to sewing for beginners guide. It’s a step-by-step guide to help you get started sewing with ease.
What Is A Seam Allowance?
One important term to understand when you begin to follow sewing patterns is the “seam allowance.” This refers to the distance between the fabric’s raw edge and the point where the stitching line is sewn. Essentially, it is the extra fabric around the edge of a sewing pattern.
The purpose of the seam allowance is to identify the seam lines without leaving visible lines to sew along. Instead, you are given a specific measurement (1cm or 3/8″) to follow. This distance is measured from the cut edges of the fabric to where the sewing machine will sew the seam lines.
For instance, if your sewing pattern states that the seam allowance is 1cm wide, you will need to sew 1cm in from the raw or cut edge of the fabric. The seam allowance is important because it will determine how the final garment fits you.
What Is The Difference Between Seams And Stitches?
This is a common question among beginner sewers and can be confusing.
- A row of stitches can be sewn by hand or using a sewing machine, made up of two threads looping through the fabric, each stitch being a loop.
- A seam is created by sewing two pieces of fabric together with stitches.
What Is A Plain And Open Seam?
Now let’s talk about two types of basic seams.
Plain Seam – The seam is created by placing the fabric pieces on the right sides together and stitching along the edge using a sewing machine or by hand. The seam is then pressed to one side of the garment.
Open Seam – A plain seam is sewn but pressed open instead of pressing the seam to one side.
Where a plain seam is used:
- Attaching sleeves to armholes
- Attaching collars to necklines
- Side seams on blouses
- Sewing a waistband onto pants or a skirt
- Attaching a skirt to a dress bodice
- Attaching a facing
Where an open seam is used:
- Pant sides seams
- Side seams on a skirt or blouse
- Tailored garments, as they are often lined
- Garments made using heavy-weight fabrics to help reduce seam bulk
Both seams can be used in lots of areas on a garment. It depends on the finished result you want.
For example, if a pattern says, ‘Neaten the seam and press it towards the back’, you want to sew a plain seam and press it towards the back of the garment.
How To Finish Seams
Let’s talk about seam finishings. This is how the raw or cut edges of the fabric will be finished to stop them from fraying.
If you are sewing a plain seam where both layers of fabric are joined together, this step will be completed after the seam is sewn.
If you are sewing an open seam, it is easier to finish the edges before sewing the seam together.
There are many types of finishing methods, but let’s look at three simple ones:
- Zigzag stitching
- Overlocking on a serger or sewing machine.
- Pinking shears
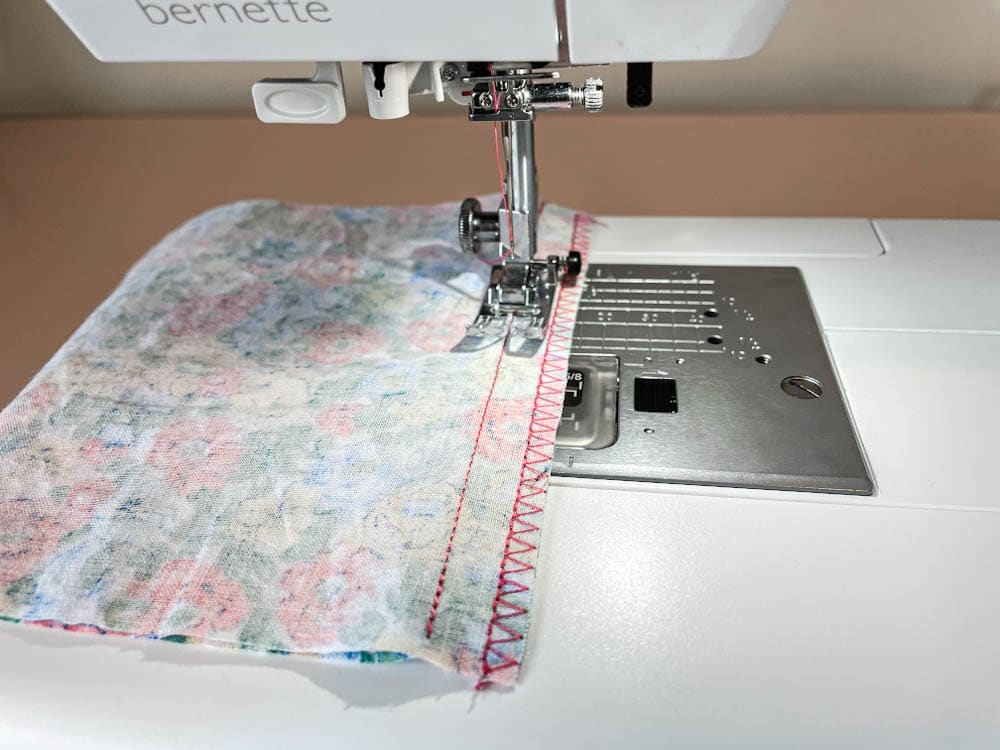
I use an overlocker, also known as a serger, to finish my seam edges. This is a separate machine you will need to buy unless you have a sewing machine that sews an overlocking stitch.
The sewing machine I am using is a Bernette B38 by Bernina, which has an overlocking stitch setting. It’s really easy to use, so if you want to purchase one machine instead of two, consider it!
How To Sew A Plain And Open Seam
To get started, find some scrap pieces of cotton fabric and cut them into 15cm x 15cm squares. You need two pieces per practice seam.
Step 1: Thread your Sewing Machine
Your sewing machine will need to be threaded up correctly before starting. If you need help, read through these two blog posts on threading up your sewing machine and winding your bobbin to get started.
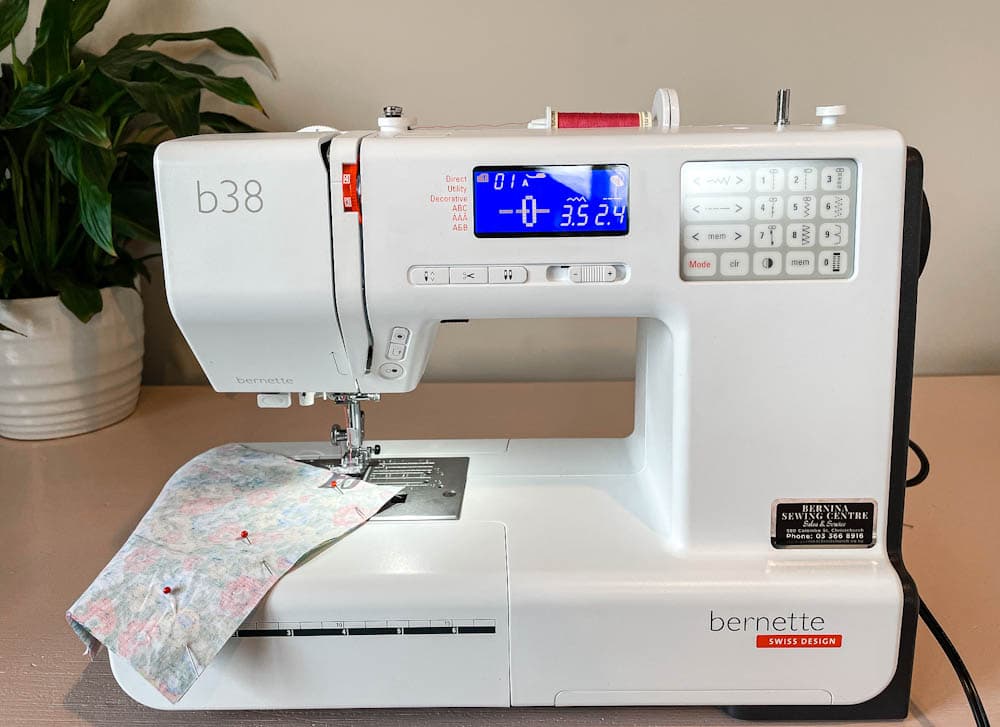
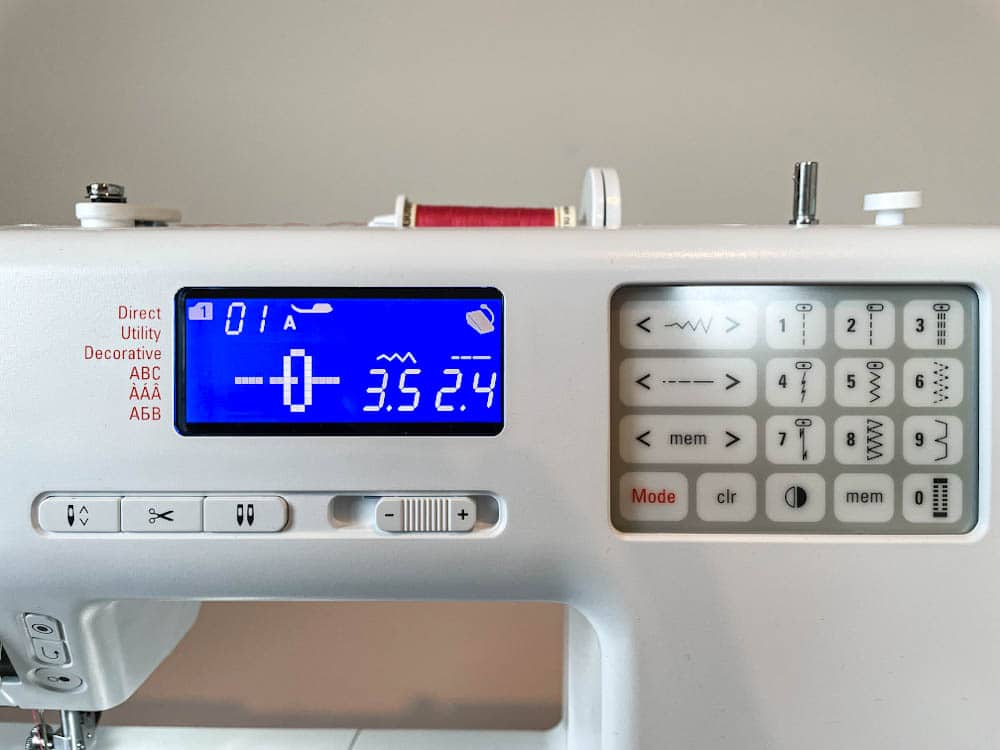
Step 2. Change the Sewing Machine Settings
Once your sewing machine is ready, check it is on the correct stitch settings. Set the stitch type to straight stitch and the length to 2.4 long. This tells the sewing machine to sew a straight stitch at 2.4mm long. This is the industry standard setting for sewing straight seams on a garment.
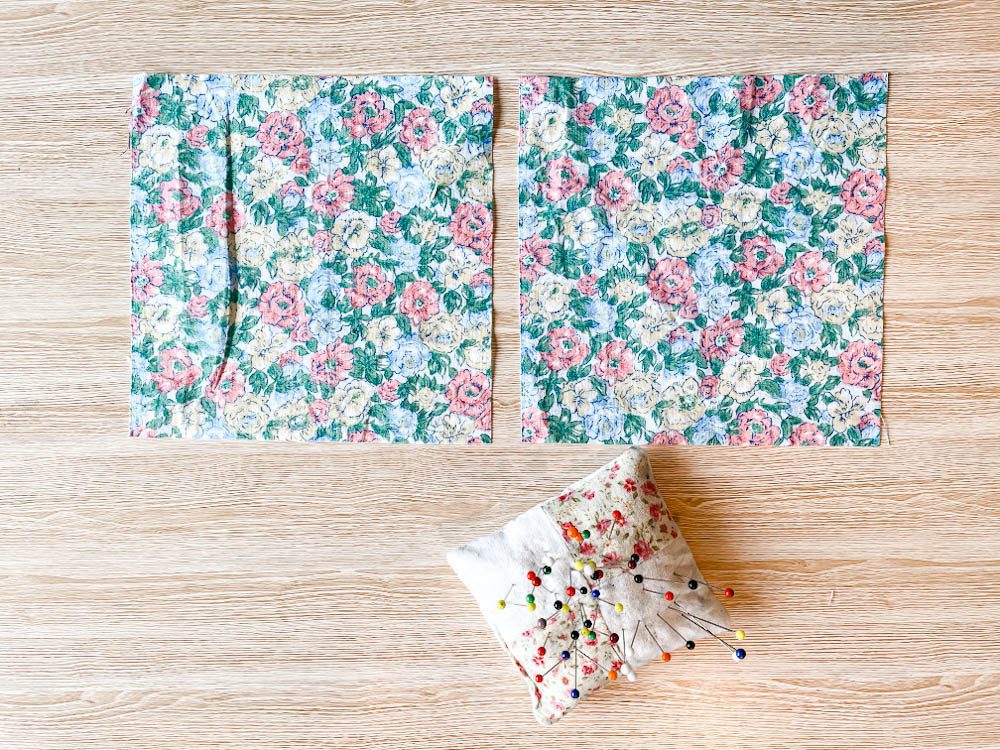
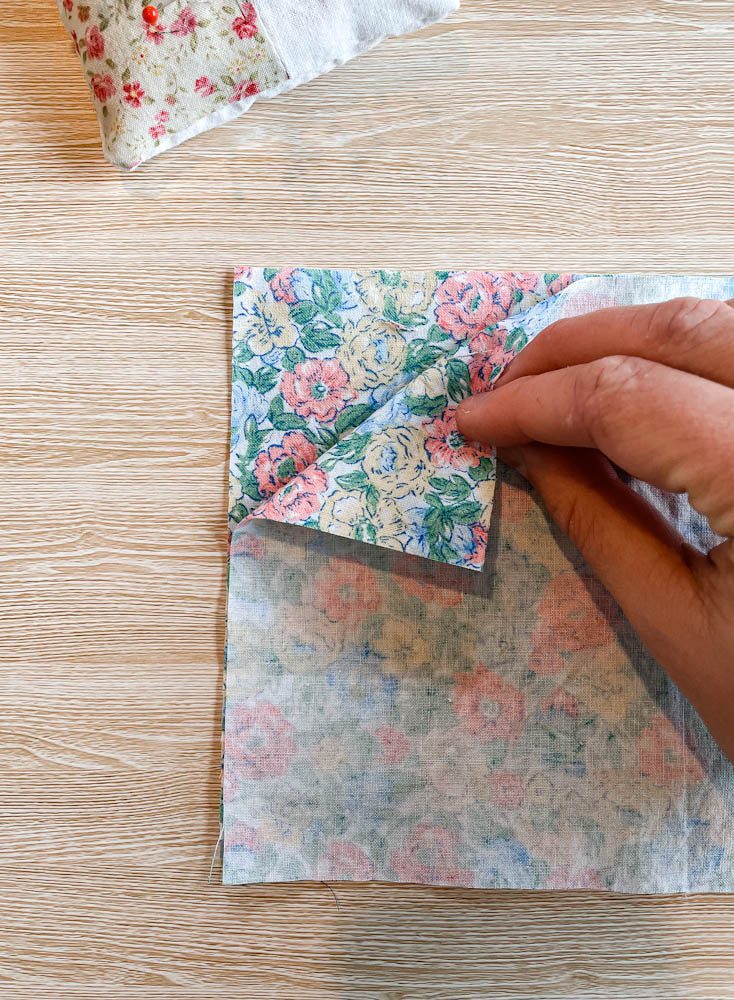
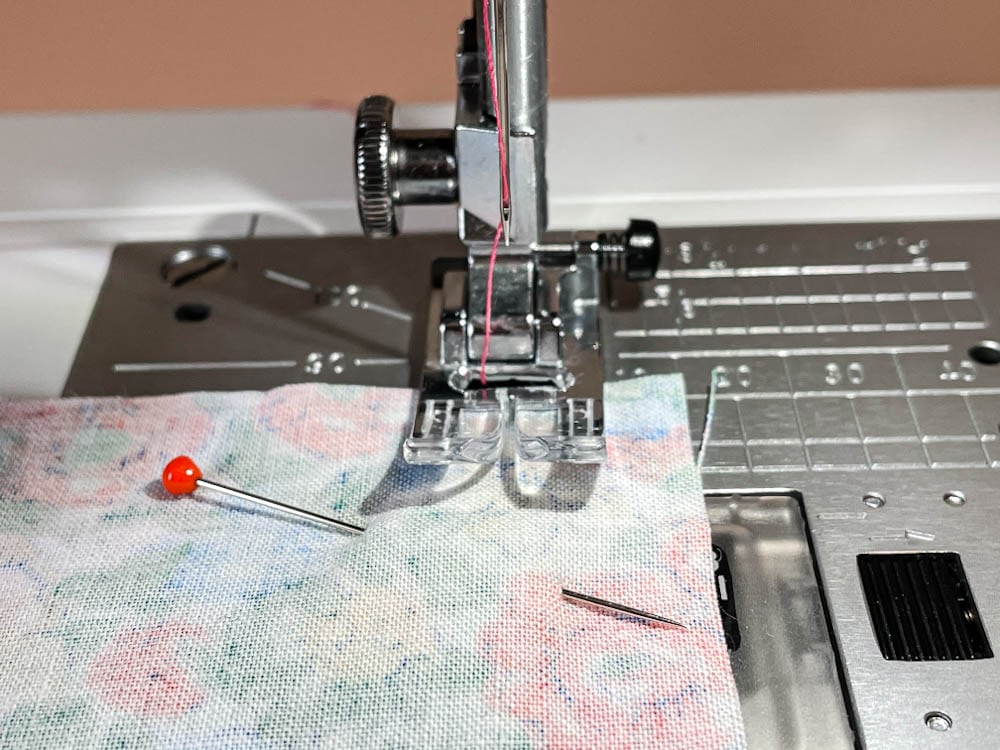
Step 3. Assemble the Fabric to Sew
Place two pieces of fabric together with the right sides facing each other.
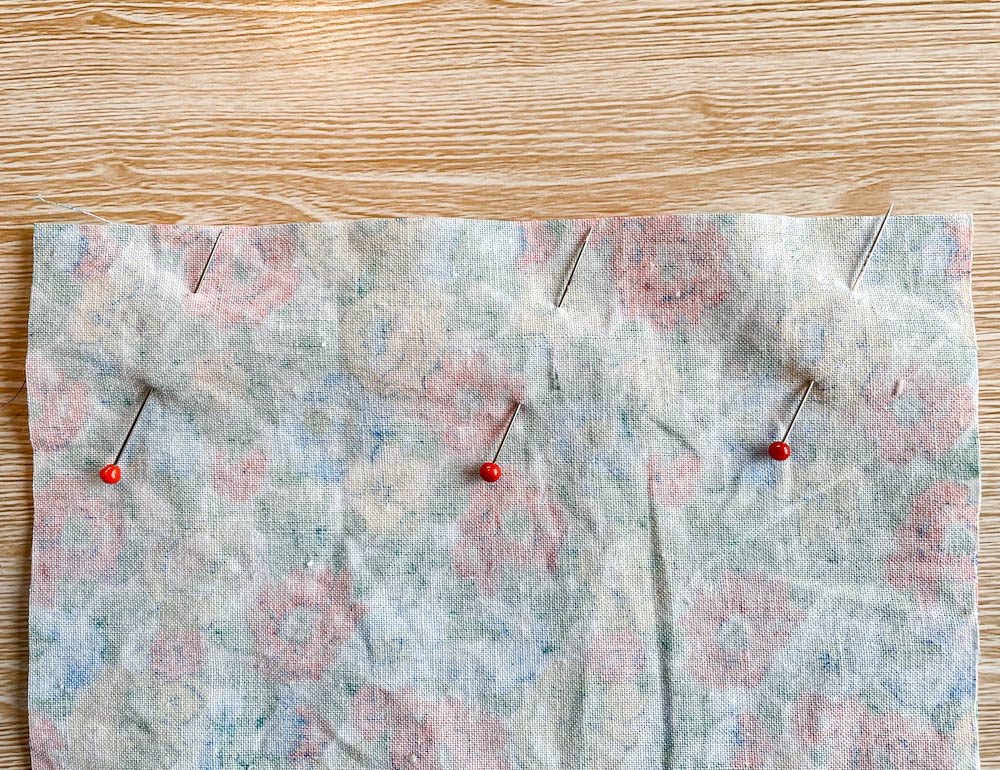
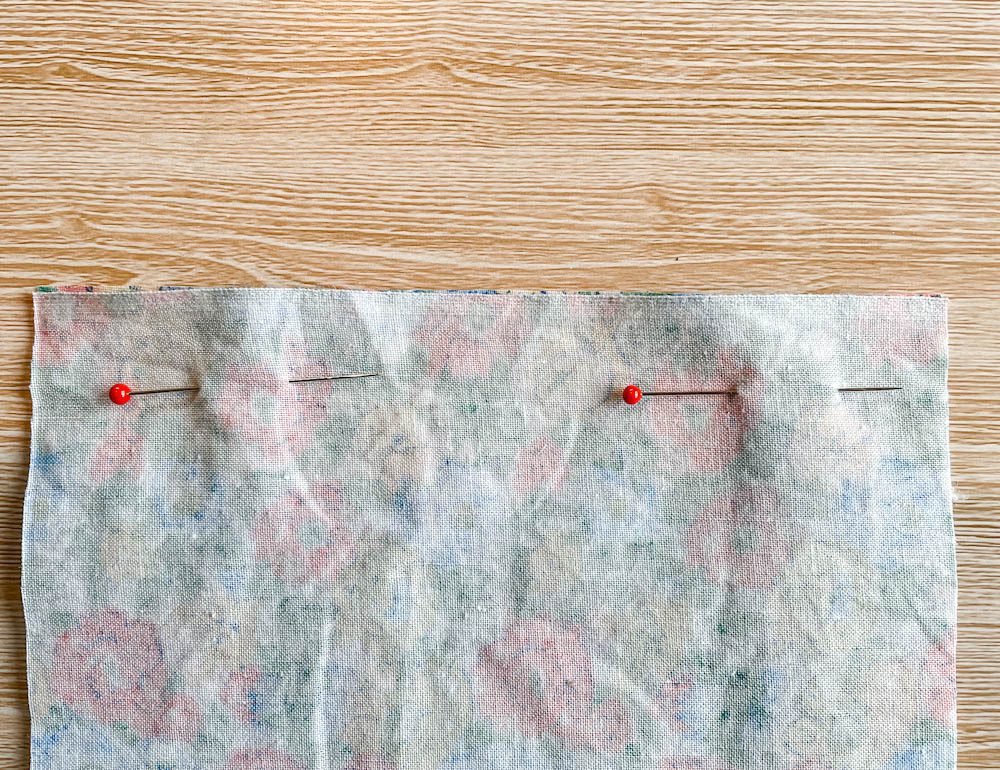
Pin along the edges to hold them in place as you sew. You can pin two ways, sideways to sew over the pins or straight with the ball ends facing you to pull them out as you sew.
Step 4. Lift the Foot Pedal up
Place the foot pedal lever up and ensure your needle is up by turning the sewing machine flywheel.

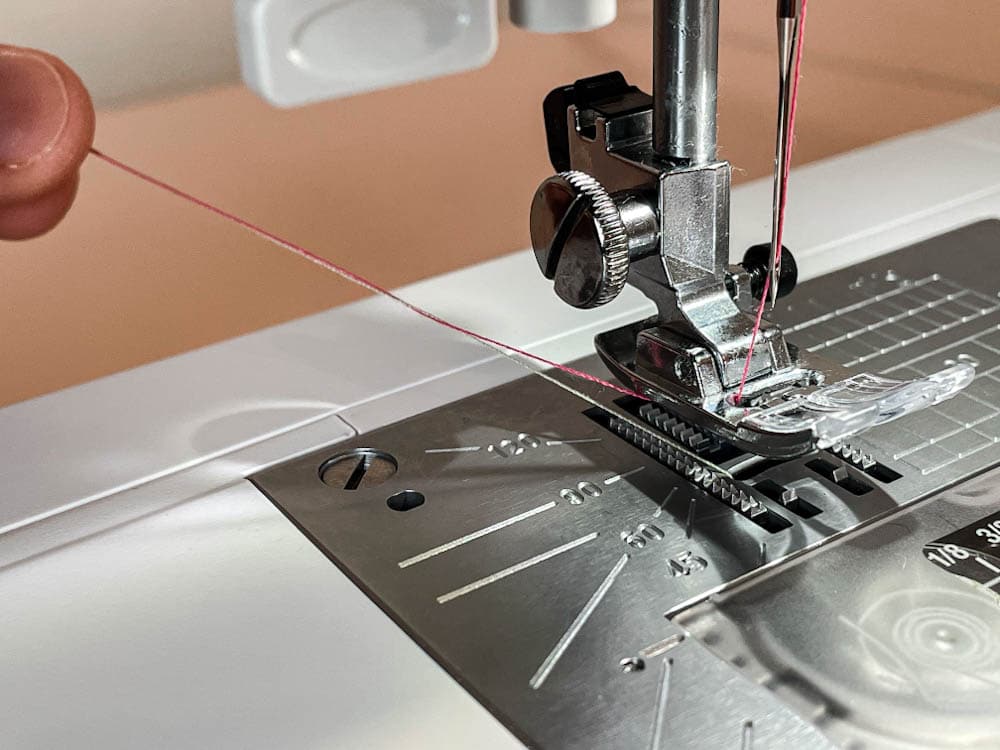
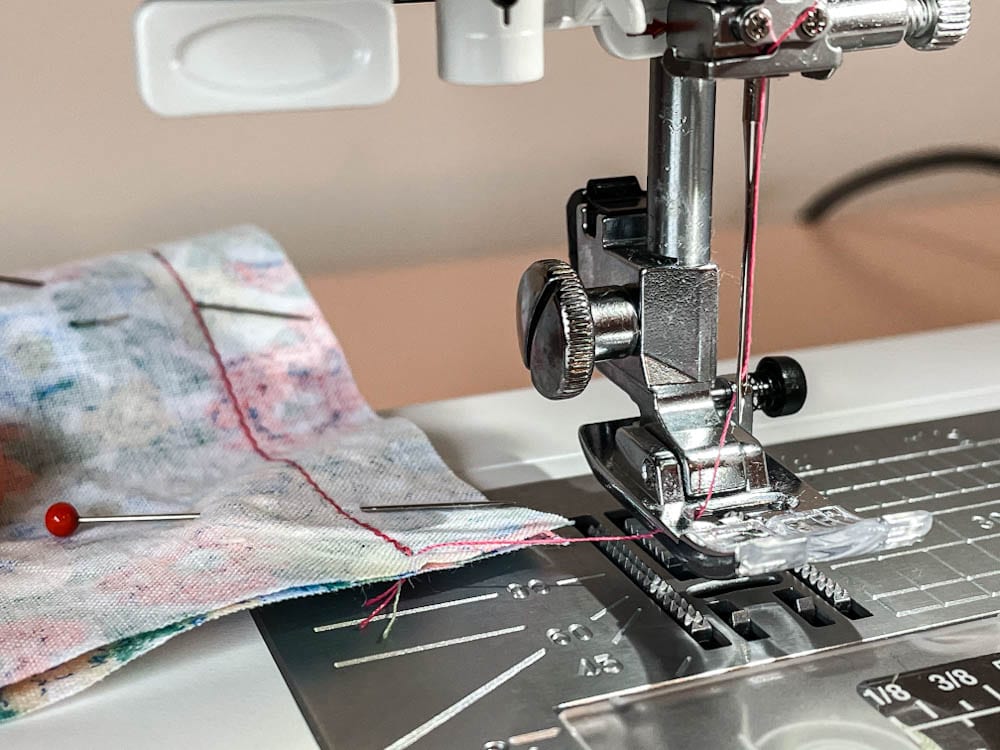
Step 5. Hold the Threads in Place
Pull the threads to the back of the sewing machine underneath the presser foot.
Placing the threads on the back of the sewing machine will help stop them from getting tangled on the bottom of the fabric. This can look messy and sometimes cause sewing problems.
Tip: You can hold the threads as you start to sew. Keep in mind that every sewing machine performs differently.
Step 6. Check the Seam Width
If you are following a sewing pattern,, check the seam allowance in the pattern instructions.
On the arm of the sewing machine are markings like 5mm, 10mm, 15mm, 20mm and so on. These lines are measured from the needlepoint so you can easily sew the right seam allowances. This means you don’t need to measure or mark the seam allowance when sewing.
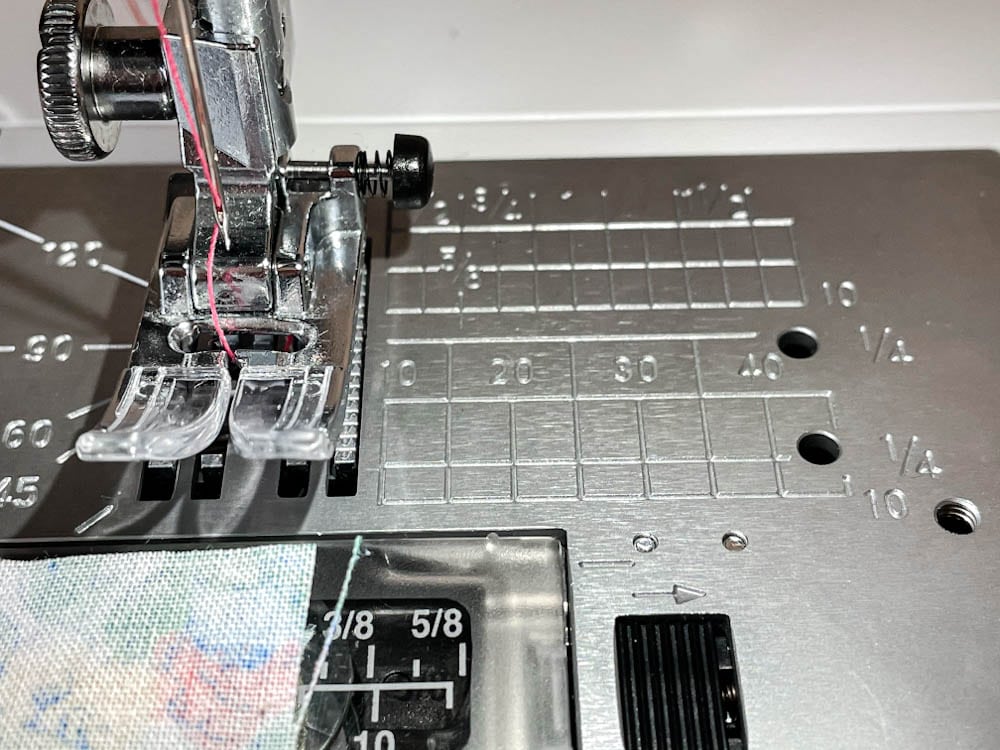
Tip: You can use washi tape to mark seam allowances on a sewing machine that doesn’t have the seam allowance needed.
Place the edge of your fabric along the 1.5cm line for this practice. If you are following a pattern, follow the seam allowance from the instructions instead.
Step 7. Place the Presser Foot Down
Place the presser foot down to hold the fabric in place.
Step 8. Sew the Seam
Start sewing 4-5 stitches by slowly pushing your foot down on the sewing machine’s pedal. Stop and reverse the stitches, so you go back over the stitches you just sewed.
To put the sewing machine into reverse, there is usually a button or lever on the machine. Check your sewing machine manual if you are unsure.
Continue to sew the seam, guiding it along the seam allowance line.
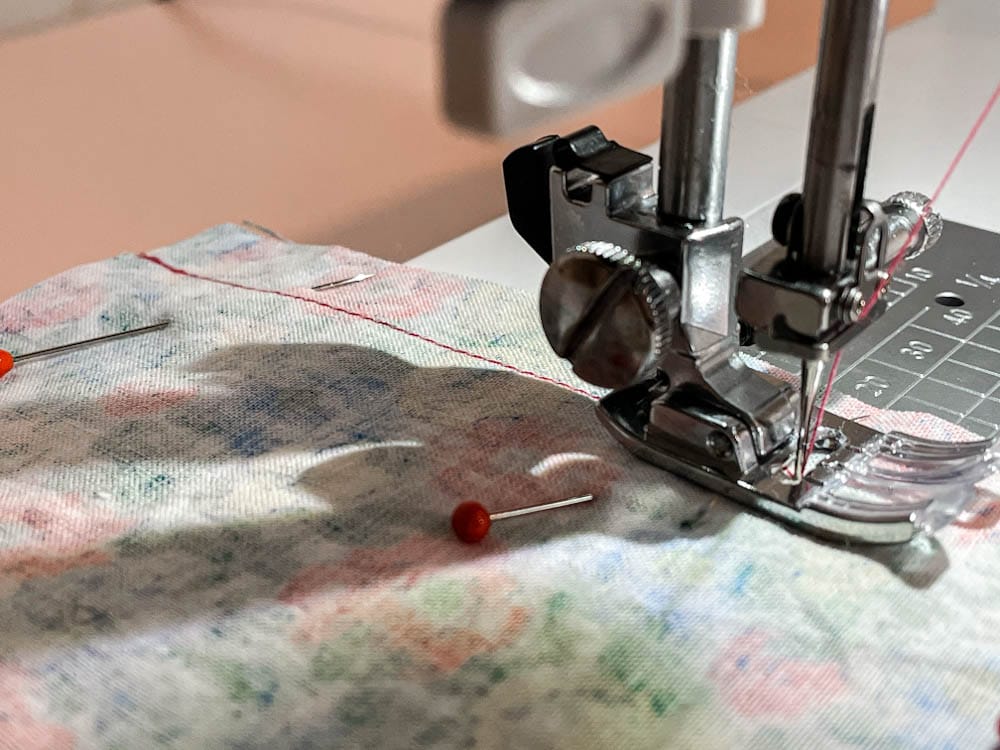
Tip: Don’t pull the fabric as you sew because this will break the needle. Just lightly guide the fabric with the tips of your fingers as you sew.
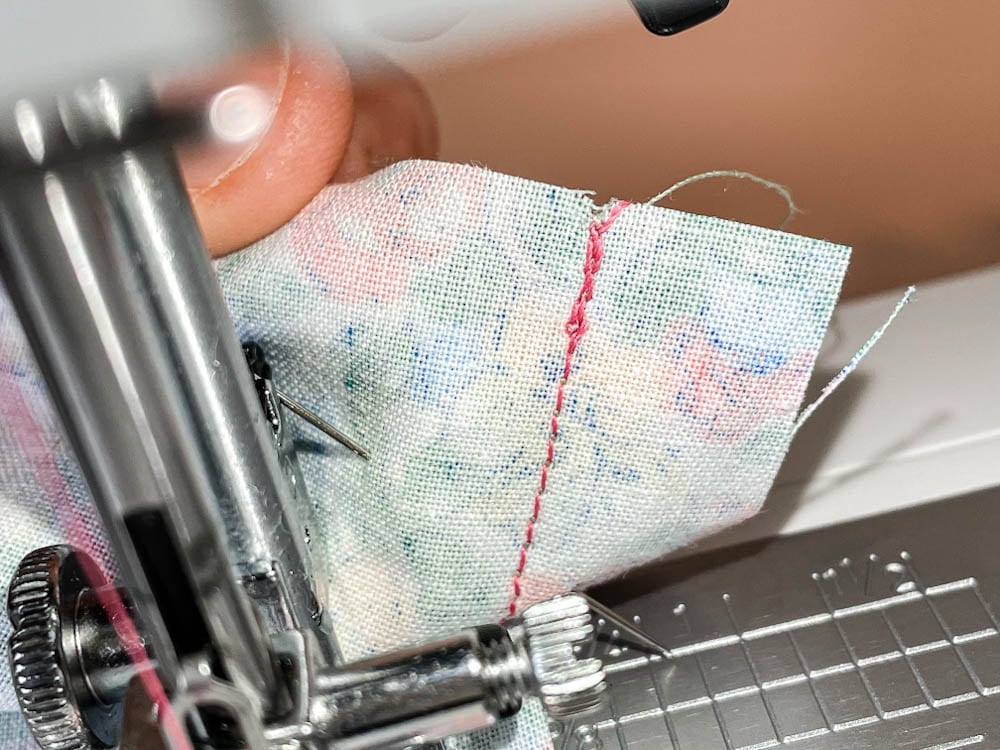
Step 9. Backstitch the end of the Seam
Once you reach the end, stop just before the edge of the fabric, about 5mm. Backstitch by reverse stitching a few stitches, as you did at the start.
Step 10. Remove the Fabric
If the needle is still down, use the flywheel to lift it up. Lift the foot pedal and pull your work out from the machine.
I like to pull my work out towards the back of the sewing machine so the threads release easier.
Cut off the threads to detach your sewing, or use the automatic cutter.
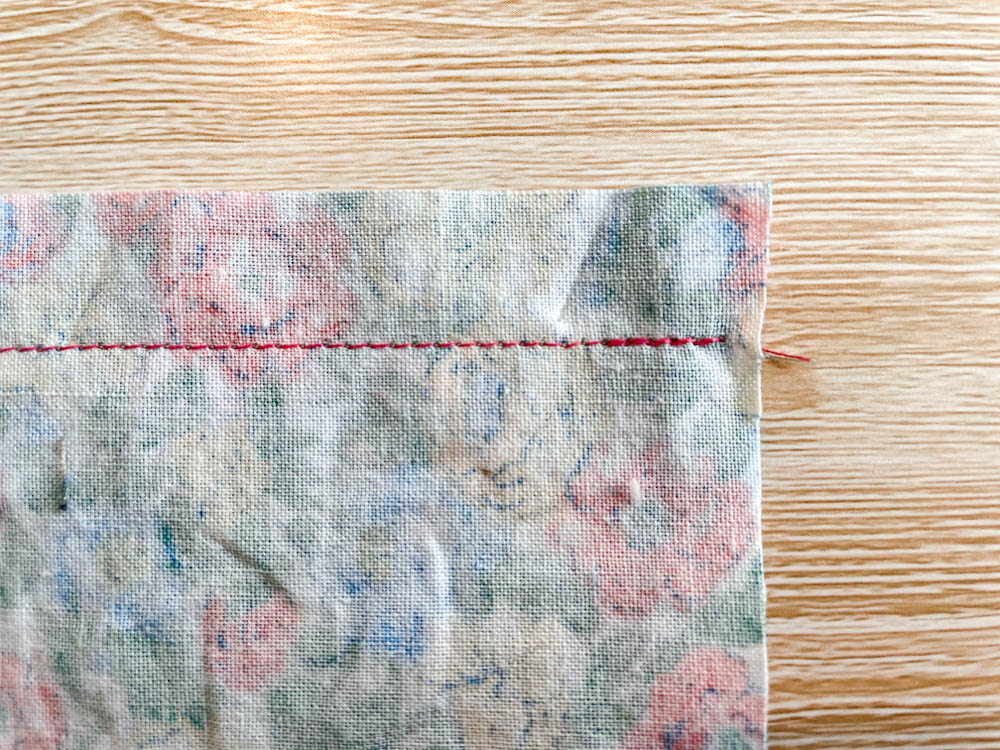
Step 11. Finish the Seam
Plain Seam: To finish the plain seam, neaten the raw edges together and press to one side.
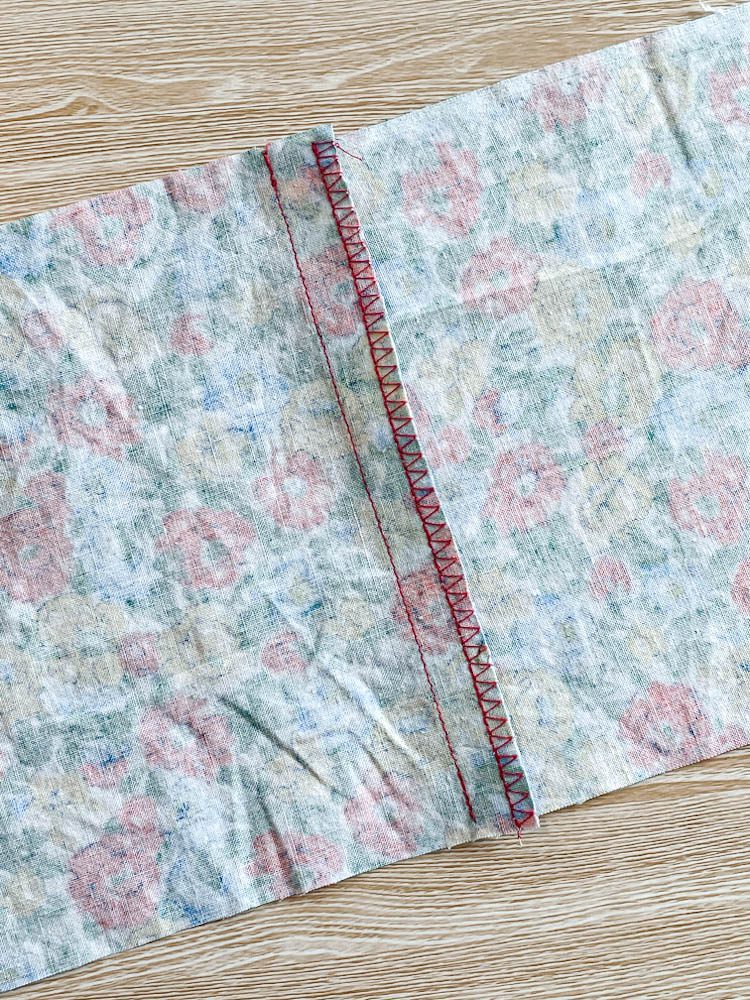
Open Seam: To create an open seam, follow the same steps as above, but before you start sewing, you need to neaten the raw edges with your serger or zigzag stitch.
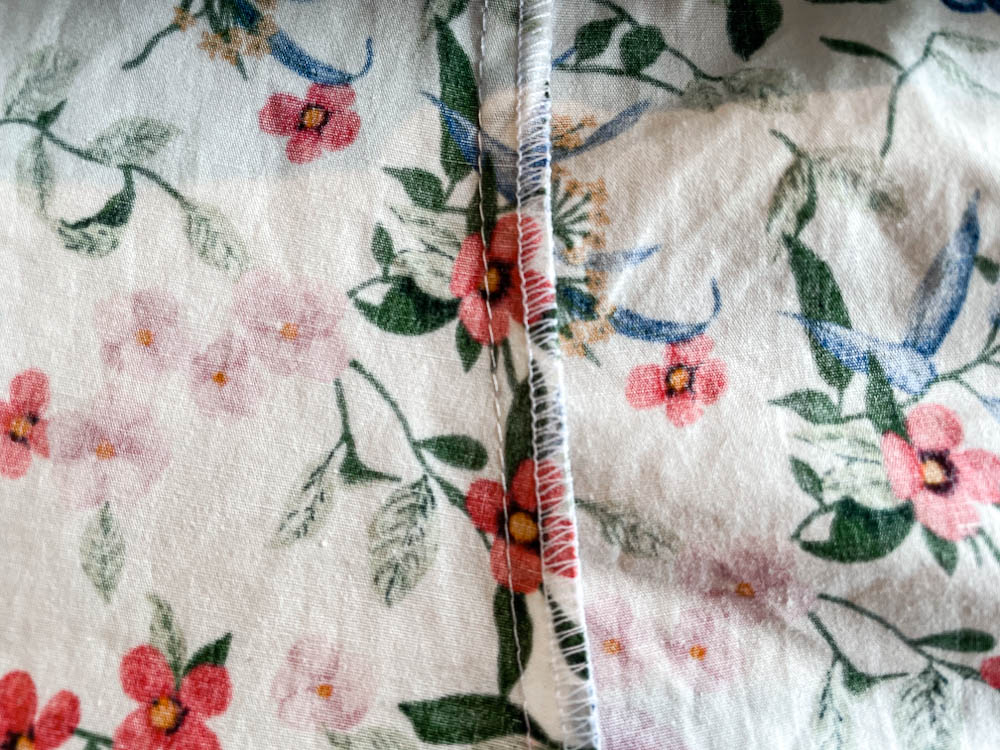
Open Seam Example
Below is an example of an open seam from my wrap dress sewing tutorial. This is a great example of why you might use an open seam on the side of a dress.
As you can see, there is a small opening in the seam, and it looks like a hole. The dress is a wrap-around style, so this open seam allows for a small opening to be used to pull the tie through.

Seams Conclusion
Now that you know how to sew a plain or open seam, you can try sewing projects or garments to practise your sewing skills.
More Helpful Sewing Posts
- How to Wind a Bobbin
- How To Thread A Sewing Machine Step-by-Step Guide
- Sewing Marking Tools with Names & Pictures
- Sewing Cutting Tools for Beginners
- Sewing Tools and Equipment List with Names and Pictures
- Sewing Pattern Storage Ideas – 10 Ideas!
- Seams – How to Sew a Plain and Open Seam
Did you find this Blog post helpful? If you did, please let us know in the comments below!