Knowing how to thread your sewing machine correctly is an excellent skill to have. It prevents you from encountering technical issues and ensures that sewing remains a pleasurable activity. Follow this step-by-step guide to learn how to thread a sewing machine.
Learning how to sew can be so much fun! You’ll be able to create your own beautiful clothes, home decor, and thoughtful gifts. It’s such a rewarding skill to have, and you have every reason to feel proud and excited as you start on this journey.
If you are dusting off your sewing machine from the cupboard and no longer have the instruction manual, don’t panic. Go to the brand’s website and search for the model number. You can find most manuals online these days.
If you’re thinking of getting a sewing machine, read my guide to sewing machines for beginners. This will help you decide what type of sewing machine is best for you.
If you are new to sewing, you may find it helpful to read through these beginner sewing guides:
- Learn How to Sew -Ultimate Guide to Sewing for Beginners
- Fabric Cutting – How to Cut Fabric Correctly
- Grainline – What is the Grainline of Fabric in Sewing & Why is it important?
- Types of Fabrics and Materials with Names and Pictures
- Seams – How to Sew a Plain and Open Seam
Getting the hang of using a sewing machine can be easy once you’ve done it a few times. It’s kind of like driving a car – you just get used to it. Once you figure out the correct way to thread your sewing machine, it’ll become so natural that you won’t even have to think about it anymore..
Tip: Before you begin threading up your sewing machine, I recommend you learn how to wind a bobbin first because this step needs to be done before your sewing machine needle is threaded up.
As an Amazon Associate, I earn from qualifying purchases. Read my full disclosure here.
How To Thread a Sewing Machine Video
Before You Get Started
- Use trusted quality threads on your sewing machine to avoid issues with threads breaking or tension. Sometimes, sewing machines can be sensitive to cheap threads, and you can have some issues when sewing.
Brands I recommend are Gutermann, Coats & Clark, or Mettler. I use all of these brands and find the quality excellent. Read my full guide to types of sewing threads to learn more. - Follow the sewing machine manual if one is available to you. This will help make sure you haven’t missed any steps when threading your sewing machine. Although most sewing machines are threaded similarly, some may have an additional step or two.
- A sewing machine has a top and bottom thread. The top is where the thread spool will sit, and the bottom is where the bobbin will go. You will need to wind the bobbin before threading up the sewing machine.
- Ensure the sewing machine is switched OFF before threading it up. This is for safety.
How To Thread A Sewing Machine Step-by-Step Guide
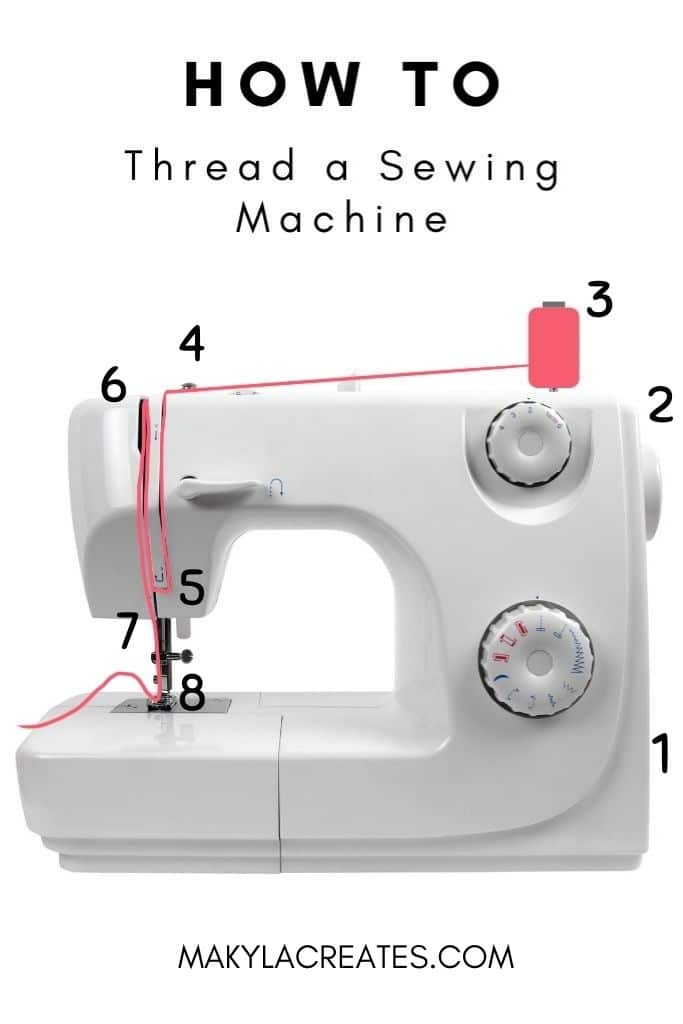
The diagram below will help you understand the steps and path we are going to thread up the sewing machine on. Each step will be explained in detail below.
Most domestic sewing machines have arrows or guides on the machine to show you each threading step. You will begin at the top and work down towards the machine needle.
Step 1: Turn Off the Sewing Machine
Before you begin threading up, TURN OFF your sewing machine! This is for safety, as your hands will be near the needle and moving machinery.
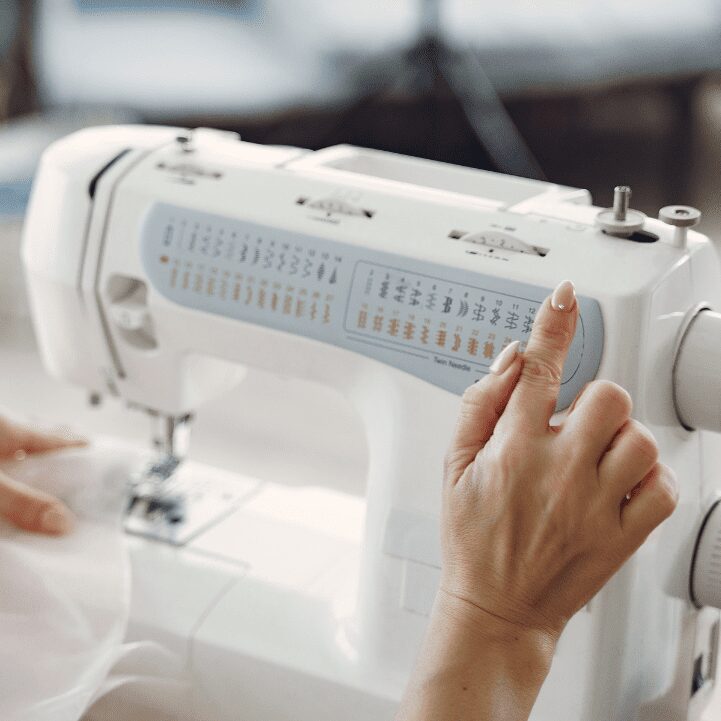
Step 2: Put the Needle Up
Turn the handwheel on the side of the sewing machine towards you until the needle is fully up. Newer sewing machines often have a small line or mark on them. The needle will be in the right position when this mark is visible at the top of the handwheel.
Step 3: Positioning the Thread Spool
Begin by putting the thread spool onto the spool holder. Some sewing machines can be pushed down for storage purposes. If it is down simply pull it up and place the spool onto it. You may also have a spool holder that is sitting sideways.
Step 4: Back Thread Guide
Holding the thread, place it through the back thread guide. There should be a small groove or hook. Make sure the thread goes through this otherwise, the machine won’t sew correctly.
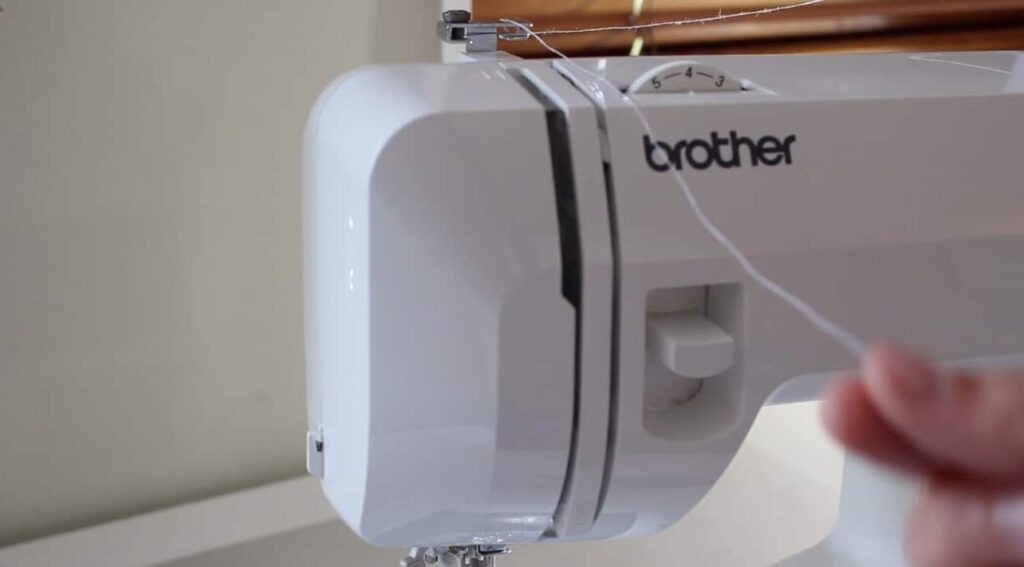
Step 5: Front Thread Guide
Take the thread down the front channel and around the front tension guide at the bottom. The dial above the “Brother” logo on the sewing machine is the tension dial that controls how tight or loose the thread is sitting.
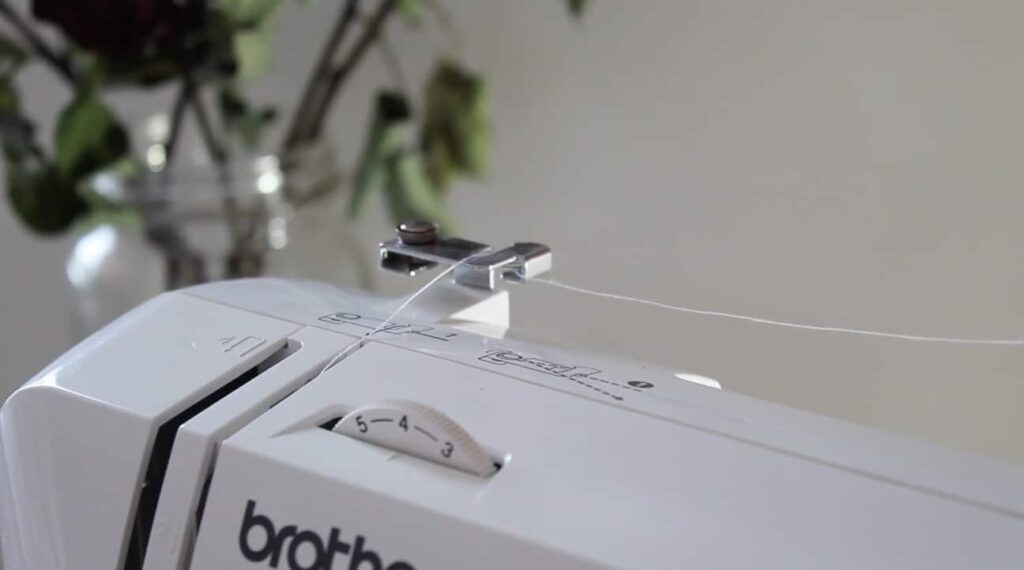
Step 6: Through the Take-up Leaver
Take the thread up from the front thread guide and through the take-up lever hook. You will notice in the image from step 5 that there is a hook inside the sewing machine. This is called the take-up lever, which moves when the needle goes up and down.
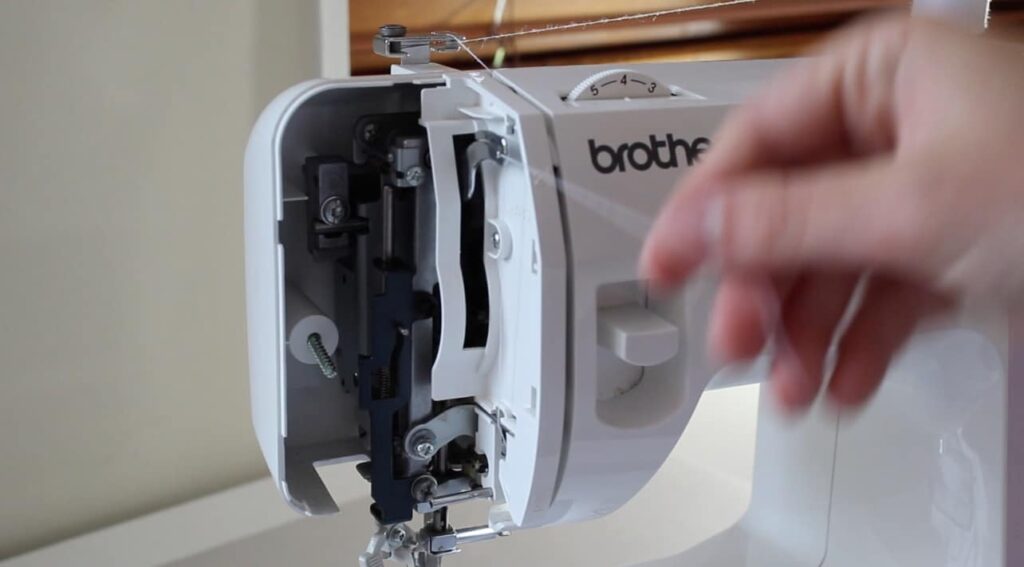
Tip: If you can’t see the take-up lever hook, go back to Step 2. It would be best to reposition the needle upwards for the hook to be seen.
Step 7: Above Needle Hook
Pull the thread down the channel from the take-up lever and through the small hook above the needle. This hook is usually around the same spot where the top of the needle sits.
Some machines will have this hook, and some won’t. If your machine doesn’t have a small hook above the needle, continue to Step 8.
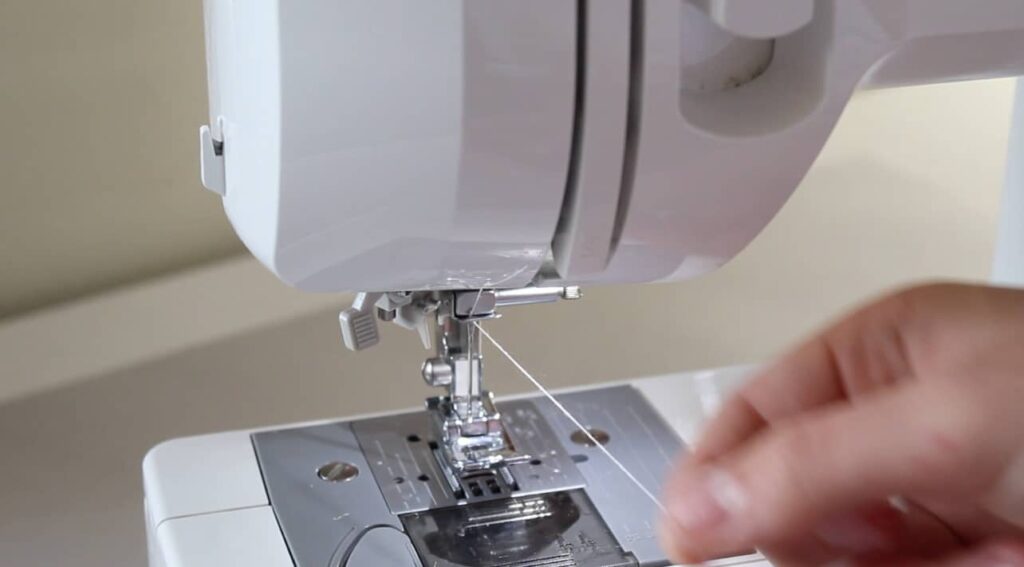
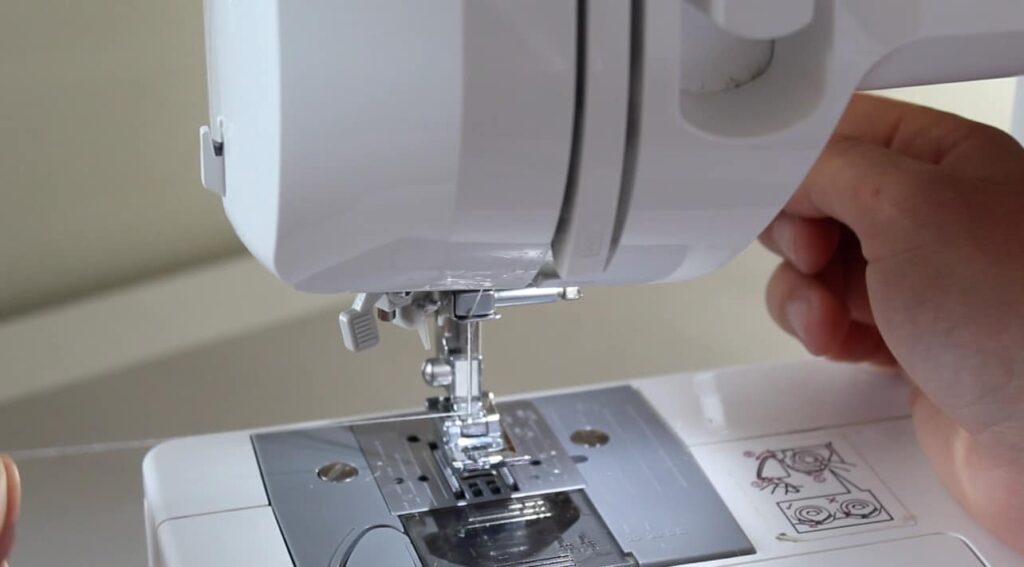
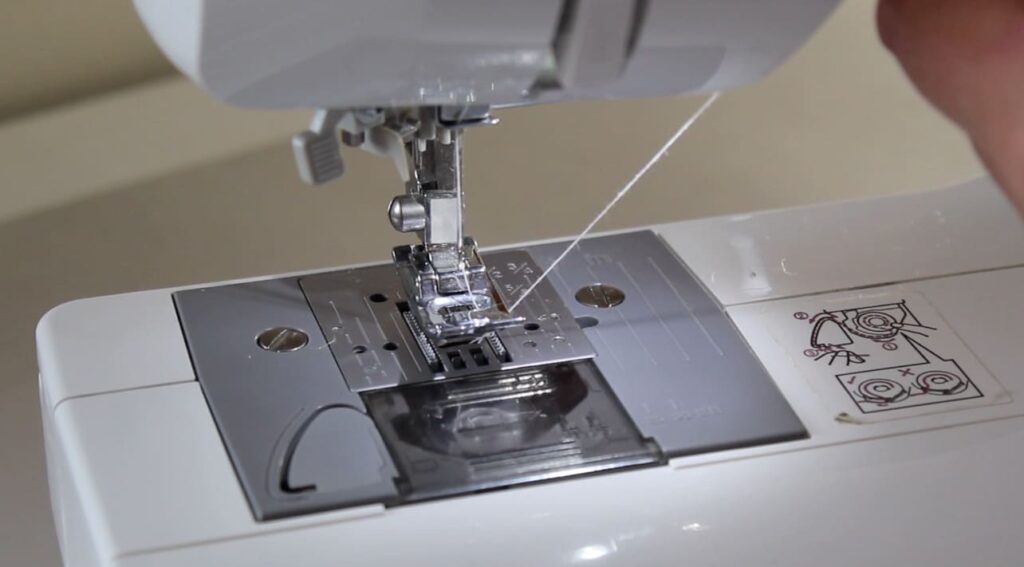
Step 8: Thread The Needle
Place the thread in the eye of the needle from the front through to the back. Pull the thread under the presser foot and past the back of the machine to create a long thread tail. If you struggle to get the thread through the eye of the needle, try using one of these needle threader tools.
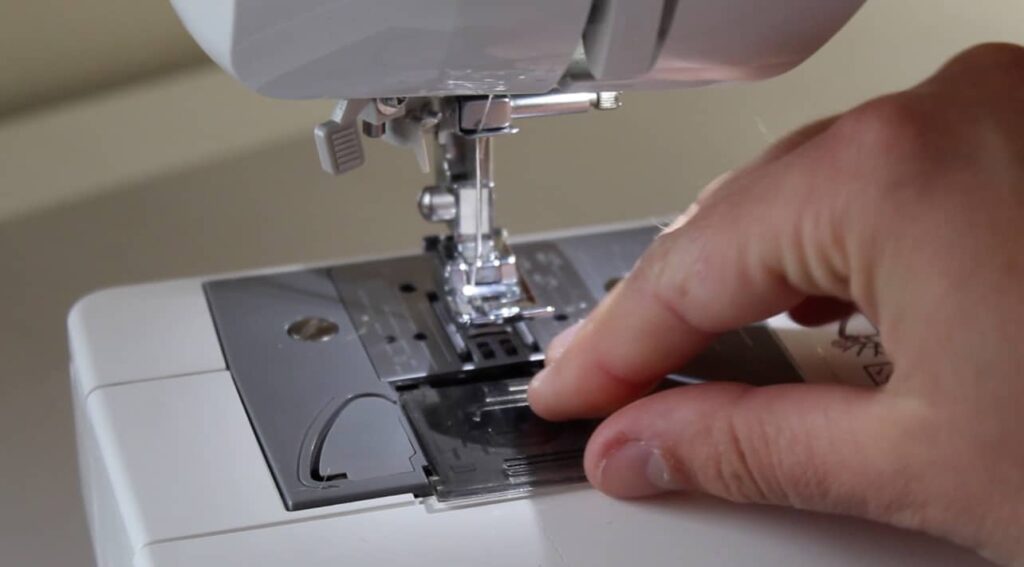
Step 9: Insert the Bobbin
Remove the bottom plate by pulling it towards you and place the bobbin into the bobbin case. Follow the arrow directions for what way to position the bobbin correctly.
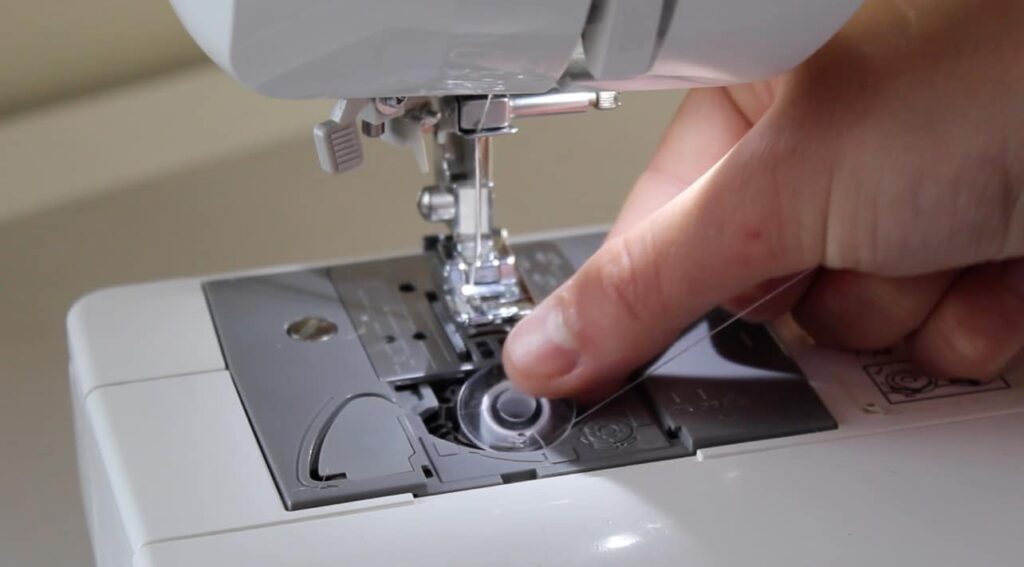
Step 10: Pull Up the Bobbin Thread
Hold the top thread tail while turning the handwheel towards you on the sewing machine. Gently pull the top thread up. You should see the bobbin thread looped around the top thread. Pull until you can grab the bobbin thread.
Pull out the same tail length as the top thread and pop both threads under the presser foot towards the back of the sewing machine. Replace the bobbin case plate on the machine.
Now, your machine has been threaded up and is ready to start sewing. Use a scrap piece of fabric to sew a few rows of stitching and check that the tension is good to go.
If you find the rows of stitching to be too loose tighten the tension dial to a higher number if it is too tight change the tension to a smaller number and test another row of stitching.
How to Maintain Your Sewing Machine
Maintaining your sewing machine is easy and a great habit to get into. I like to clean my machine every few months. I use a makeup brush to remove as much dust as I can.
Remove the bottom plates on the machine and remove any fluff or dust that has built up in the bottom. This helps stop the machine from rusting, getting jammed, or sewing fluff and oil onto your garments.
Check your machine manual on how to oil your machine, too.
Was this blog helpful? Let us know in the comments below.
How to Thread a Sewing Machine Step-by-Step Guide
Learning how to thread your sewing machine correctly is a great skill to have. It will stop you from running into technical difficulties and keep sewing an enjoyable experience. Learn how to thread up a sewing machine with this step-by-step guide.
Materials
- Thread
- Fabric scraps
Tools
- Sewing machine
- Snips
Instructions
- Turn Off the Sewing Machine
Before you begin threading up TURN OFF your sewing machine! This is for safety, as your hands will be near the needle and moving machinery. - Put the Needle Up
Turn the handwheel on the side of the sewing machine towards you until the needle is fully up. Newer sewing machines often have a small line or mark on them. When this mark is visible at the top of the handwheel, the needle will be in the right position. - Positioning the Thread Spool
Begin by putting the thread spool onto the spool holder. Some sewing machines can be pushed down for storage purposes. If yours is down simply pull it up and place the spool onto it. You may also have a spool holder that is sitting sideways. - Back Thread Guide
Holding the thread place it through the back thread guide. There should be a small groove or hook. Make sure the thread goes through this otherwise the machine won't sew correctly. - Front Thread Guide
Take the thread down the front channel and around the front tension guide at the bottom. The dial above the "Brother" logo on the sewing machine is the tension dial that controls how tight or lose the thread is sitting. - Through the Take-up Leaver
Take the thread up from the front thread guide and through the take-up lever hook. You will notice in the image from step 5 that there is a hook inside the sewing machine. This is called the take-up lever, which moves when the needle goes up and down.
Tip: If you can't see the take-up lever hook go back to Step 2. You need to reposition the needle upwards for the hook to be seen. - Above Needle Hook
Pull the thread down the channel from the take-up lever and through the small hook above the needle. This hook is usually around the same spot the top of the needle sits.
Some machines will have this hook and some won't. If your machine doesn't have a small hook above the needle continue on to Step 8. - Thread The Needle
Place the thread in the eye of the needle from the front through to the back. Pull the thread under the presser foot and past the back of the machine to create a long thread tail. If you struggle to get the thread through the eye of the needle try using one of these needle threader tools. - Insert the Bobbin
Remove the bottom plate by pulling it towards you and place the bobbin into the bobbin case. Follow the arrow directions for what way to position the bobbin correctly. - Pull Up the Bobbin Thread
Hold the top thread tail while turning the handwheel towards you on the sewing machine. Gently pull the top thread up. You should see the bobbin thread looped around the top thread. Pull until you can grab the bobbin thread. Pull out the same tail length as the top thread and pop both threads under the presser foot towards the back of the sewing machine. Replace the bobbin case plate on the machine.
Now your machine has been threaded up and is ready to start sewing. - Test Sew
Use a scrap piece of fabric to sew a few rows of stitching and check that the tension is good to go.
Most domestic sewing machines have arrows or guides on the machine to show you each threading step. You will begin at the top and work your way down towards the machine needle.
Notes
- If you find the rows of stitching to be too loose tighten the tension dial to a higher number. If it is too tight change the tension to a smaller number and test another row of stitching.
- Try to use trusted quality threads on your sewing machine to avoid any issues with threads breaking or tension. Sometimes sewing machines can be sensitive to cheap threads and you can end up having some issues when sewing. Brands I recommend are Gutermann, Coats & Clark, or Mettler. I personally use all of these brands and find the quality to be excellent.
- Follow the sewing machine manual if one is available to you. This will ensure you haven’t missed any steps in the threading up process. As I mentioned most sewing machines are threaded the same but some could have an extra step or two.
- A sewing machine has a top and bottom thread. The top is where the thread spool will sit and the bottom is where the bobbin will go. You will need to wind the bobbin before threading up the sewing machine.
- Make sure the sewing machine is switched OFF before you start threading it up. This is for safety.
What if you don’t put your thread through the thread guide (Brother machine). My thread keeps coming out of this guide. Tx
Hi Pat, Your tension may be too tight if it keeps coming out of the thread guide. Turning this down to a lower number may do the trick x