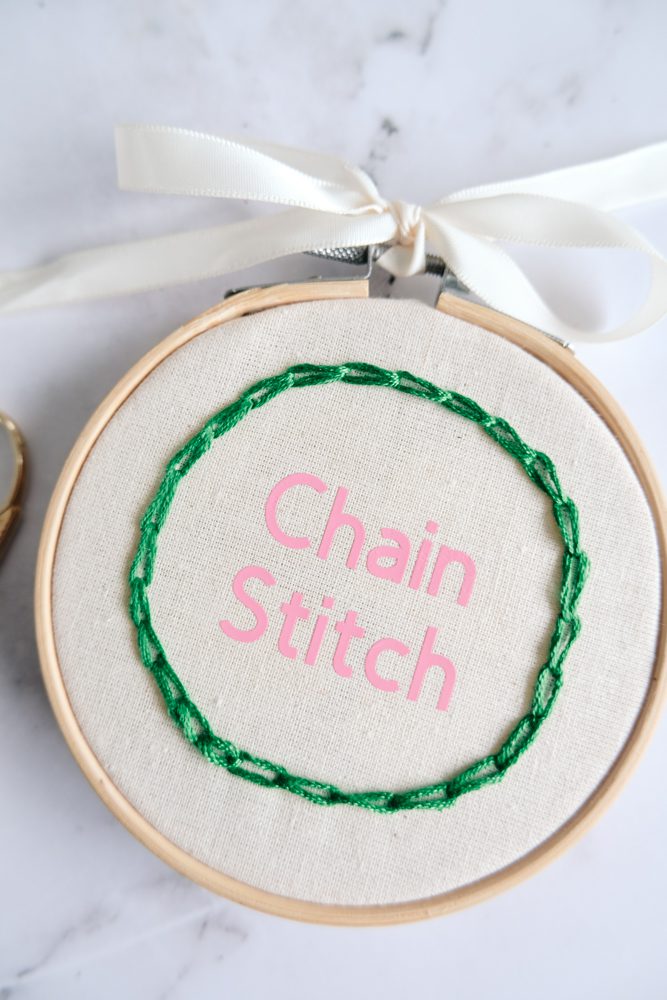
Learn how to chain stitch with this detailed step-by-step tutorial for beginners. The chain stitch is a versatile and decorative hand-sewing technique used in various sewing projects. I also think it’s super fun to sew!
What is a Chain Stitch?
The chain stitch is a looping stitch that creates a chain-like pattern. It is formed by making a series of interlocking loops with the thread, resulting in a beautiful and textured line.

As an Amazon Associate, I earn from qualifying purchases. Read my full disclosure here.
What is a Chain Stitch Used For?
Chain stitch can be used in sewing in many ways because it’s so versatile and sturdy. Here are some ways it can be used:
- Decorative Stitching – When it comes to embroidery, chain stitches are a popular choice for making outlines, decorative borders, and pretty designs. They add texture and depth to fabric surfaces, and they can create stunning patterns and embellishments. Depending on the effect you want, chain stitches can be worked closely together to fill in larger areas or spaced apart for a more delicate look. I have come across some lovely sweaters that have names embroidered in a chain stitch.
- Joining Fabrics – If you want to join fabrics together, especially lightweight, and stretchy materials, you can use chain stitches. This type of stitch creates a flexible and slightly elastic line, which allows the fabric to stretch without breaking the seam. Chain stitches are often used in garments like T-shirts, knitwear, and lingerie.
- Basting fabric – Basting is a temporary stitching technique used to hold fabric layers together before final sewing. Chain stitches can be used for basting as they are easy to remove later. By making loose and large chain stitches, you can temporarily secure fabric pieces, layers, or pattern markings. Once the final sewing is complete, the basting stitches can be easily removed without damaging the fabric. You can also try a running stitch if you need a quicker basting method.
- Sewing Hems – Using chain stitches is ideal for hemming lightweight and delicate fabrics. This type of stitch creates loops that help maintain the fabric’s flexibility and prevent tension. It is often used for hemming skirts, dresses, and lightweight trousers.

Materials & Tools
To practice sewing chain stitches, you will need a needle, thread, and a few other tools listed below.
- Hand sewing needles
- Embroidery thread
- Fabric shears
- Piece of calico or fabric to practice on cut to 25cm x 25cm
- Ruler
- Fabric marker
How to Sew a Chain Stitch
Step One: Draw practice lines on the fabric
Using your ruler and fabric marking tool, draw as many practice lines as you require on the fabric. These will be the lines you follow as you learn to sew a chain stitch.
Step Two: Thread the needle
Start by threading the needle. Cut the thread length double your stitching line length and knot the end once.
Step Three: Start the chain stitch
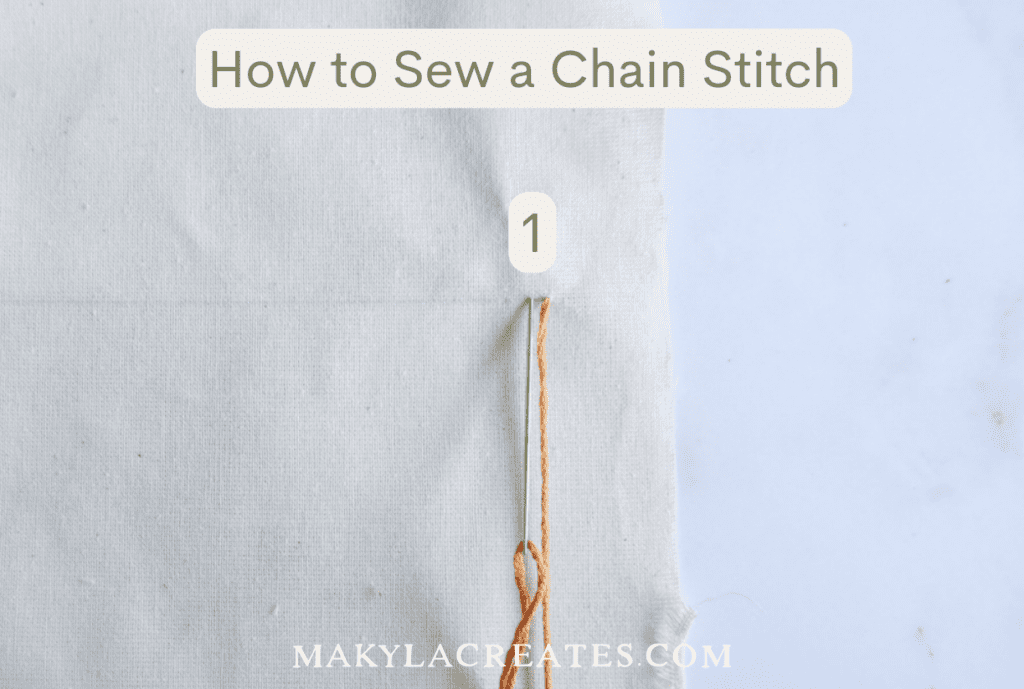
Bring the threaded needle up from the back of the fabric at the starting point of your chain. Insert the needle into the fabric 2mm from the first stitch to create a small starting stitch (1).

Step Four: Create the chain stitch
Bring the needle up through the fabric, the distance you desire from the first small stitch (2). This distance will be the chain stitch length.
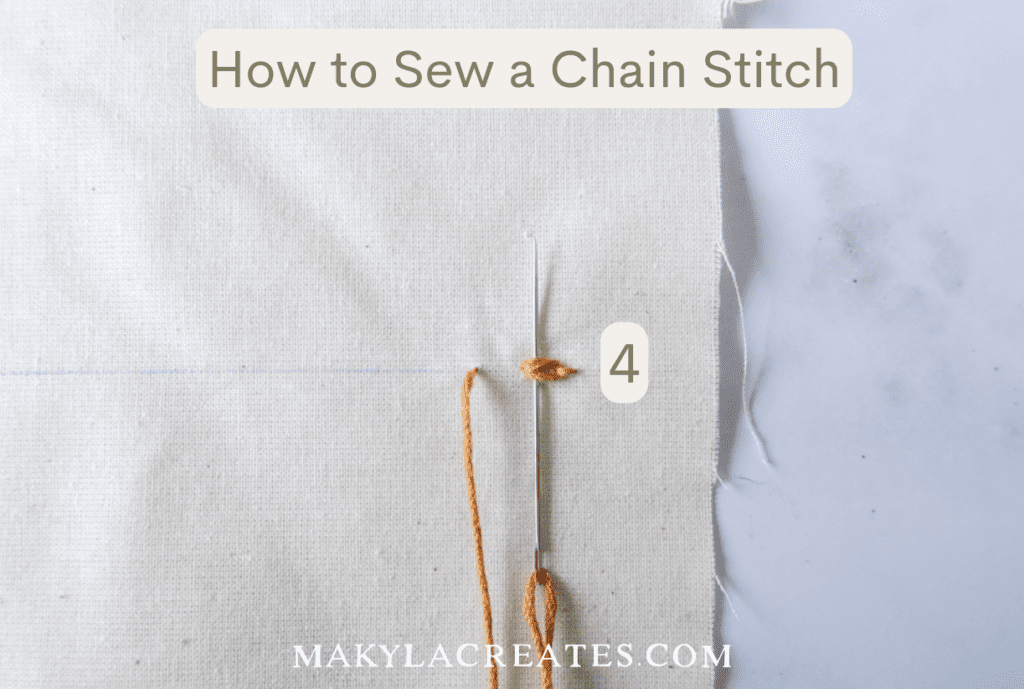
Pass the needle under the small stitch (3). Then, insert the needle back through the fabric next to point (2). Pull the thread gently to form the first chain stitch loop.

Step Five: Continue stitching
To create the next chain stitch, bring the needle up from the back of the fabric slightly ahead of the previous stitch. Then pass the needle through the loop and pull gently to secure it.

Step Six: Repeat the process
Continue making chain stitches by repeating steps 4 and 5. Ensure that the loops are of consistent size and evenly spaced along your guideline.
Step Seven: Finishing
Make a small backstitch or knot at the end of your stitching line to finish the chain stitch. Trim off any excess thread.

Chain Stitch Frequently Asked Questions
What type of needle should I use?
When sewing chain stitching, make sure you use a needle that’s sharp and good for embroidery. Look for one with a medium-sized eye so it can go through the fabric real easy and the thread can move smoothly.
What type of thread do I use for chain stitching?
When chain stitching, it’s a good idea to pick a thread that matches the fabric and can handle some tension. Some threads that work well are embroidery floss, cotton, or silk. How thick the thread is, affects how bold or delicate the stitch looks. Thicker threads will give you a bolder stitch, while thinner threads will look daintier.
Chain Stitch Conclusion
I hope you’re feeling confident to continue sewing chain stitches following this tutorial. Trust me, once you master the chain stitch, there’s no limit to the amazing details and decorative touches you can add to your sewing projects.
Remember that practice makes progress, so don’t stress if your first attempts aren’t picture-perfect. Embrace the learning curve, have fun with different fabrics and threads, and get creative. Happy stitching!
More Hand Sewing Techniques:
How to Chain Stitch

Learn how to chain stitch with this detailed step-by-step tutorial for beginners. The chain stitch is a versatile and decorative hand-sewing technique used in various sewing projects. I also think it's super fun to sew!
Materials
- Embroidery thread
- Piece of calico or fabric to practice on cut to 25cm x 25cm
Tools
- Hand sewing needles
- Fabric shears
- Ruler
- Fabric marker
Instructions
- Step One: Draw practice lines on the fabric
Using your ruler and fabric marking tool, draw as many practice lines as you require on the fabric. These will be the lines you follow as you learn to sew a chain stitch. - Step Two: Thread the needle
Start by threading the needle. Cut the thread length double your stitching line length and knot the end once. - Step Three: Start the chain stitch
Bring the threaded needle up from the back of the fabric at the starting point of your chain. Insert the needle into the fabric 2mm from the first stitch to create a small starting stitch (1). - Step Four: Create the chain stitch
Bring the needle up through the fabric, the distance you desire from the first small stitch (2). This distance will be the chain stitch length. Pass the needle under the small stitch (3). Then, insert the needle back through the fabric next to point (2). Pull the thread gently to form the first chain stitch loop. - Step Five: Continue stitching
To create the next chain stitch, bring the needle up from the back of the fabric slightly ahead of the previous stitch. Then pass the needle through the loop and pull gently to secure it. - Step Six: Repeat the process
Continue making chain stitches by repeating steps 4 and 5. Ensure that the loops are of consistent size and evenly spaced along your guideline. - Step Seven: Finishing
Make a small backstitch or knot at the end of your stitching line to finish the chain stitch. Trim off any excess thread.
Notes
What Thread Do I Use?
There are various types of sewing threads that can be used when hand-sewing but a backstitch is often sewn to be seen. When sewing backstitch to create seams, using a standard universal thread is best. However, if you are sewing backstitching for details, it is recommended to use a thicker thread such as embroidery thread (skeins).
What type of needle should I use?
When sewing chain stitching, make sure you use a needle that's sharp and good for embroidery. Look for one with a medium-sized eye so it can go through the fabric real easy and the thread can move smoothly.
What type of thread do I use for chain stitching?
When chain stitching, it's a good idea to pick a thread that matches the fabric and can handle some tension. Some threads that work well are embroidery floss, cotton, or silk. How thick the thread is, affects how bold or delicate the stitch looks. Thicker threads will give you a bolder stitch, while thinner threads will look daintier.


