How to do Running Stitch for Beginners
Learn how to sew the running stitch with this detailed step-by-step tutorial for beginners. A running stitch is one of the simplest, quickest, most versatile hand stitches to learn and is a fantastic starting point for anyone wanting to spruce up their hand sewing skills.
What is a Running Stitch?
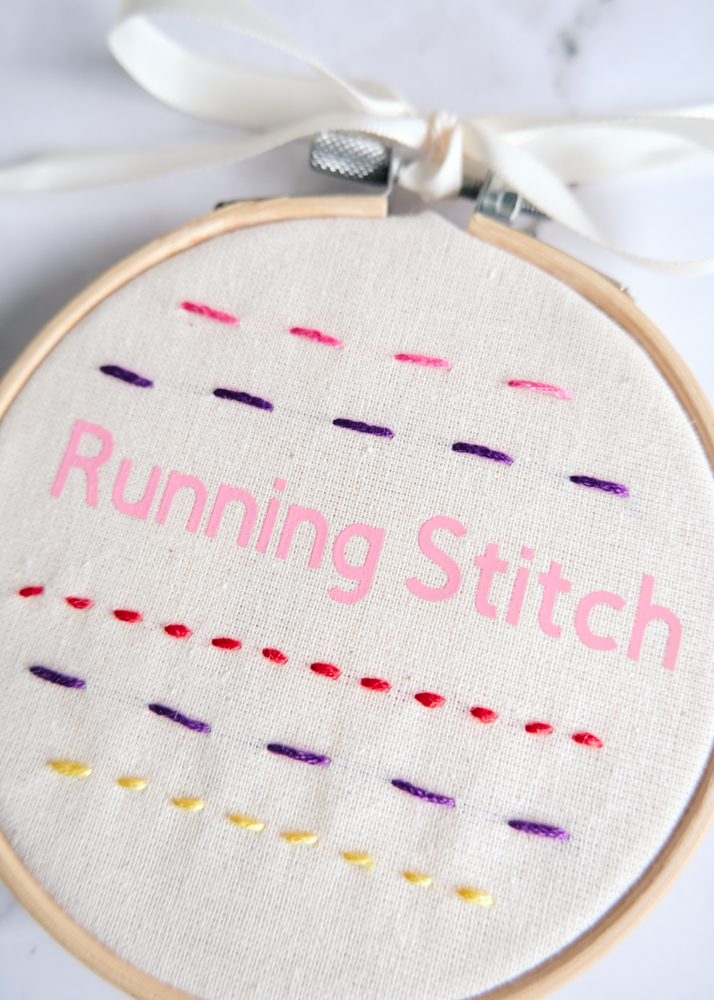
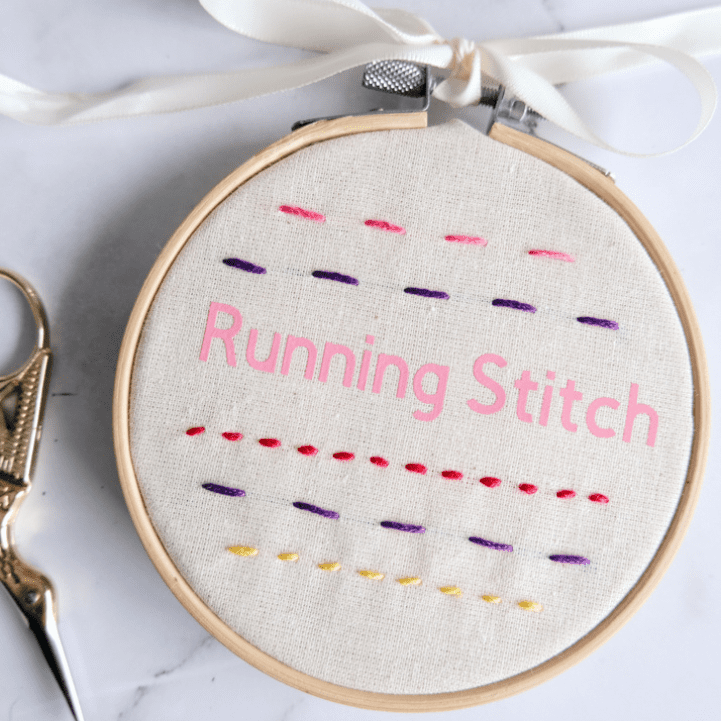
A running stitch is a simple straight stitch that weaves in and out of the fabric. Depending on the desired use, it can be applied at any length (as seen in the image below).
Longer stitches can be pulled to gather fabric whereas smaller stitches can be used to hand-sew seams together.
As an Amazon Associate, I earn from qualifying purchases. Read my full disclosure here.
What is Running Stitch Used For?
A running stitch can be used in sewing in many ways because it’s versatile and straightforward. Here are some ways it can be used:
- Seams: the running stitch can be used as a simple and quick way to sew seams by hand. By sewing smaller stitches, the running stitch will be secure enough to hold the pieces together as a machine stitch would. This is a good alternative if you don’t have a sewing machine or are working with delicate materials.
- Basting fabric together: a large running stitch can be sewn to hold pieces of fabric in place like a dart or sleeve. Once the final seam is sewn the running stitch can be removed.
- Gathering fabric: if you need to gather up material like a sleeve head or skirt panel then a large running stitch is quick and easy to sew into the seam allowance.
- Embroidery: If you are learning how to embroider then a running stitch is super handy for sewing outlines or design lines like a flying trail behind a buzzy bee or to outline a dog’s face.
- Quilting: If you are learning how to quilt you can use a running stitch to hand-quilt your work together. I used this technique for my DIY quilted jacket project, which helped my jacket turn out super cosy.

Materials & Tools
To practice sewing a running stitch you will need a needle and thread and a few other tools as listed below.
- Hand sewing needles
- Embroidery thread
- Fabric shears
- Piece of calico or fabric to practice on cut to 25cm x 25cm
- Ruler
- Fabric marker
How to Sew a Running Stitch
Step One: Draw practice lines on the fabric
Using your ruler and fabric marking tool, draw as many practice lines as you require on the fabric. These will be the lines you follow as you learn to sew a running stitch.
Step Two: Thread the needle
Start by threading the needle. Cut the thread length to 20cm and knot the end once.
Step Three: Start sewing a running stitch
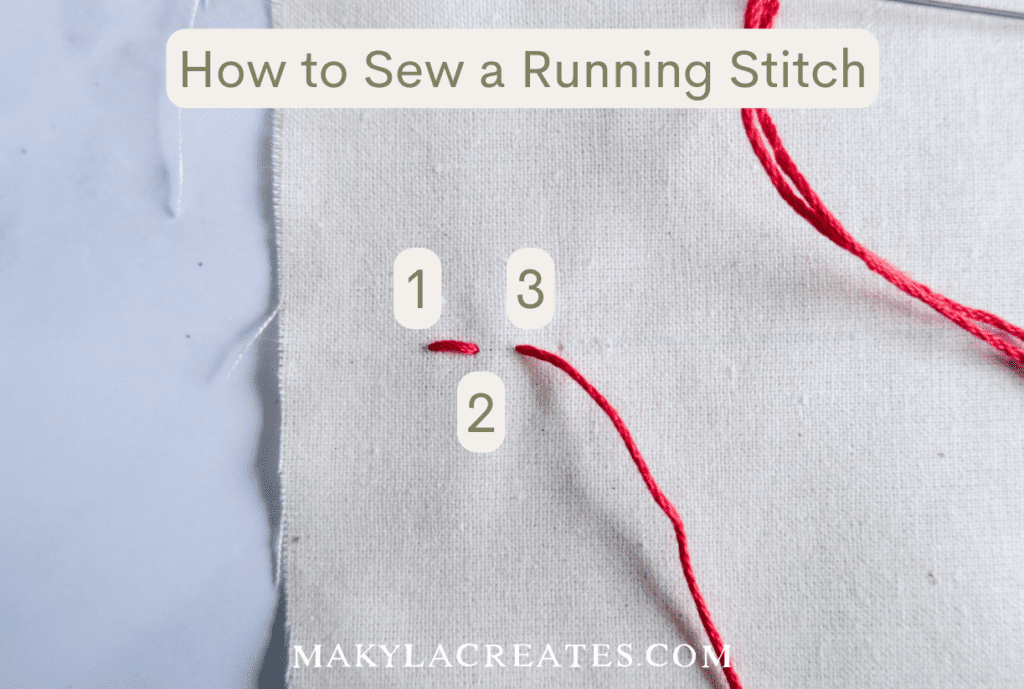
Begin sewing a running stitch on the lefthand side of the fabric by bringing the needle up the back of the fabric (1). Pull the thread until the knot is flush against the fabric.

Step Four: Sew the first stitch
Insert the needle back through the fabric the desired length away from position (1) and back up again to start another stitch (2).

Below you can see one running stitch has been sewn and a new stitch has begun at point (3).
Step Five: Continue sewing the running stitch
Continue inserting the needle in and out of the fabric along the guideline to continue sewing the running stitch.
It is important to keep your stitches the same length and distance apart unless you are sewing a decorative stitch. Practising a few lines will help you get the rhythm of the running stitch.
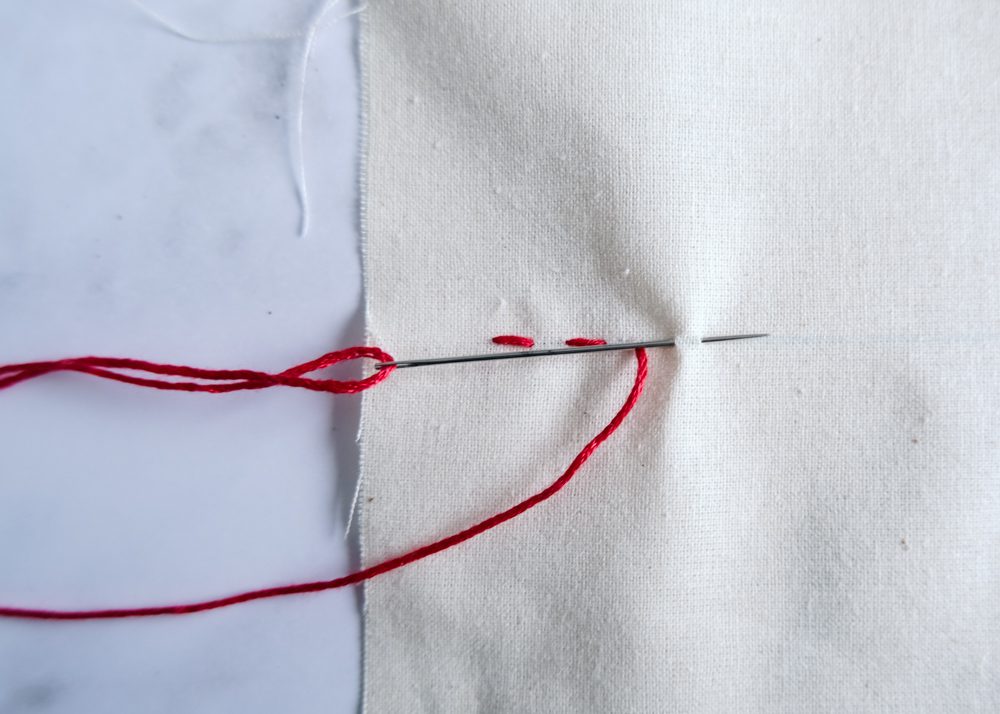
When finishing, make a knot at the back of your work to secure the thread. Trim off any excess thread.

What Thread Do I Use?
For each sewing task, there are various types of sewing threads that can be utilised when hand-sewing a running stitch to achieve the desired outcome.
When sewing a seam by hand, using a standard universal thread is best. However, if you are sewing quilt layers together, it is recommended to use a thicker thread such as embroidery thread (skeins).
More Hand Sewing Techniques
How to Sew a Running Stitch
Learn how to sew a running stitch with this detailed step-by-step tutorial for beginners. A running stitch is one of the simplest, quickest, most versatile hand stitches to learn and is a fantastic starting point for anyone wanting to spruce up their hand sewing skills.
Materials
- Embroidery thread
- Piece of calico or fabric to practice on cut to 25cm x 25cm
Tools
- Hand sewing needles
- Fabric shears
- Ruler
- Fabric marker
Instructions
- Step One: Draw practice lines on the fabric
Using your ruler and fabric marking tool, draw as many practice lines as you require on the fabric. These will be the lines you follow as you learn to sew a running stitch. - Step Two: Thread the needle
Start by threading the needle. Cut the thread length to 20cm and knot the cut end once. - Step Three: Start sewing a running stitch
Begin sewing a running stitch on the lefthand side of the fabric by bringing the needle up the back of the fabric (1). Pull the thread until the knot is flush against the fabric.
- Step Four: Sew the first stitch
Insert the needle back through the fabric the desired length away from position (1) and back up again to start another stitch (2).
Below you can see one running stitch has been sewn and at point (3) a new stitch has begun.
- Step Five: Continue sewing the running stitch
Continue inserting the needle in and out of the fabric along the guideline to continue sewing the running stitch.
When finishing, make a small anchor stitch or a knot at the back of your work to secure the thread. Trim off any excess thread.
Notes
Tip: It is important to keep your stitches the same length and distance apart unless you are sewing a decorative stitch. Practising a few lines will help you get the rhythm of the running stitch.


