Want to stay warm and snuggly this Winter? A handmade quilted jacket is just the thing you need! This jacket makes any outfit snuggly and shows your unique personality and style. Don’t worry if you’re a beginner – I will show you how to make your own quilted jacket with this step-by-step tutorial!
I recently embarked on this fun quilted jacket project to create a cosy quilted jacket. Having recently moved to Christchurch, New Zealand, where it gets super chilly, this seemed like an appropriate project.
After seeing so many beautiful quilt coats from Julie O’Rourke and Sea, I needed to jump on the bandwagon and sew my own.
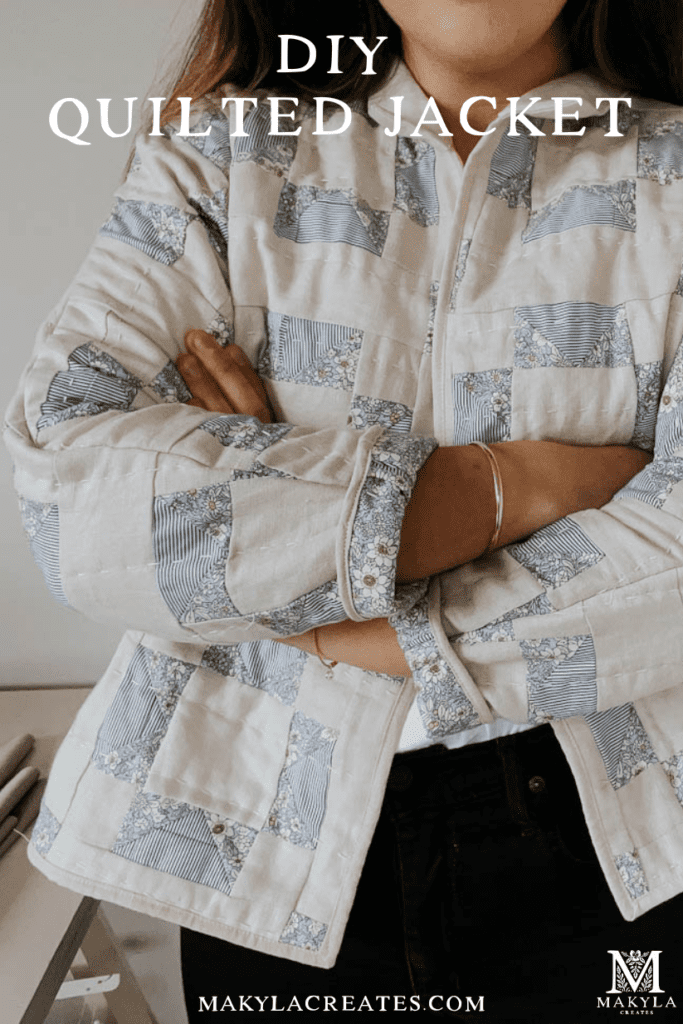
The trouble with living in New Zealand is that finding a pre-loved vintage quilt is next to impossible. If you live in an area where vintage quilts are accessible, consider purchasing one to make your jacket if you don’t want to spend hours quilting. Some great places to look are eBay, Depop, and Facebook marketplace.
If you want to try quilting your jacket, look online for patterns. You can also find many great second-hand quilting books or magazines in secondhand stores.
If you’re new here, I love making many of my clothes. You can learn how to make a few of my most treasured clothing items yourself by following my tutorials. This DIY wrap skirt and tiered maxi dress are perfect additions for Summer. You can also make these Spring & Summer approved tops, my favourite diy cami, and this cute zero-waste off-the-shoulder top.
Check out my digital sewing pattern store if you prefer using sewing patterns. Here, you will find the Camille Top, a loved sewing pattern by many.
If you are new to sewing, here are some helpful sewing articles to help you get started:
- Learn how to sew – Ultimate guide for beginners
- Best sewing machines for beginners
- Sewing tool and equipment guide
- Types of fabrics
- How to cut out fabric
As an Amazon Associate, I earn from qualifying purchases. Read my full disclosure here.
How To Make A Quilted Jacket With A Pattern
I purchased the supplies below for my quilted jacket. Your supply list may differ slightly from mine, depending on whether you are making a quilt and what jacket pattern you choose. Just use this as a guide.
Materials & Supplies List
- 2m main fabric
- 1m contrasting main fabric
- 0.5m 2nd contrasting fabric
- 2m lining fabric
- Olympus 100% cotton Sashiko thread
- Olympus Sashiko needles
- Jacket pattern – I used the All-Well Cardigan Coat hacked into the Simple Collar version.
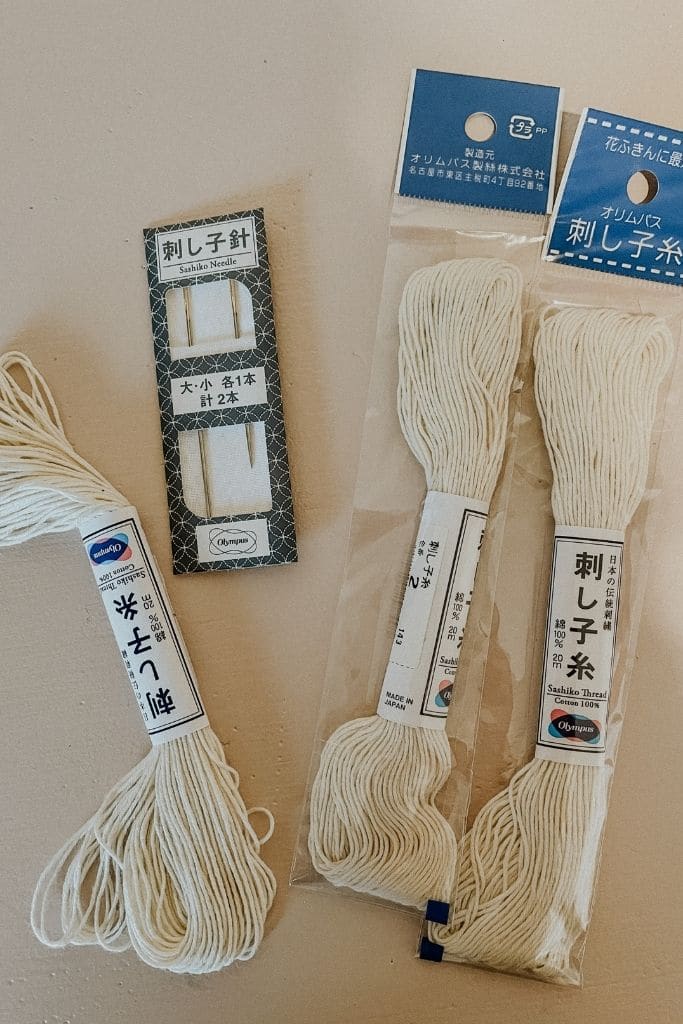
Quilted Jacket Materials
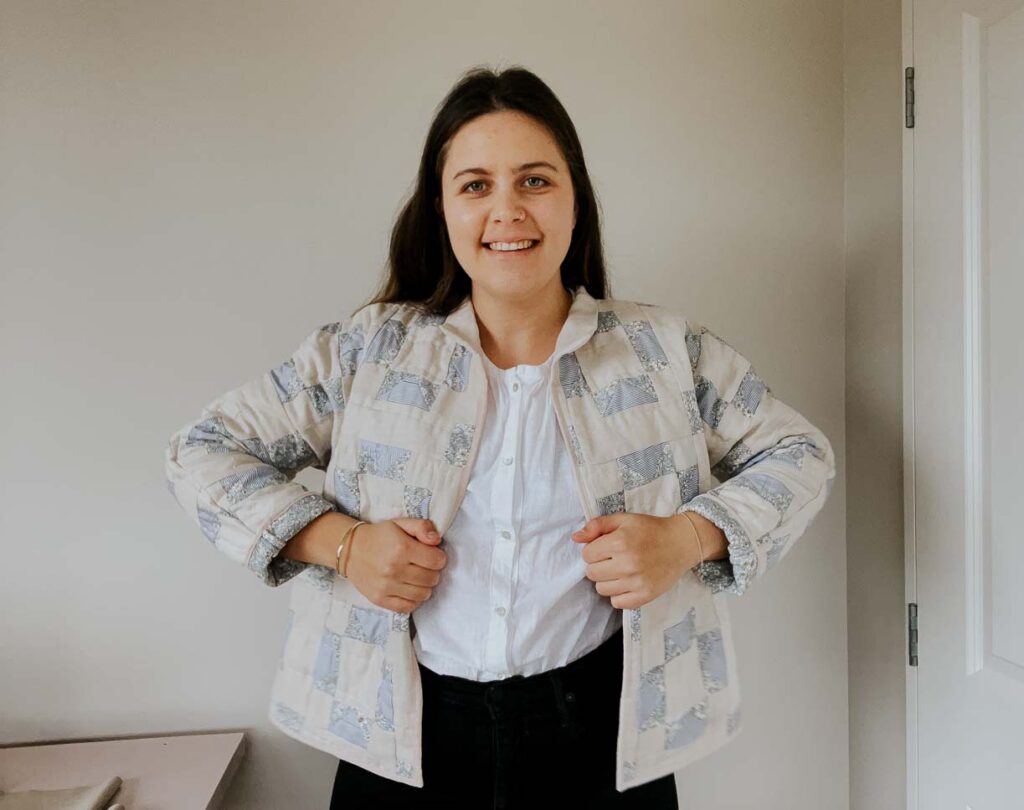
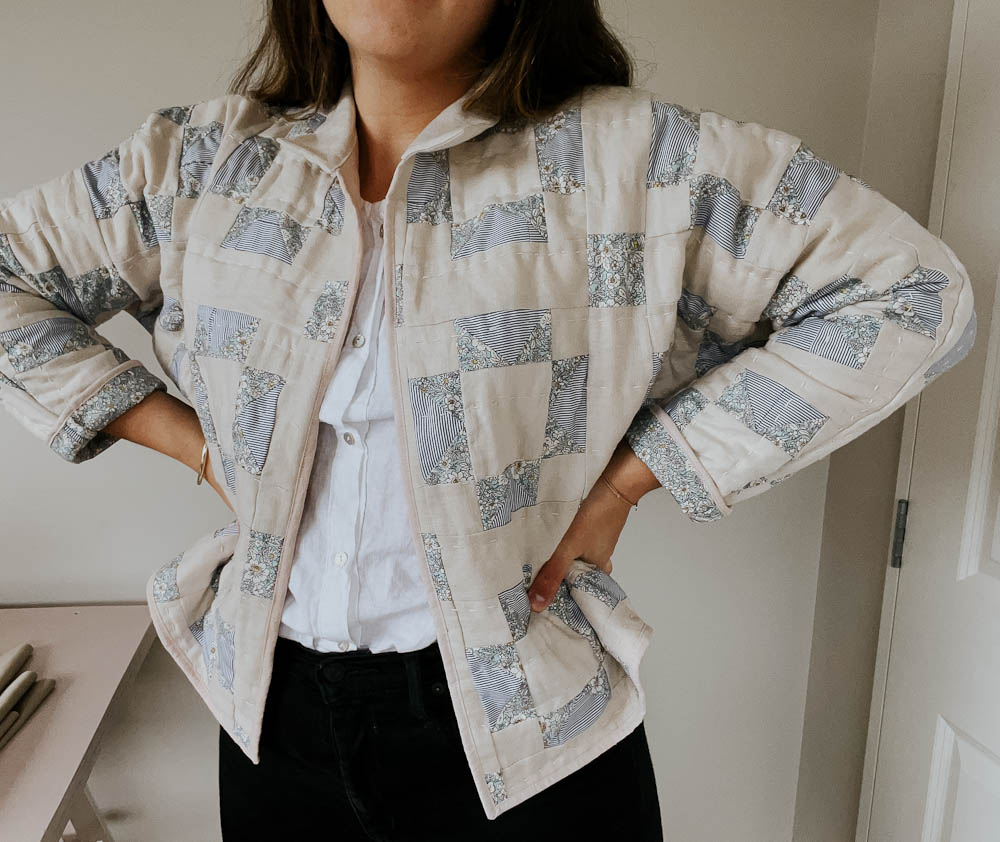
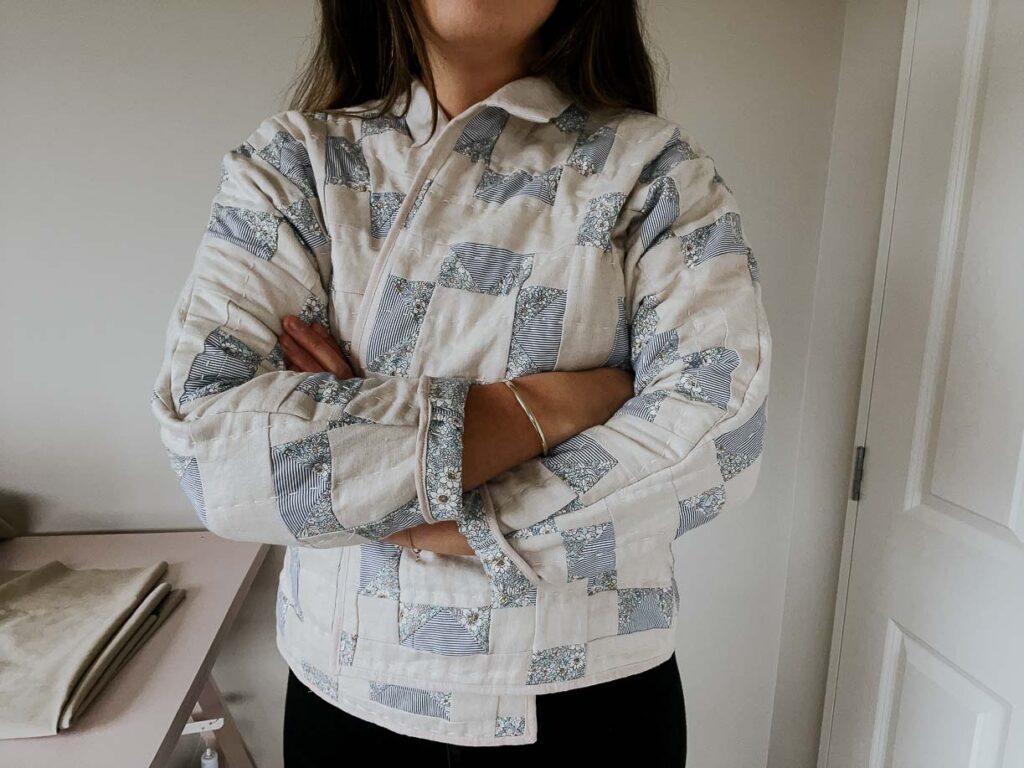
I used beige linen for the primary material, and the contrasting fabrics are blue floral cotton and an old blue & white striped shirt that I found in a thrift shop for $2.
I lined my quilted jacket with hand-dyed linen. I created a soy milk mordant to soak my linen fabric before naturally dyeing it with avocado pips and skin.
Best fabrics to use:
- Quilting Cotton
- Medium to thick Linen
Quilting cotton is specifically made for quilting. Depending on your fabric supplier, it’s sturdy and often high-quality. If you are unsure of what fabrics to use, you can learn more in my guide to types of fabrics.
How To Make A Quilted Jacket
Step 1: Choose a quilt pattern or find a quilt
If you don’t want to sew a quilt, find a premade quilt that is either new or vintage.
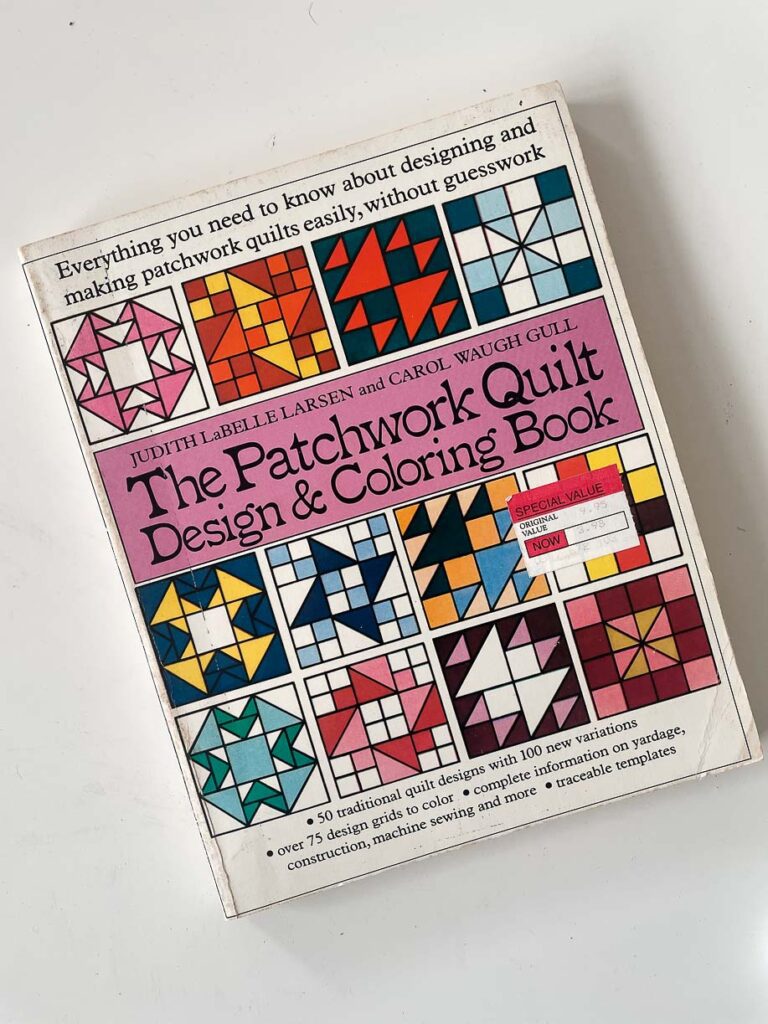
I made my quilt using a book called The Patchwork Quilt Design & Colouring Book, which is full of helpful quilting information. I settled on a traditional saw tooth pattern.
Once the pattern is decided, begin planning where each fabric will go.
I decided on using plain linen as the inner squares and the borders. Then, I used the stripe and floral as the triangular shapes and the outer border squares of the saw tooth pattern.
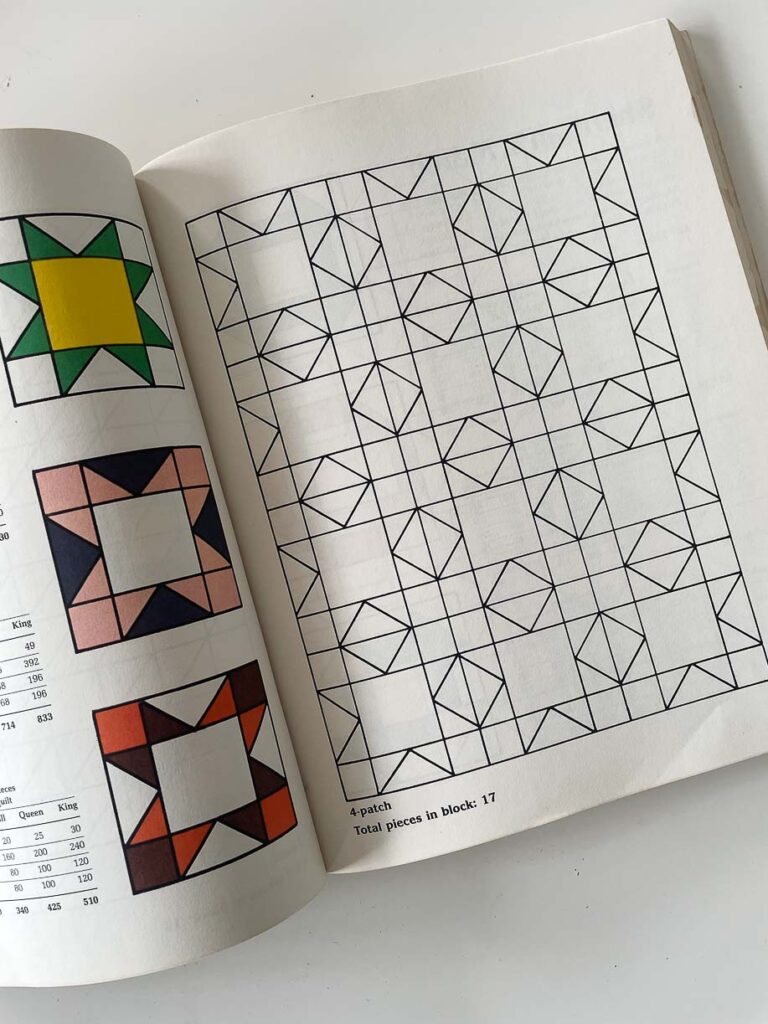
It would help to consider how big or small each quilt block is. The smaller they are, the more cutting and sewing that’s needed.
Take your time to plan and get things right before you start cutting out your materials.
I made four mini quilts to fit each sewing piece rather than an entire rectangle quilt because it would waste materials.
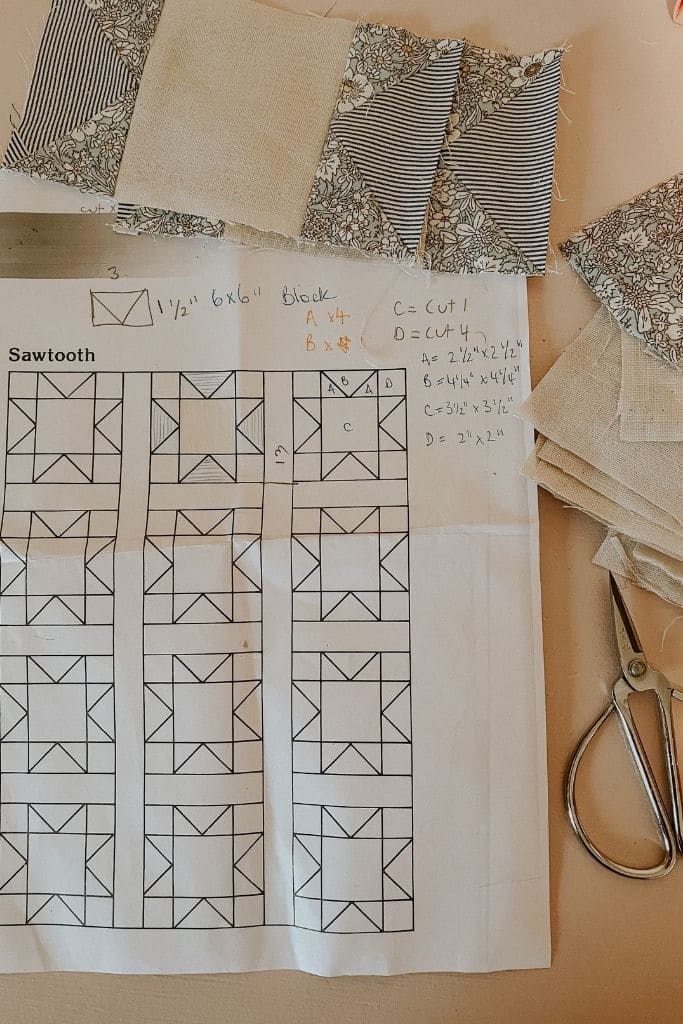
Draw a diagram of the quilt block pieces with dimensions and how many bits to cut out.
Step 2: Cut out the fabric
Following your quilt block diagram, begin cutting out all the pieces needed to sew the quilt up.
Step 3: Sew the quilt blocks together
Start sewing the quilt blocks together. I found it easiest to sew piles of the same block pieces together at once before moving on to the next. For example, a Saw Tooth can be sewn together starting with the flying goose method.
Sewing in batches will make this quilting process a lot quicker.
Step 4: Trim the quilt blocks
Before sewing the Saw Tooth blocks together, they must be squared up and trimmed. This is done by using a rotary cutter and quilting ruler.
Trimming the blocks helps keep everything accurate. Seams can stretch once sewn to other fabrics, so don’t miss this step.
Step 5: Sew the quilt together
Begin joining the quilt blocks into a pattern layout you are happy with.
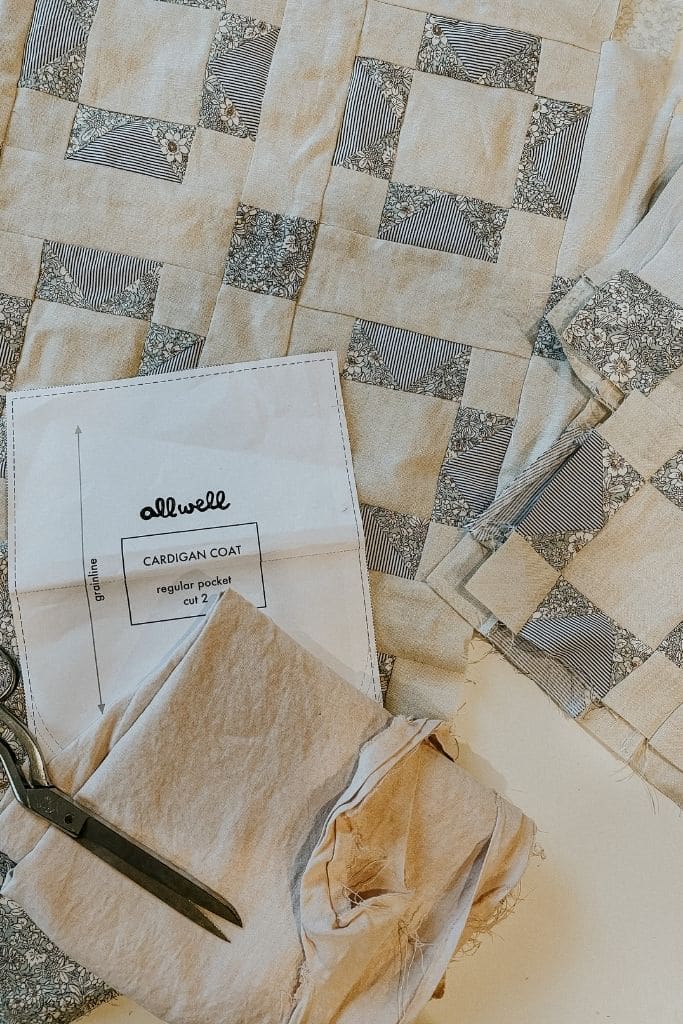
I used my sewing pattern pieces to help guide me on how many pieces to sew together.
I sewed linen borders around the Saw Tooth blocks to break up the pattern.
Step 6: Sew the lining together
Find a flat, hard-surfaced area to lay the lining and batting fabrics. I placed my lining right side down first and taped it to the tile floor using masking tape. I pulled the fabric tight to keep it nice and flat.
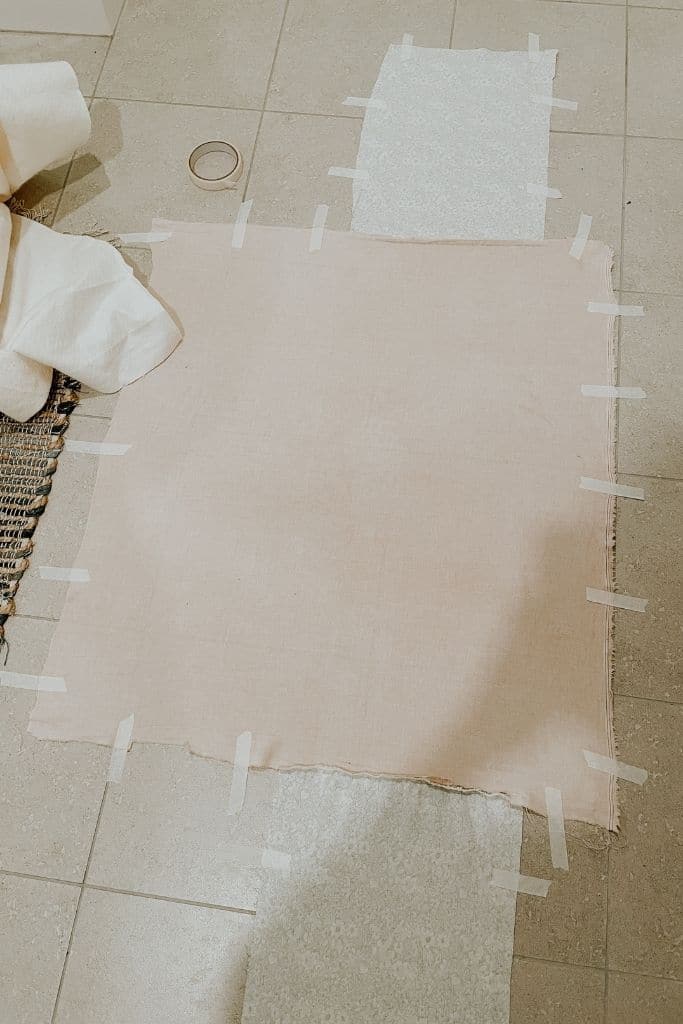
Place the batting down on top of the lining and smooth it flat.
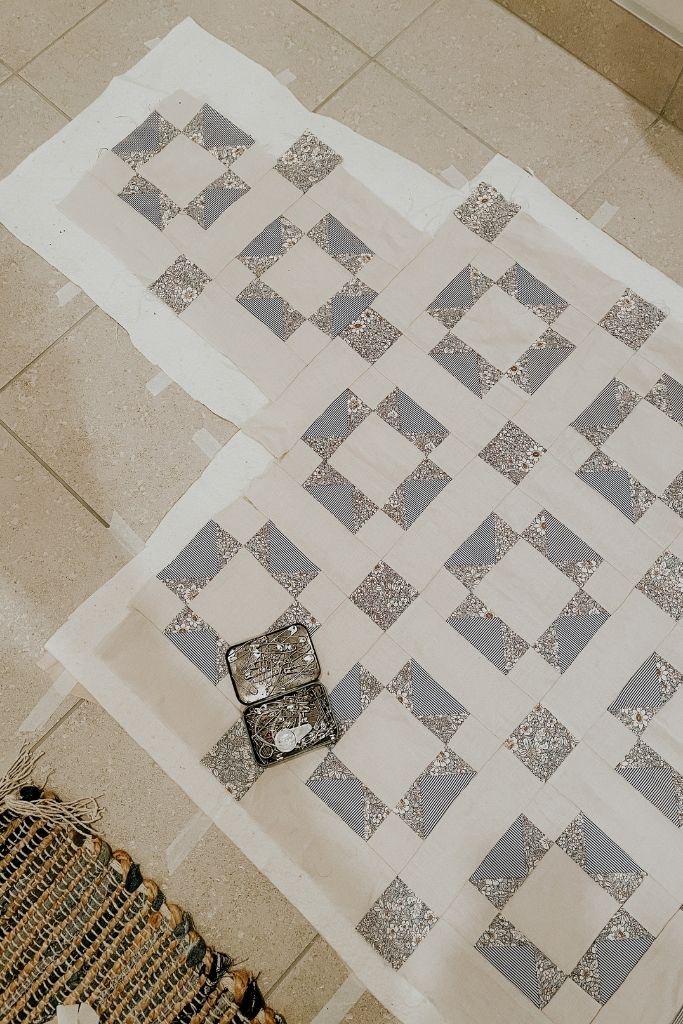
Place the quilt top onto the batting and lining. Smooth this out, and tape it to the tiles like the lining. This holds everything in place for pinning.
Once all three quilt layers are in place, begin pinning the layers together with quilting safety pins. These will keep all the layers together so the quilt can be hand or machine stitched.
Try adding more pins than less so everything sits nicely. Pull the tape off the fabric and tiles.
Step 7: Quilt the fabrics together
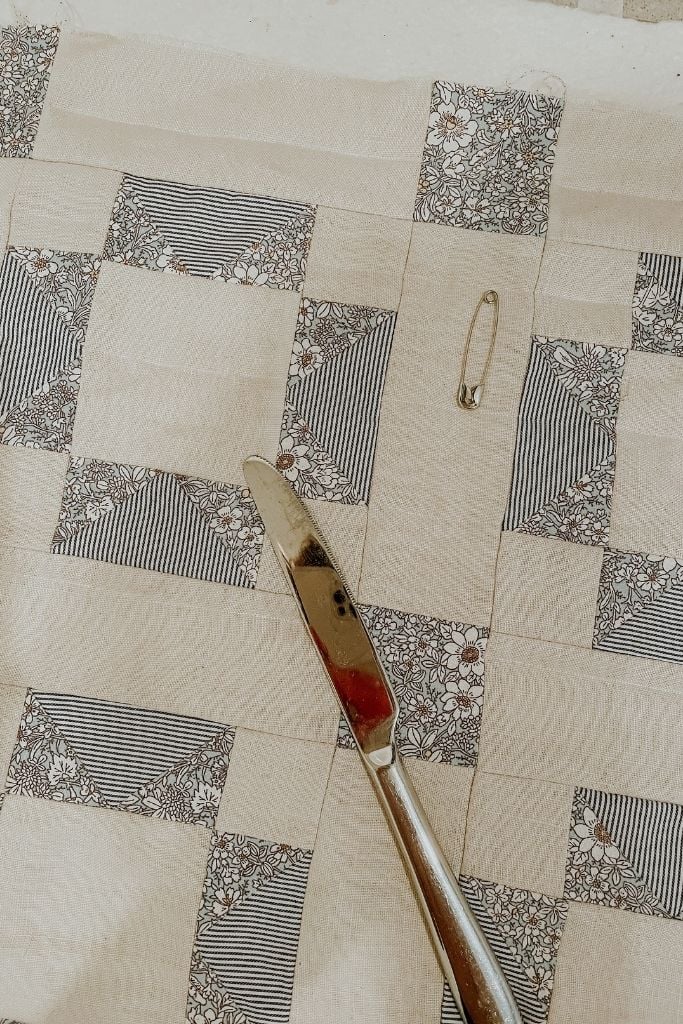
Mark lines into the quilt top to quilt the fabric layers together. I used the back of a butter knife and a long ruler to mark mine. A Hera marker is the proper tool to mark the lines, but I don’t have one.
Step 9: Follow the sewing pattern to sew together the quilted jacket
I chose to stitch my jacket together by hand because I prefer the finish. Sara has shared a helpful step-by-step hand-sewing tutorial on her Instagram stories.
Begin stitching the fabric layers with a needle and thread. (or use a sewing machine if you prefer). Follow along the marked lines. (Follow Sara’s tutorial as linked above for this step).
Step 8: Cut out the quilt using a jacket pattern
I chose the All Well Cardigan Coat pattern because I loved the shape and style. This pattern comes with a pattern hack guide, which I followed for the collar.
Chalk on the pattern pieces and cut the quilt out.
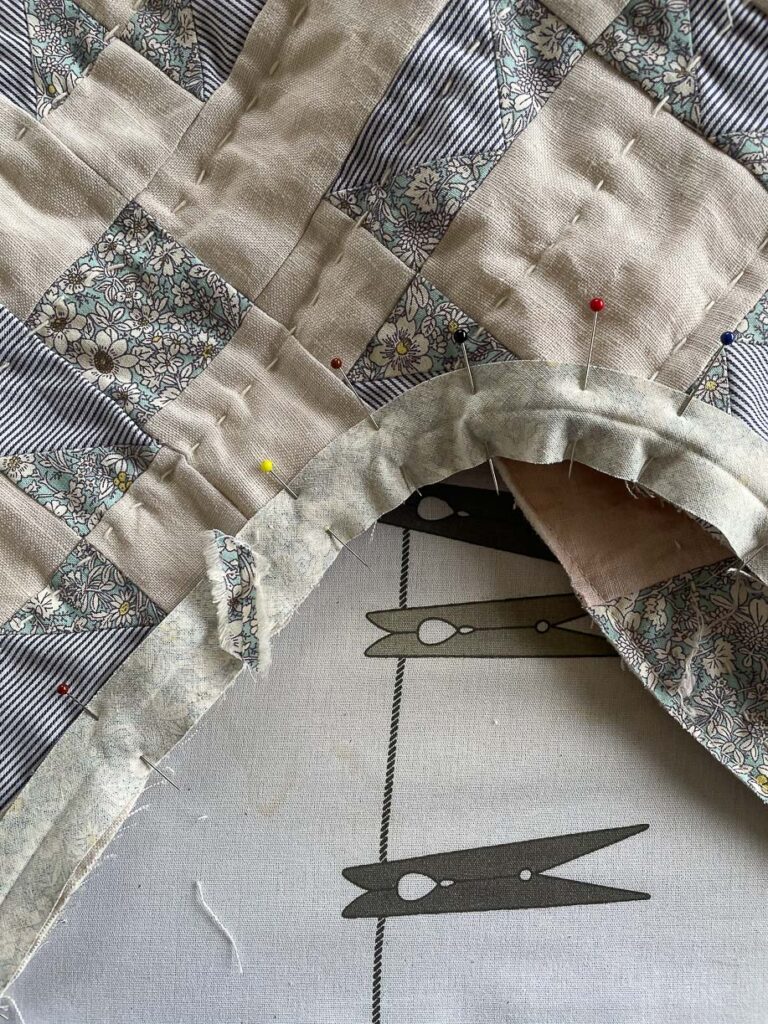
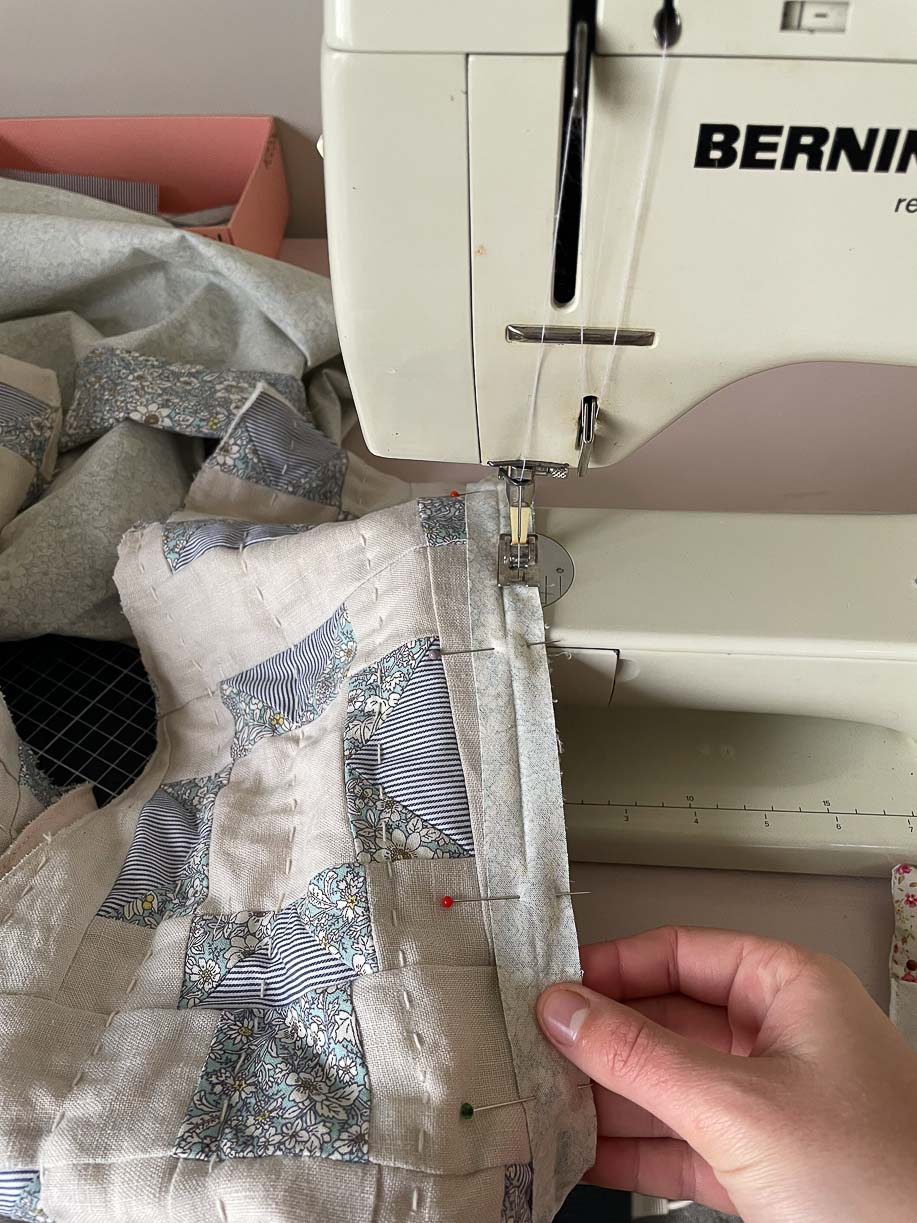
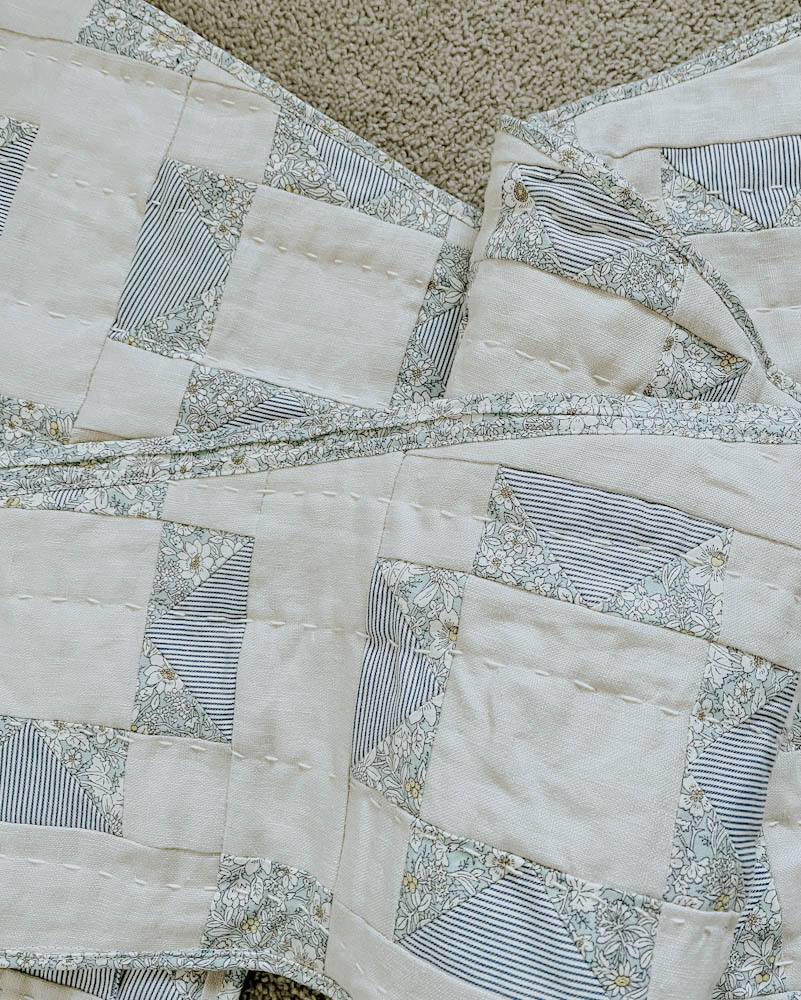
Follow along with the sewing pattern instructions to construct your quilted jacket. The pattern I used had instructions to bind the outer jacket edges, which I like.
I decided to cut out binding strips and use them to finish the inside seams.
Quilt Jacket Summary
This is one of the longest sewing projects I have done so far. It was pretty challenging, but it was fun to make. I hope you have found some inspiration and helpful tips to make your quilted jacket and can appreciate this special art form. There’s something joyous about slowing down and taking time to craft something in a world that’s so rushed. Happy sewing, friend!
More Sewing Projects to Make:
- How to Make Pot Holders with No Pattern
- How to Make a Pin Cushion
- DIY Wrap Dress
- DIY Patchwork Laptop Case
- DIY Heating Pad for Microwave
- DIY Ruffle Check Cushions {Heather Taylor Inspired}
- DIY Baby Blanket Step-by-Step Sewing Tutorial
- How to Make an Apron (With Apron Pattern)
How to Make a Quilted Jacket with a Pattern
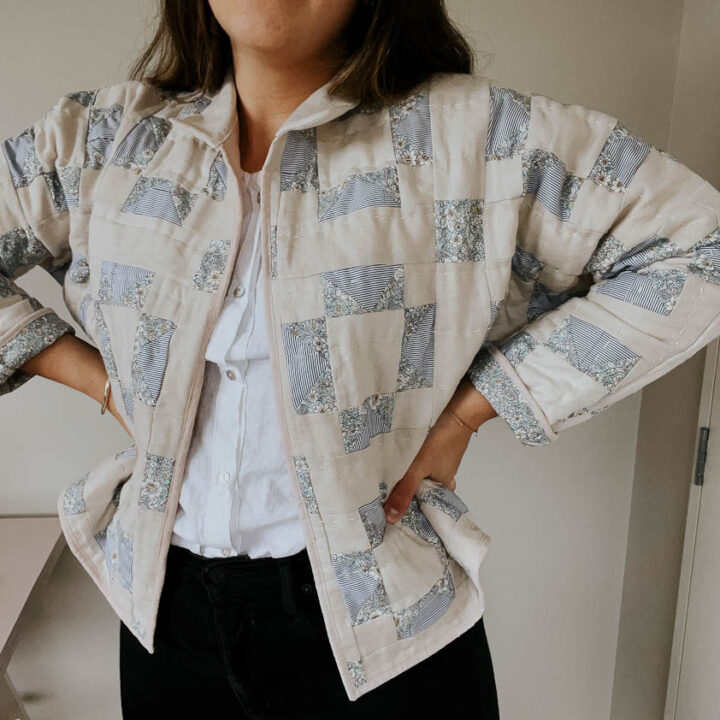
Keep warm and cosy this Winter in a beautiful handmade quilted jacket. Adding this quilted jacket to any outfit elevates it, showing off your character and style. Anyone can give this sewing project a go by following a simple, beginner-friendly sewing pattern.
Materials
- 2m main fabric
- 1m contrasting main fabric
- 0.5m 2nd contrasting fabric
- 2m lining fabric
- Olympus 100% cotton Sashiko thread
- Olympus Sashiko needles
- Jacket pattern
Tools
- Sewing machine
- Rotary cutter
- Cutting mat
- Quilters ruler
- Hera marker or butter knife
- Quilting pins
Instructions
- If you don’t want to sew a quilt, find a premade quilt that is either new or vintage.
I made my quilt using a book called The Patchwork Quilt Design & Colouring Book, which is full of helpful quilting information. I settled on a traditional saw tooth pattern.
Once the pattern is decided, begin planning where each fabric will go.
I decided on using plain linen as the inner squares and the borders. Then I used the stripe and floral as the triangular shapes, and the outer border squares of the saw tooth pattern.
It would help if you also considered how big or small each quilt block is. The smaller they are, the more cutting and sewing that’s needed.
Take your time to plan and get things right before you start cutting out your materials.
I made four mini quilts to fit each sewing piece rather than an entire rectangle quilt because it would waste materials.
Draw a diagram of the quilt block pieces with dimensions and how many bits to cut out. - Following your quilt block diagram, begin cutting out all the pieces needed to sew the quilt up.
- Start sewing the quilt blocks together. I found it easiest to sew piles of the same block pieces together at once before moving on to the next. For example, a Saw Tooth can be sewn together starting with the flying goose method.
Sewing in batches will make this quilting process a lot quicker. - Before sewing the Saw Tooth blocks together, they must be squared up and trimmed. This is done by using a rotary cutter and quilters ruler.
Trimming the blocks helps keep everything accurate. Seams can stretch once sewn to other fabrics, so don’t miss this step. - Begin joining the quilt blocks into a pattern layout you are happy with.
I used my sewing pattern pieces to help guide me on how many pieces to sew together.
I sewed linen borders around the Saw Tooth blocks to break up the pattern. - Find a flat, hard-surfaced area to lay the lining and batting fabrics. I placed my lining right side down first and taped it to the tile floor using masking tape. I made sure to pull the fabric tight to keep it nice and flat.
Place the batting down on top of the lining and smooth it flat.
Place the quilt top onto the batting and lining. Smooth this out, and tape it to the tiles like the lining. This holds everything in place for pinning.
Once all three layers of the quilt are in place, begin pinning the layers together with quilting safety pins. These will keep all the layers together so the quilt can be hand or machine stitched.
Try adding more pins than less so everything sits nicely. Pull the tape off the fabric and tiles. - Mark lines into the quilt top to quilt the fabric layers together. I used the back of a butter knife and a long ruler to mark mine. A Hera marker is the proper tool to mark the lines, but I don’t have one.
I chose to stitch my jacket together by hand because I prefer the finish. Sara has shared a helpful step-by-step hand sewing tutorial on her Instagram stories.
Begin stitching the fabric layers with a needle and thread, or use a sewing machine. Follow along the marked lines. (Follow Sara’s tutorial as linked above for this step). - I chose the All Well Cardigan Coat pattern because I loved the shape and style. This pattern comes with a pattern hack guide which I followed for the collar.
Chalk on the pattern pieces and cut the quilt out. - Follow along with the sewing pattern instructions to construct your quilted jacket. The pattern I used had instructions to bind the outer jacket edges, which I like.
I decided to cut out binding strips and use them to finish the inside seams.
I don’t know what ‘m’ stands for….(as in 2m fabric). If you give me the term I can look it up for a translation to US terms. Thanks. I appreciated your technique and I liked your jacket.
Hi Marcia, thank you so much for your lovely comment. Sorry for the confusion, M = metres of fabric. Happy sewing xx
Love this so much!
When you say you made 4 mini quilts for each piece does that mean you made 1 mini quilt for each arm, back, and front?
And how did you know what size to make each mini quilt – did you go off the jacket pattern dimensions?
Hi Emily, thank you! Yes, you are spot on. I cut out the jacket pattern pieces and used them as size guides to sew together the quilt panels. I didn’t want to waste material or my time sewing one large quilt to cut out, so it made sense to me to do it that way. I hope that makes sense 🙂
I’m really happy to find a website with patterns from this decade! Your jacket turned out lovely.
Aw thank you so much!
I’m so glad I discovered your websites. So many beautiful patterns and useful information – thank you! Also, yours is one of the only newsletters I’ve purposely subscribed to and actually read.
Thank you for this lovely comment, Julia! I’m so glad you find my content helpful. Thanks for your support xx
Been wanting a drop sleeve pattern on a jacket. Your short cuts on just making and mini quilt sections makes a lot of sense to me. Feel I can go forward and try this out. Thank you.
Hi Linda, Im so pleased that my tutorial helped you find clarity with your jacket project. Making the mini quilts really helped save time and reduced my overall waste of both fabric and money. Good luck with your jacket 🙂
This might sound silly, but should I preshrink the material before a start?
Hi Shelby, thats not silly at all. You don’t need to prewash quilting fabrics but it depends on the final look you are after. If you prewash then the fabric won’t shrink at all. If you don’t prewash the fabric will shrink a little bit creating that scummy wrinkled quilt look.
Hi, I loved your tutorial. Well explained. I have retired from patchwork & quilting in NZ after 25years. I am a New Zealander living in England(miss NZ). Good luck with your venture.
Thank you Indra. This message makes me so happy! I hope you get to come back home to New Zealand soon. Take care x
I think the quilted jacket you made is so adorable. My granddaughter wants me to make her one using a pattern that has a hoodie and with 2-1/2” squares! Wow! Please wish me luck because this is a daunting task for me! I’ve only been quilting for about 2-/2 years. I’d much rather tackle the pattern like the one you used. I’ve enjoyed your tutorial. Keep up the good work!
Thank you Glenda. That is so kind. Your granddaughter is very lucky, I’m sure it will turn out beautiful. Enjoy sewing!