The process of sewing involves cutting out a lot of fabric. Getting this step right is critical but often overlooked as a quick step. Cutting fabric out incorrectly can cause sewing problems, frustration, and wasted materials. In this blog, I will explain why it’s important to cut fabric carefully and how to do it so you can avoid making mistakes.
Why it’s Important to Cut Out Fabric Correctly for Garment Making
Many problems can occur when garment fabric is cut out incorrectly. If you are sewing garments, the material needs to be suitable for the sewing pattern, i.e., a knit or woven fabric. This is a mistake I often made when I started sewing because I didn’t understand the importance of fabric types. For example, my Camille top sewing pattern is suitable for lightweight woven fabrics like cotton poplin.
Now that I have chosen a suitable material for my Camille top, I can begin cutting out the cotton according to the sewing pattern instructions. Cutting out fabric can be confusing because the terminology used is sewing-related and new to many, so let’s break it down.
Before we get into how to cut out fabric correctly, let’s look at what can happen when a sewing pattern is cut out of fabric incorrectly.
As an Amazon Associate, I earn from qualifying purchases. Read my full disclosure here.
Fabric Cutting Problems in Sewing
One of the biggest problems when cutting out fabric incorrectly is that the seams won’t sit properly. The seams can pull against one another when sewn together, causing tension and pilling. This causes garments to sit awkwardly on the body or not fit properly. Unpicking can’t fix this problem because the fabric has been cut out on the wrong grainline.
You can learn more about fabric grainlines, and their importance in my Grainline – What is the Grainline of Fabric in Sewing & Why is it important? post.
Here are a few common fabric-cutting mistakes that many sewers can make:
- Cutting jagged edges – fabric needs to be cut smoothly along the edge of the pattern to be accurate and true to size. When the fabric has jagged edges, it will cause incorrect seam allowances in the sewing stages, making the garment too big or too small—Use sharp, clean shears to cut the fabric on a flat, hard surface to avoid jagged edges. My current favourite pair are these beautiful hand-crafted fabric shears from LDH.
- Incorrect pattern sizes – when following a sewing pattern, it can be easy to include a sewing pattern that is another size. Double-check all the pattern pieces before you begin cutting out your fabric.
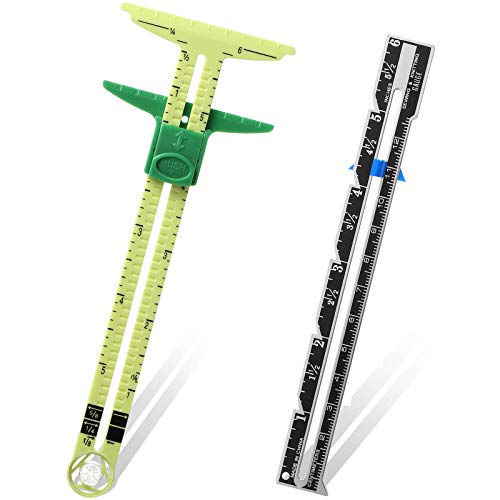
- Not measuring adaptations – if you want to change the length of a garment, don’t try to eyeball the cut. Always use a measuring tape to mark the hemline accurately. Then use a handy tool like a hem gauge to get the hem as even as possible.
- Grainlines were not followed – hopefully, you have already read my blog post on grainlines. If not, I suggest doing this now! Grainlines are essential when cutting out any pattern, showing you the correct way to place your sewing pattern onto your fabric. This ensures the fabric will drape as expected once sewn together.
- Fabric not laid out correctly – laying up your fabric correctly will make cutting out your fabric quicker and more accurate. Smooth, wrinkle-free material will ensure your pattern is cut to the correct size.
What Are the Best Tools for Cutting Fabric?
There are many helpful tools to choose from for cutting out fabric. The most common are fabric shears or rotary cutters. Each tool has its place, but it can also come down to personal preference.

You could opt for a rotary cutter and mat if you have a large sewing area. This is a great way to cut out fabric without moving it around too much. If you don’t have the space for a large cutting mat, then a simple pair of fabric shears works wonders. All you need is a flat surface to cut out on, like a dining room table or floor space.
Shop Cutting Tools


To learn more about the best tools for sewing, check out these helpful articles:
- Sewing Cutting Tools for Beginners
- Sewing Marking Tools with Names & Pictures
- Sewing Tools and Equipment List with Names and Pictures
How to Cut Fabric for Sewing (Fabric Cutting)
Step One: Prepare your fabric
First, you need to prepare your fabric for cutting by washing it. It can seem boring and mundane to wash your fabric before cutting it out, but I assure you it’s worth the trouble.
Many fabrics can shrink in the wash the first time they get washed. So, if you don’t do this before cutting out your size, it may shrink after hours of sewing. It’s not worth the heartbreak. Guess how I know this, lol!
It’s best to air dry your fabric on a washing line to avoid further shrinkage in a dryer.
After washing and drying your fabric, press it with an iron so it doesn’t have creases or folds. This helps your cutting stay accurate when the pattern pieces are laid on top. A small fold in the fabric can cause the pattern shape to be warped or have extra seam allowance, making the pattern not fit the corresponding pieces.
Step Two: Lay up your fabric
Once your fabric is washed, dried, and pressed, it’s time to lay it up. Find a large surface area to fit your fabric, like a hard floor or dining table. If you are using a cutting mat, place this down before laying your fabric down.
Check your sewing pattern instructions to see how your fabric needs to be laid up. It could be one layer or folded. If your fabric needs to be folded, follow the lay plan in the sewing instructions. Most patterns instruct you to fold your fabric in half lengthwise with the selvedges touching as below.

If you don’t need to fold your fabric, lay it out as instructed in your sewing pattern. Usually, the right side of the material should be facing up.
The goal is to have the fabric selvedge as straight as possible, so the fabric grainline is straight. If you use a tabletop, try lining the fabric selvedge along the edge to get it straight. You can use a wall edge if you’re using a floor surface.

If you have a slippery fabric like silk, chiffon, or satin, try this laying-up method for cutting out delicate fabrics I learned in fashion school.
Step Three: Lay out the sewing pattern
Once your fabric is laid up, place the sewing pattern pieces on top. Follow the grainlines marked on the sewing patterns and place them on the material. There are two types of grainlines used on sewing patterns, on the fold or a straight grainline, as below.

If your pattern has a cut on the fold grainline, place the pattern along the folded edge of the fabric. A sewing pattern becomes a symmetrical piece when cut on the fold. It is common for pattern pieces like bodice backs, skirts, collars, and cuffs to be cut on the fold.

Tip: One rule you must remember when sewing is that the grainline always runs parallel to the selvedge.

When laying up your patterns, it’s essential to have the grainline parallel to the fabric selvedge. This can be achieved by measuring from the selvedge edge to the pattern grainline.
I like to measure in 2-3 places on the pattern to ensure the entire piece is the same distance from the fabric selvedge. This means the pattern will be cut out of the fabric as accurately as possible.


Use pins or pattern weights to hold the sewing patterns in place.

Step Four: Cut out the fabric
The final step is to cut out the pattern pieces from the fabric. This step is quick because we’ve taken the time to prepare our fabric and pattern accurately before cutting. Remember the saying measure twice, cut once?
Using your fabric shears or rotary cutter, carefully cut around the sewing pattern pieces. Take care to cut with long, clean strokes. This will stop your fabric from getting jagged and limit the amount of cutting you need to do. Cut as close to the sewing pattern as possible to get an accurate size.
Don’t forget to cut the notches and mark any drill holes or buttons before unpinning the pattern.
My tip to make sewing quicker is to leave the pattern pieces pinned to the fabric. This helps you identify each sewing piece quickly when sewing the garment together. If you have lots of pieces that look alike, this can save lots of time and prevent accidents from occurring.
Do You Need Help Beginning Sewing? Check Out These Helpful Articles:
- How To Thread A Sewing Machine Step-by-Step Guide
- How to Wind a Bobbin
- Seams – How to Sew a Plain and Open Seam
- How to Sew a Button – 3 Button Types
- How to Sew French Seams
- Top 10 Sewing Books for Beginners
How to Cut Out Fabric - Fabric Cutting 101

The process of sewing involves cutting out a lot of fabric. Getting this step right is critical but often overlooked as a quick step. Cutting fabric out incorrectly can cause sewing problems, frustration, and wasted materials. In this blog, I will explain why it's important to cut fabric carefully and how to do it so you can avoid making mistakes.
Materials
- Sewing pattern
- Fabric
Tools
- Fabric Shears
- Pins
- Iron
Instructions
- Prepare your fabric
First, you must prepare your fabric for cutting by washing it. It can seem boring and mundane to wash your fabric before cutting it out, but I assure you it’s worth the trouble.
Many fabrics can shrink in the wash the first time they get washed. So, if you don’t do this before cutting out your size, it may shrink after hours of sewing. It’s not worth the heartbreak. Guess how I know this, lol!
It’s best to air dry your fabric on a washing line to avoid further shrinkage in a dryer.
After washing and drying your fabric, press it with an iron, so it doesn’t have any creases or folds. This helps your cutting stay accurate when the pattern pieces are laid on top. A small fold in the fabric can cause the pattern shape to be warped or have extra seam allowance, making the pattern not fit the corresponding pieces. - Lay up your fabric
Once your fabric is washed, dried, and pressed, it’s time to lay it up. Find a large surface area to fit your fabric, like a hard floor or dining table. If you are
using a cutting mat, place this down before laying your fabric down.
Check your sewing pattern instructions to see how your fabric needs to be laid up. It could be one layer or folded. If your fabric needs to be folded, follow the lay plan in the sewing instructions. Most patterns instruct you to fold your fabric in half lengthwise with the selvedges touching as below.
If you don’t need to fold your fabric, lay it out as instructed in your sewing pattern. Usually, the right side of the material should be facing up.
The goal is to have the fabric selvedge as straight as possible, so the fabric grainline is straight. If you use a tabletop, try lining the fabric selvedge along the edge to get it straight. You can use a wall edge if you’re using a floor surface.
If you have a slippery fabric like silk, chiffon, or satin, try this laying-up method for cutting outcuttingout delicate fabrics I learned in fashion school. - Lay out the sewing pattern
Once your fabric is laid up, place the sewing pattern pieces on top. Follow the grainlines marked on the sewing patterns and place them on the material. There are two types of grainlines used on sewing patterns, on the fold or a straight grainline, as below.
If your pattern has a cut on the fold grainline, place the pattern along the folded edge of the fabric. A sewing pattern becomes a symmetrical piece when cut on the fold. It is common for pattern pieces like bodice backs, skirts, collars, and cuffs to be cut on the fold.
The rule you must remember in sewing is that the grainline is always parallel to the selvedge.
When laying up your patterns, it's essential to have the grainline parallel to the fabric selvedge. This can be achieved by measuring from the selvedge edge to the pattern grainline.
I like to measure in 2-3 places on the pattern to ensure the entire piece is the same distance from the fabric selvedge. This means the pattern will be cut out of the fabric as accurately as possible. Use pins or pattern weights to hold the sewing patterns in place. - Cut out the fabric
The final step is to cut out the pattern pieces from the fabric. This step is quick because we've taken the time to prepare our fabric and pattern accurately before cutting. Remember the saying measure twice, cut once? Using your fabric shears or rotary cutter, carefully cut around the sewing pattern pieces. Take care to cut with long, clean strokes. This will stop your fabric from getting jagged and limit the amount of cutting you need to do. Cut as close to the sewing pattern as possible to get an accurate size.
Don’t forget to cut the notches and mark any drill holes or buttons before unpinning the pattern.
Notes
- My tip to make sewing quicker is to leave the pattern pieces pinned to the fabric. This helps you identify each sewing piece quickly when sewing the garment together. If you have lots of pieces that look alike, this can save lots of time and prevent accidents from occurring.
Recommended Products
As an Amazon Associate and member of other affiliate programs, I earn from qualifying purchases.