Learn how to make coasters from fabric, a simple beginner sewing project.
Grab yourself a nice cup of tea and check out my tutorial on how to make patchwork from small scraps of fabric here.

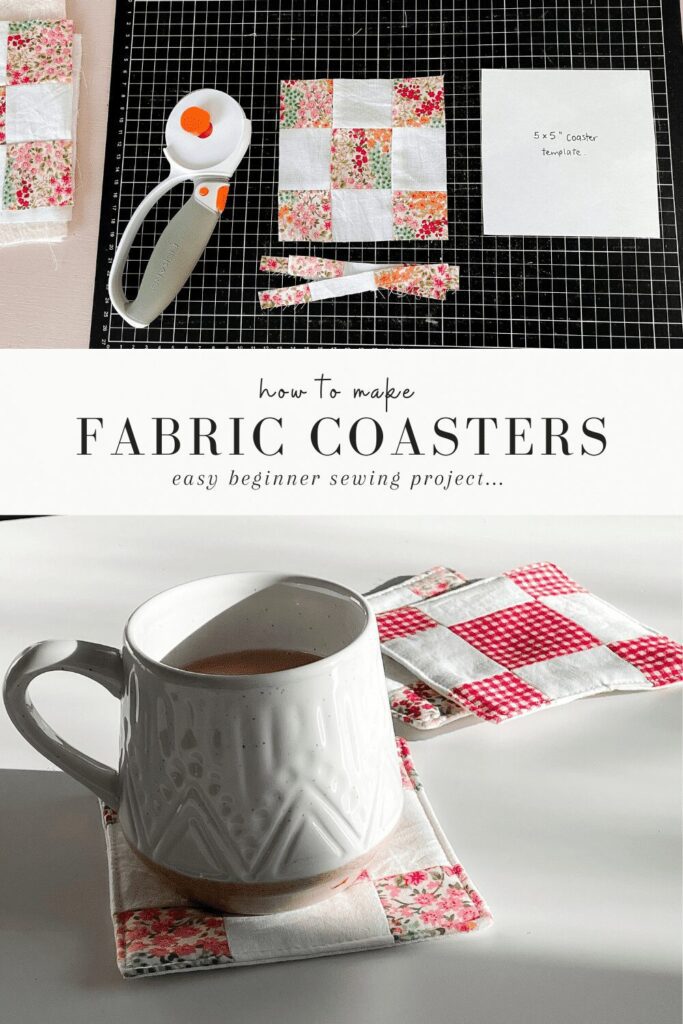
This is a sweet sewing project that you can be as simple or creative as you want to be! I chose to make my fabric coasters from patchwork pieces of fabric to use up some of the smaller scrap fabrics I had in my fabric stash.
I love to use dainty floral prints with pops of colour in them as they bring that cottage country feel to my home that I love. I also used a red and white gingham that I had left over from my Christmas decoration tutorial.
Making small items like these adds character and love to your home. You can’t buy that feeling in a shop! These are affordable to make as you can use small scraps of fabric or you can purchase a fat quarter or two.
If you are short on gift ideas consider finding a basket at the thrift shop and adding a few fabric coasters along with some mugs, tea, and chocolate. Many people appreciate thoughtful gifts over expensive ones!
These cases are great for in the Summertime to protect your glasses at the beach with sand getting into your bags. You could also pop in some smaller items like a credit card and lip gloss if you need to!
FABRIC coaster Supplies
- 1-2 fat quarters or small fabric scraps
- Batting
- Thread
- Sewing machine – this is my favourite sewing machine
- Fabric shears
Please note this post contains affiliate links, which means I make a small commission at no extra cost to you. You can read the full disclosure here.
How to Make coasters from fabric PROJECT tips
- Use up small fabric scraps from other projects to save money and waste.
- Add pretty quilt stitching to add character and detail.
- Create a gift basket filled with coasters, mugs, chocolate, and other goodies.
- Explore new fabric print and colour combinations for fun!

How to Make coasters from fabric
Cut out the top layers of the fabric coasters at 5 by 5 inches to create squares.
Cut out the batting for the inside of the coasters at 5 by 5 inches also. Then cut out the back fabrics the same size. I made a card template and used my rotary cutter to speed this step up!


Once the fronts, batting, and backs are cut out it’s time to assemble the pieces together. With the front right side up, place the back on top wrong side up. Place the batting on top of the back piece and make sure all three layers are lined up. Begin to pin around all 4 edges of the fabric coasters.

Sew around the outer edges with a 1/2″ seam allowance leaving a 1-inch opening on one of the sides. This will be used to turn the fabric coaster through to the right sides.
Trim off all four corners to help reduce bulk. This helps the corners sit sharp when turned through.

Turn the coaster through the 1 inch hole to the right sides. Wiggle out the corners by using a pin or knitting needle. Press flat with an iron.
Edgestitch around the outer edges to close the opening. This will also help the fabric coasters keep their shape and add detail. You could also hand-quilt the coasters to add character to them.

How To Make Coasters From Fabric
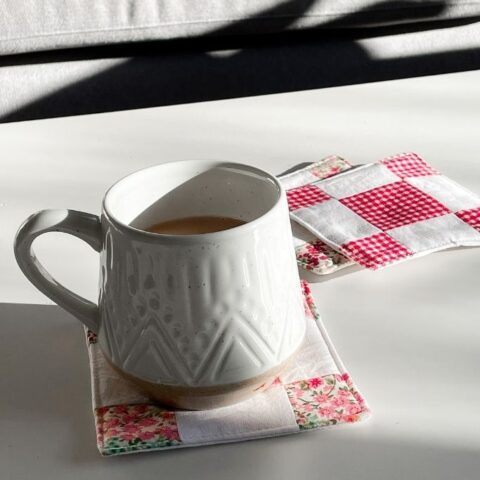
Simple fabric coasters for your home! This is a sweet sewing project that you can be as simple or creative as you want to be! I chose to make my fabric coasters from patchwork pieces of fabric to use up some of the smaller scrap fabrics I had in my fabric stash. These make really lovely gift ideas for friends and family when paired with some coffee, mugs, and chocolate in a nice basket.
Materials
- 1-2 Fat quarters or small fabric scraps
- Batting
- Matching thread
Tools
- Sewing machine
- Fabric shears
- Pins
Instructions
- Cut out the top layers of the fabric coasters at 5 by 5 inches to create squares.
- Cut out the batting for the inside of the coasters at 5 by 5 inches also. Then cut out the back fabrics the same size. I made a card template and used my rotary cutter to speed this step up!
- Once the fronts, batting, and backs are cut out it's time to assemble the pieces together. With the front right side up, place the back on top wrong side up. Place the batting on top of the back piece and make sure all three layers are lined up. Begin to pin around all 4 edges of the fabric coasters.
- Sew around the outer edges with a 1/2" seam allowance leaving a 1 inch opening on one of the sides. This will be used to turn the fabric coaster through to the right sides.
- Trim off all four corners to help reduce bulk. This helps the corners sit sharp when turned through.
- Turn the coaster through the 1-inch hole to the right sides. Wiggle out the corners by using a pin or knitting needle. Press flat with an iron.
- Edgestitch around the outer edges to close the opening. This will also help the fabric coasters keep their shape and add detail. You could also hand-quilt the coasters to add character to them.
Notes
- Use up small fabric scraps from other projects to save money and waste.
- Add pretty quilt stitching to add character and detail.
- Create a gift basket filled with coasters, mugs, chocolate, and other goodies.
- Explore new fabric print and colour combinations for fun!


Do you suggest washing the fabrics and the batting before cutting and sewing? Thank you!
Hello, great question! Usually when quilting no pre-washing is required. The cotton fabric will shrink a tiny bit, which gives it that lovely quilted washed look. If you don’t want that to happen then just prewash your fabric but not the batting. Thanks!
Do you think fusible fleece could be used in place of the batting?
Hi Alyssa, yes that will work 🙂
Hi Makyla,
How did you make the top layer? Your video didn’t show this. I’m totally new to quilting, would love to see all the steps 🙂
Hi! That’s a 9 patch block. You can make a small one like this! I just made one with 2” squares. You may have to play around to get measurements just right.
How did you make yours with the patchwork? I’m new to sewing but I love that look! I’d love to make some for Christmas like that!