Learn how to sew a zippered pouch in less than an hour to hold your makeup, pens, sewing supplies, or anything you want.
This zippered pouch sewing project is beginner-friendly – yes, even for those who haven’t sewn a zipper before…I’ve got you!

This sewing project has been on my make list for a while now. Since moving to the South Island of New Zealand, we have travelled a lot to see our friends and family on the North Island.
I travel with makeup, skincare, pens, books, jewellery and snacks of course! So, having a few of these zipper pouches will make organising my things so much easier, especially when I’m living out of a backpack for a week or two…ekk!
These pouches are perfect to put into this tote bag that I recently made to take on the plane with me. I also sewed an eye mask to sleep if I wanted to.
As an Amazon Associate, I earn from qualifying purchases. Read my full disclosure here.
Why You Will Love This Zipper Pouch
What Can a Zipper Pouch be Used for?
Well, what can this zipper pouch not be used for is probably a more appropriate question because it’s so versatile.
Here are my top picks:
- Makeup and skincare
- Pencils and pens
- Money
- Snacks
- Jewellery
- Tech like chargers, headphones, cords
- Craft and sewing supplies
- Kid’s books or small toys
What is the Best Fabric to Use for a Zipper Pouch?
Woven fabrics are easier to sew and will work well for this sewing project because they won’t stretch out of shape. Here are some options:
- Quilting Cotton
- Cotton drill
- Cotton ticking
- Medium to heavy-weight linen
- Lightweight denim
Materials & Tools You Will Need
2 x Outer fabric (27cm wide x 22cm long)
2 x Lining fabric (27cm wide x 22cm long)
1 x 23cm Zipper
Tape measure
Chalk
Pins
Fabric shears
Thread
Sewing machine
Iron

How to Sew a Zippered Pouch
Step 1 – Cut out the fabric
Measure your zipper, including the entire zip, tails and all. Cut the width of your zipper pouch to this length.
My zipper is 27cm long so I cut my zipper pouch to 27cm wide x 22cm long. This includes 1cm seam allowances on all sides.
Cut out 1 pair of linings and 1 pair of outer fabrics.

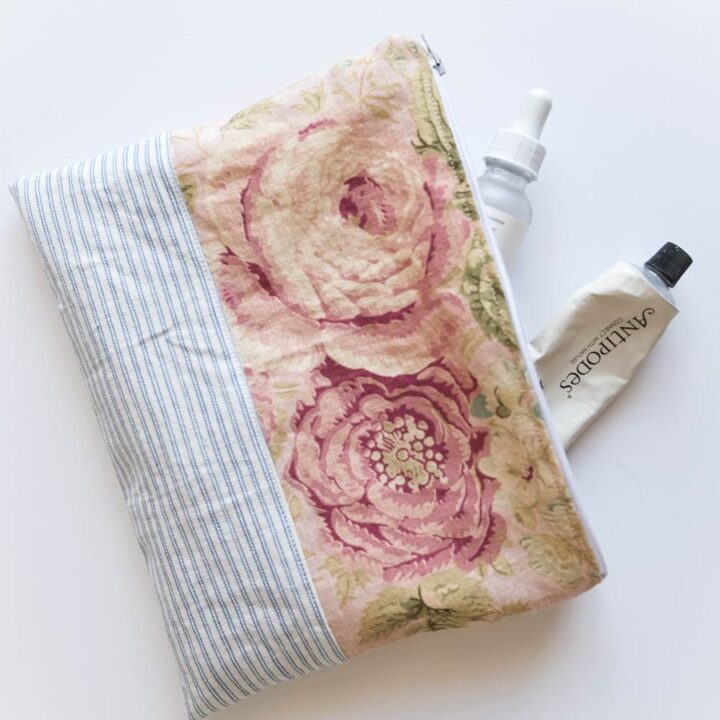
I had some beautiful floral linen fabric left over from a pair of curtains I made for our spare bedroom. However, it wasn’t large enough for this pouch project. So, I patched it together with some ticking fabric before cutting it out into the zipper pouch size.

Step 2 – Attach the zipper
To attach the zipper to the pouch, place one of the lining pieces right side up. Lay the zipper on the lining, matching up the top edges.

Next, place the outer fabric wrong side up on the lining and zipper. Matching up the top edges. Pin or clip the layers together.

Step 3 – Sew the zipper
Change your sewing machine foot over to the zipper foot. Keep the stitch straight and set it to a standard length of 2.4-3.0.

Unzip the zipper about 1/3 of the way open.

Start sewing the seam together, but stop before you reach the zipper tab. Keeping the sewing needle down, lift up the sewing machine foot and pull the zipper tab to close the zip.
Sew as close to the edge of the zipper teeth as possible.

Continue sewing the rest of the zipper to the fabric. Now the zip is attached to one side of the pouch, yay!

Now, we need to attach the zipper to the other side of the pouch. Fold the attached lining and outer fabric down together, then repeat the same steps as above.


Press the layers to each side of the zip so they sit nice and flat.

Lastly, topstitch along the zipper on both sides. Sew close to the edge of the fabric. You will need to use the same trick as before by opening and closing the zip as you sew.
This will help keep the lining and other fabric from getting caught in the zipper.


Step 4 – Sew the lining and outer fabric together
Open the zipper halfway to turn the pouch through at the end.
Line up the seam edges. Match the lining layers and the outer layers together.


Sew around the pouch with a 1cm seam allowance, leaving a 10cm opening in the lining.


Trim the corners and cut the bulk of the seams near the zipper.

Turn the pouch through the seam gap. Wiggle out the corners so they sit nice and sharp.

Next, edgestitch the gap in the seam closed, then push the lining into the pouch. And you’re done!


How to Sew a Zippered Pouch Conclusion
In just a few easy steps, you can create a practical and stylish zipper pouch that can be used for many purposes. This project is perfect for beginners, and with a little customisation of fabrics, zippers or added extras like buttons, sequins or patches, it’s truly unique to your style.
More Sewing Projects to Try:
- How to Make Pot Holders with No Pattern
- How to Make an Apron (With Apron Pattern)
- How to Make Cushion Covers – 10 Minute Envelope Cushions
- How to Make a Placemat
- Dog Bandana Pattern
- How to Make a Bandana with Bandana Pattern
How to Sew a Zippered Pouch
Learn how to sew a zippered pouch in less than an hour to hold your makeup, pens, sewing supplies, or anything you want.
Materials
- 2 x Outer fabric (27cm wide x 22cm long)
- 2 x Lining fabric (27cm wide x 22cm long)
- 1 x 23cm Zipper
Tools
- Tape measure
- Chalk
- Pins
- Fabric shears
- Thread
- Sewing machine
- Iron
Instructions
- Cut out the fabric
Measure your zipper, including the entire zip, tails and all. Cut the width of your zipper pouch to this length.
My zipper is 27cm long so I cut my zipper pouch to 27cm wide x 22cm long. This includes 1cm seam allowances on all sides.
Cut out 1 pair of linings and 1 pair of outer fabrics. - Attach the zipper
To attach the zipper to the pouch, place one of the lining pieces right side up. Lay the zipper on the lining, matching up the top edges.
Next, place the outer fabric wrong side up on the lining and zipper. Matching up the top edges. Pin or clip the layers together. - Sew the zipper
Change your sewing machine foot over to the zipper foot. Keep the stitch straight and set it to a standard length of 2.4-3.0.
Unzip the zipper about 1/3 of the way open.
Start sewing the seam together, but stop before you reach the zipper tab. Keeping the sewing needle down, lift up the sewing machine foot and pull the zipper tab to close the zip.
Sew as close to the edge of the zipper teeth as possible.
Continue sewing the rest of the zipper to the fabric. Now the zip is attached to one side of the pouch, yay!
Now, we need to attach the zipper to the other side of the pouch. Fold the attached lining and outer fabric down together, then repeat the same steps as above. Press the layers to each side of the zip so they sit nice and flat.
Lastly, topstitch along the zipper on both sides. Sew close to the edge of the fabric. You will need to use the same trick as before by opening and closing the zip as you sew.
This will help keep the lining and other fabric from getting caught in the zipper. - Sew the lining and outer fabric together
Open the zipper halfway to turn the pouch through at the end. Line up the seam edges. Match the lining layers and the outer layers together.
Sew around the pouch with a 1cm seam allowance, leaving a 10cm opening in the lining.
Trim the corners and cut the bulk of the seams near the zipper.
Turn the pouch through the seam gap. Wiggle out the corners so they sit nice and sharp.
Next, edgestitch the gap in the seam closed, then push the lining into the pouch. And you're done!
Notes
What is the Best Fabric to Use for a Zipper Pouch?
Woven fabrics are easier to sew and will work well for this sewing project because they won’t stretch out of shape. Here are some options:
- Quilting Cotton
- Cotton drill
- Cotton ticking
- Medium to heavy-weight linen
- Lightweight denim
What to use your zipper pouch for:
- Makeup and skincare
- Pencils and pens
- Money
- Snacks
- Jewellery
- Tech like chargers, headphones, cords
- Craft and sewing supplies
- Kid's books or small toys


