Learn how to easily make Cricut vinyl labels for your kitchen pantry containers or jars in this beginner Cricut tutorial.
If you are new to using a Cricut machine, these quick and easy organisational labels are perfect to make. You only need two materials: vinyl and transfer tape, and no specialised machine foot is required.

Today, I took out my Cricut Maker 3 to make labels for my pantry. I love homemaking and due to the high cost of living, I have been making a conscious effort to cook and bake at home. So, organising my kitchen has become a top priority for me.
You can learn more about 11 ways I save money on groceries.
Since my spice jars have been disorganised for years, I purchased matching glass jars with wooden lids, so everything looks neat on the shelves…not to mention pretty!
After tossing up white, black, or gold vinyl, I finally decided on the white.
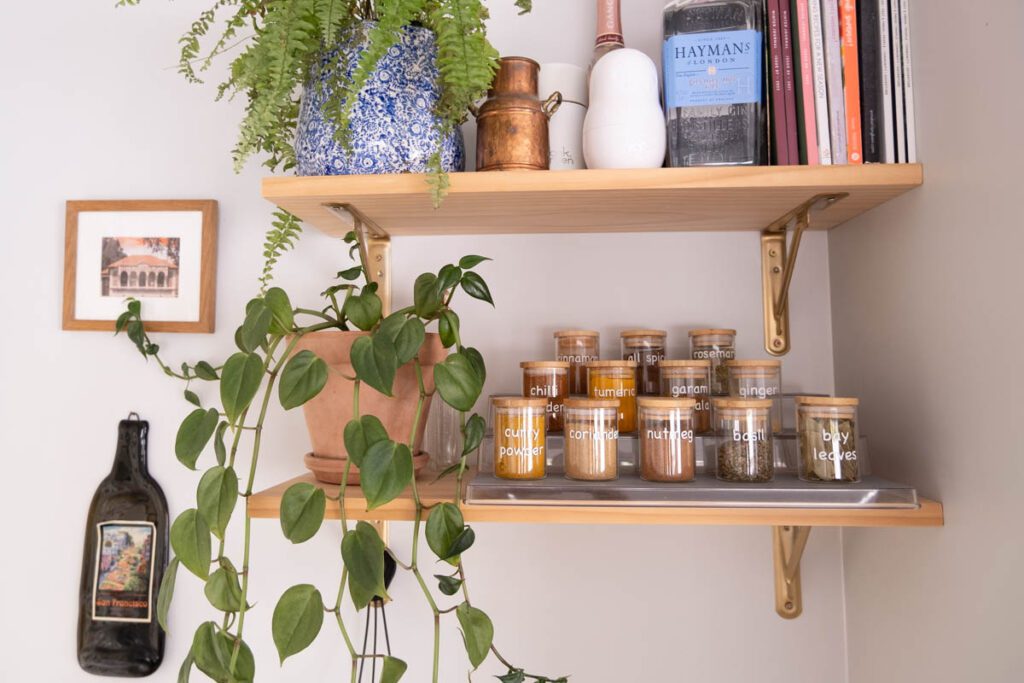
You can make these labels for anywhere in your home: your craft room, bathroom cupboard, cleaning supplies, pantry containers, or kid’s toy buckets.
I like using vinyl labels, especially in the pantry, because they’re waterproof and easy to remove or adjust. Plus, they’re pretty! In this post, I’ll show you how to make your own vinyl labels with Cricut.
As an Amazon Associate, I earn from qualifying purchases. Read my full disclosure here.
Why You Will Love These Cricut Pantry Labels
Materials & Tools You Will Need
- Cricut Maker 3 or Cricut Explore 3 (I used my Cricut Maker 3 in this tutorial, and it’s AMAZING!)
- Cricut Permanent vinyl white
- Cricut Transfer tape
- Cricut scraper tool (or a credit card) and Cricut weeder tool OR you can get this Cricut tool kit.
- Scissors

Cricut Maker 3 & Cricut Explore 3 VS Older Cricut Machines
The Cricut Maker 3 and Cricut Explore 3 machines can be used with Cricut’s Smart Material range, which allows you to cut without the need for mats. This means that you can save time by not having to place the vinyl onto the mat before inserting it into the machine.
How to Make Cricut Vinyl Labels for Your Pantry
Step 1 – Calculate the dimensions required for your Cricut labels
Start by measuring the height and width of your labels using a ruler or tape measure. Make sure that the dimensions of your labels are slightly less than the surface area.

Step 2 – Open Cricut Design Space
Start by opening up Cricut design space.
Either create your own labels using a Cricut font or use my labels found here in Cricut Design Space. I used a free font called ‘chalkboard’, so you don’t need a subscription to make these labels.
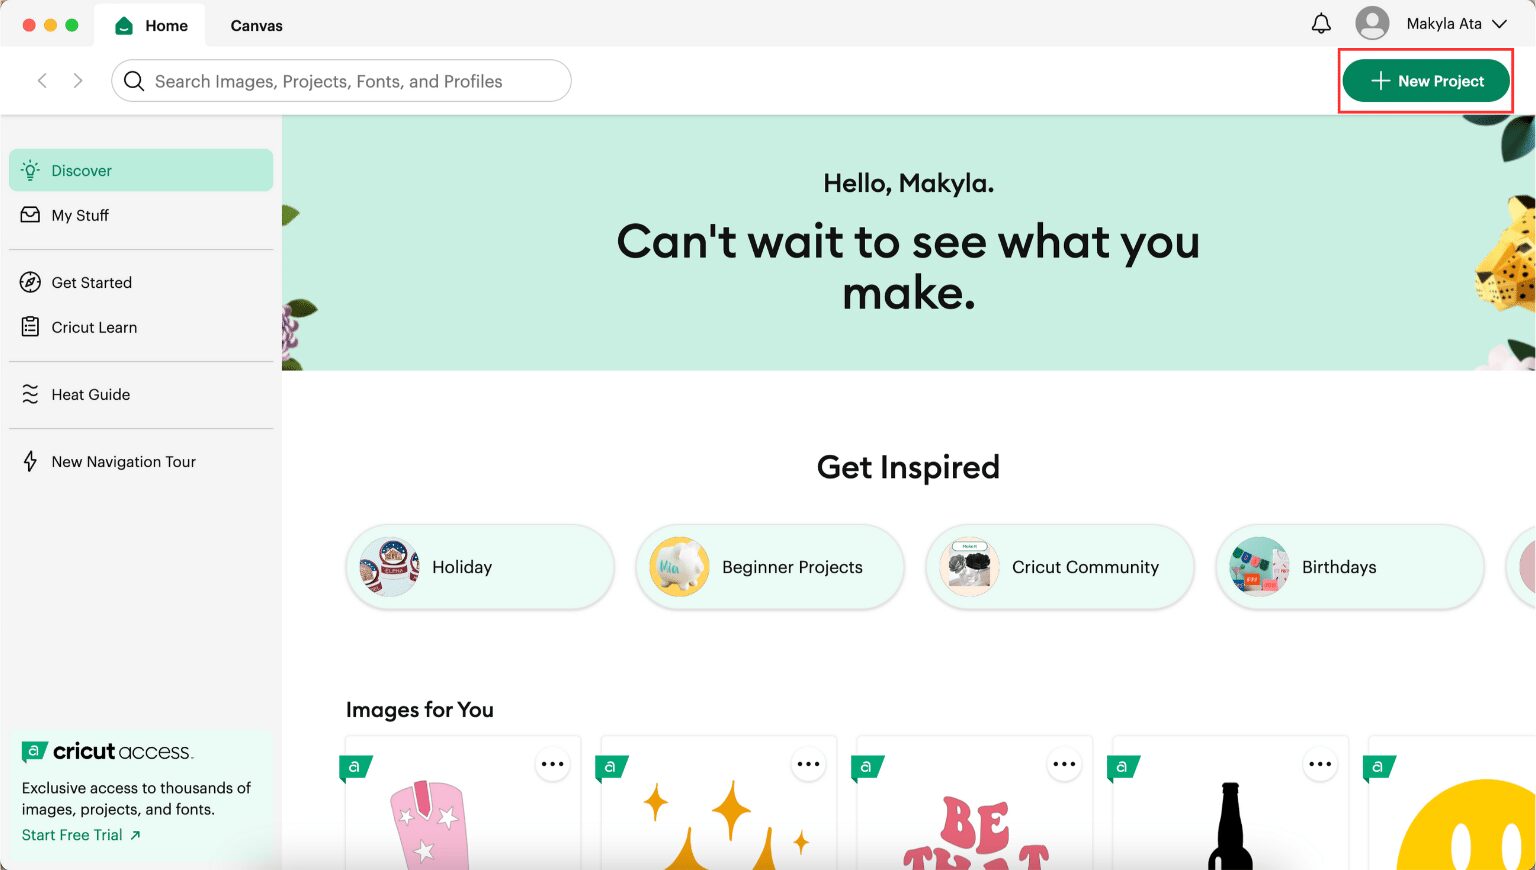
To create your own labels, click on ‘new project’ in the top right-hand corner.
Click on ‘text’ in the left-hand toolbar.

It will add a text box to the project board. Double-click it to edit the text. Add the ingredient you want for your label.
You can copy and paste this to create more labels.
Step 3 – Edit the label sizes for your containers
Choose each label separately and adjust its size to your required dimensions. Enter the custom width and height values in the designated size boxes along the top toolbar in Cricut Design Space.
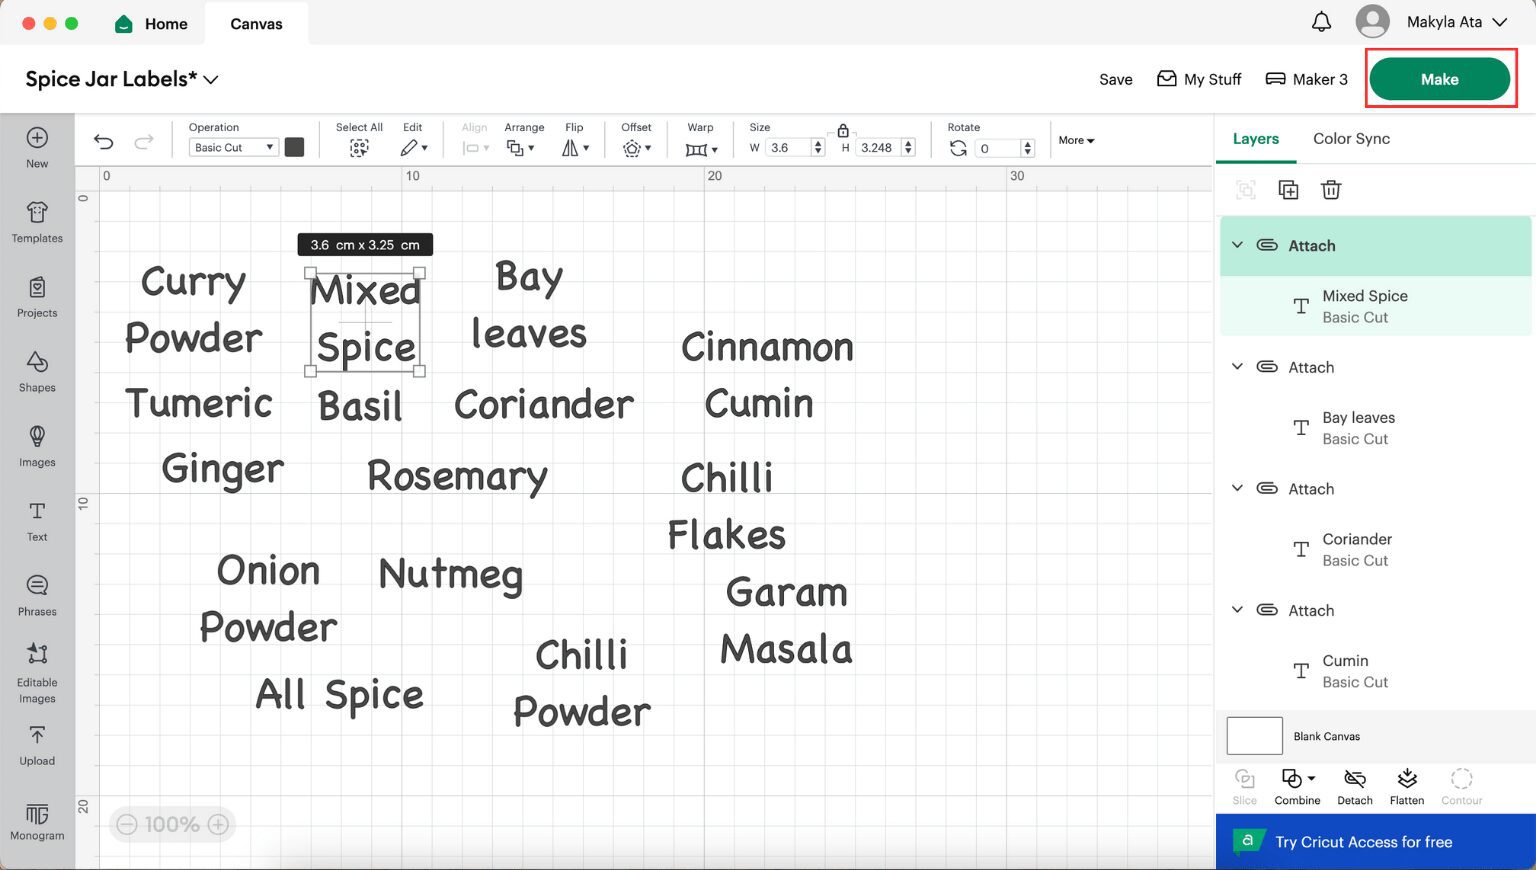
I decided to keep the font sizes the same for my spice jars rather than the height and width. I used two lines instead of one for the longer ingredient names like ‘curry powder’.
Ensure that when resizing, you click on the lock icon to secure the scale and prevent distortion of letters when adjusting the height or width.
If you use a cutting mat, drag the labels onto the grid within the measurements to ensure they fit.
Select all the pantry labels (Control A on PC or Command-A on Mac), then click ” Attach “ in the lower right-hand corner. This ensures that the labels are cut precisely as they appear on the screen.

Step 4 – Send the design to your Cricut to start cutting the vinyl material for your pantry labels
Once you are happy with your labels, it’s time to cut them out.
In Cricut design space click on ‘Make’.
Choose if you are using a mat or smart materials. I selected smart materials.

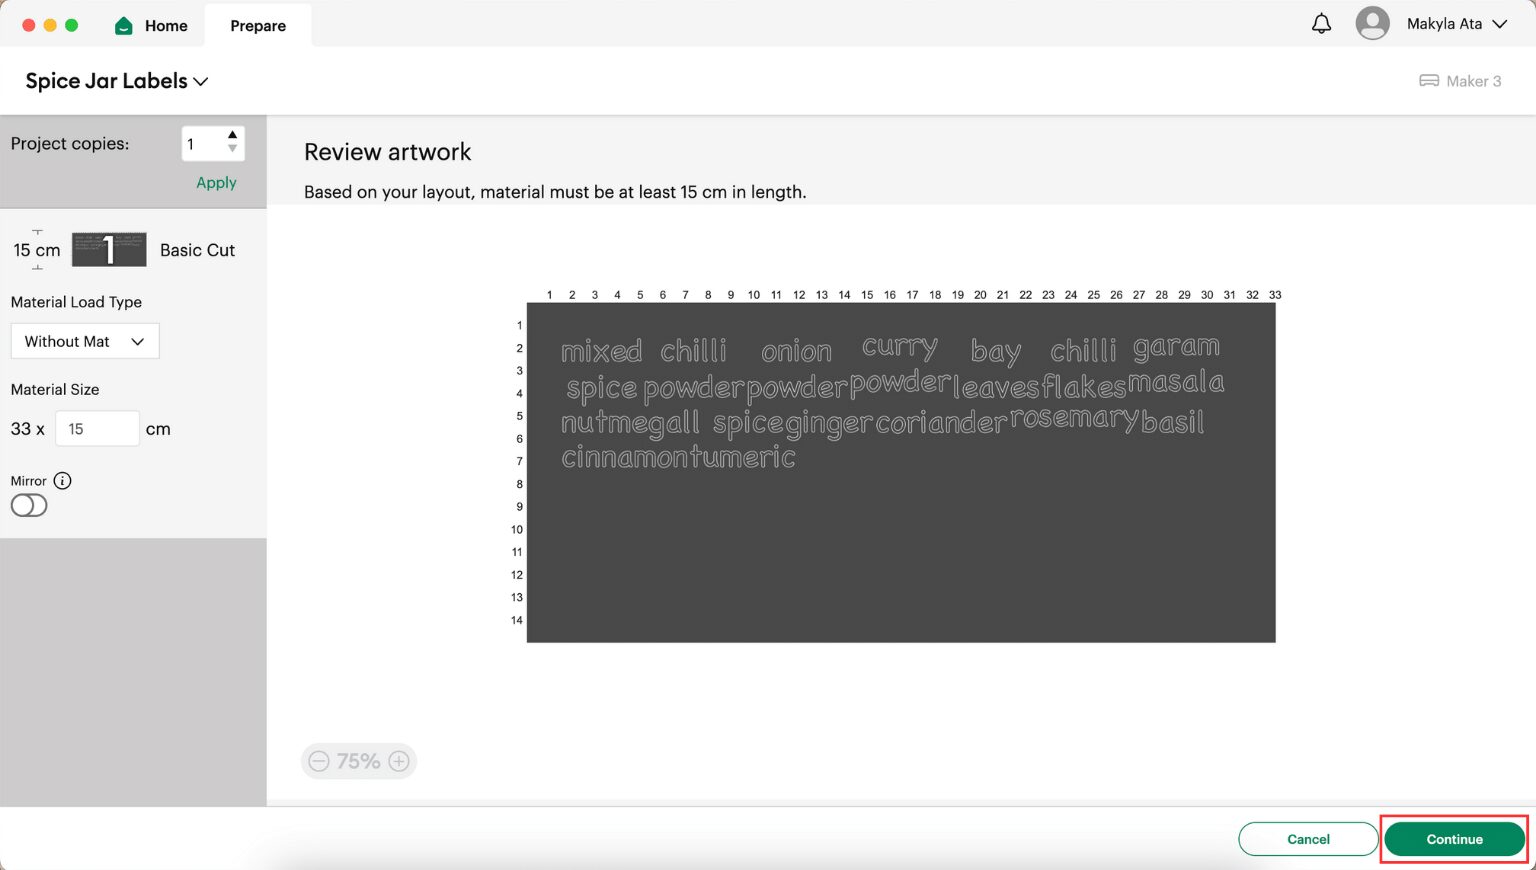
Review your labels. Make sure everything is clear and looking good. Once you’re happy, click ‘continue’.
Choose the appropriate material, which is ‘permanent smart vinyl’.
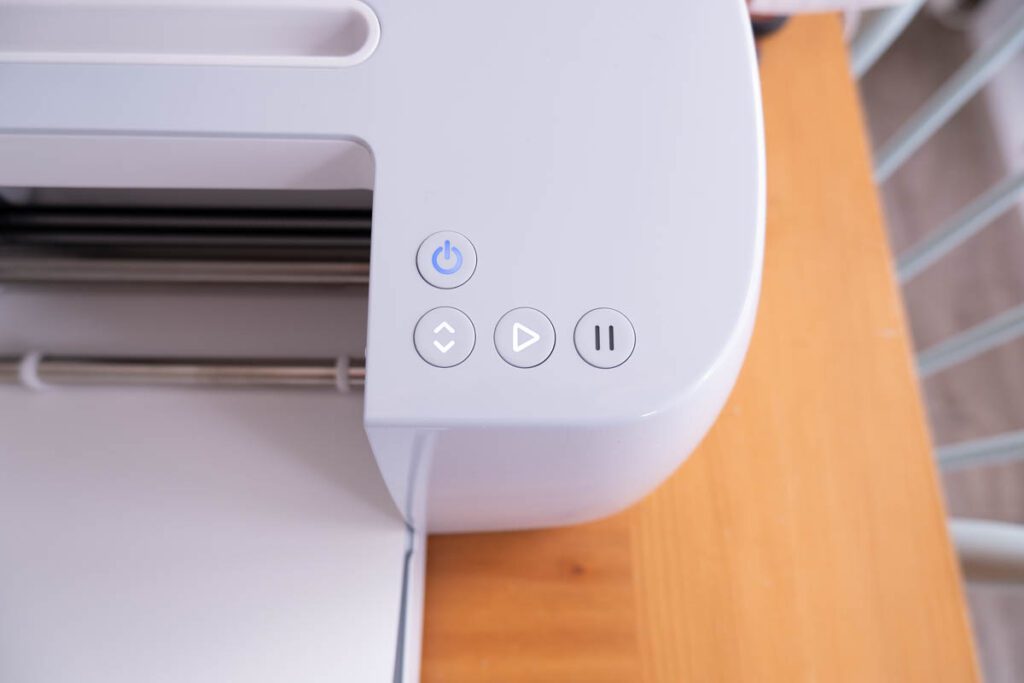
Load your Cricut machine with the smart vinyl or cutting mat. Push the flashing button to prompt the machine to feed the vinyl through.
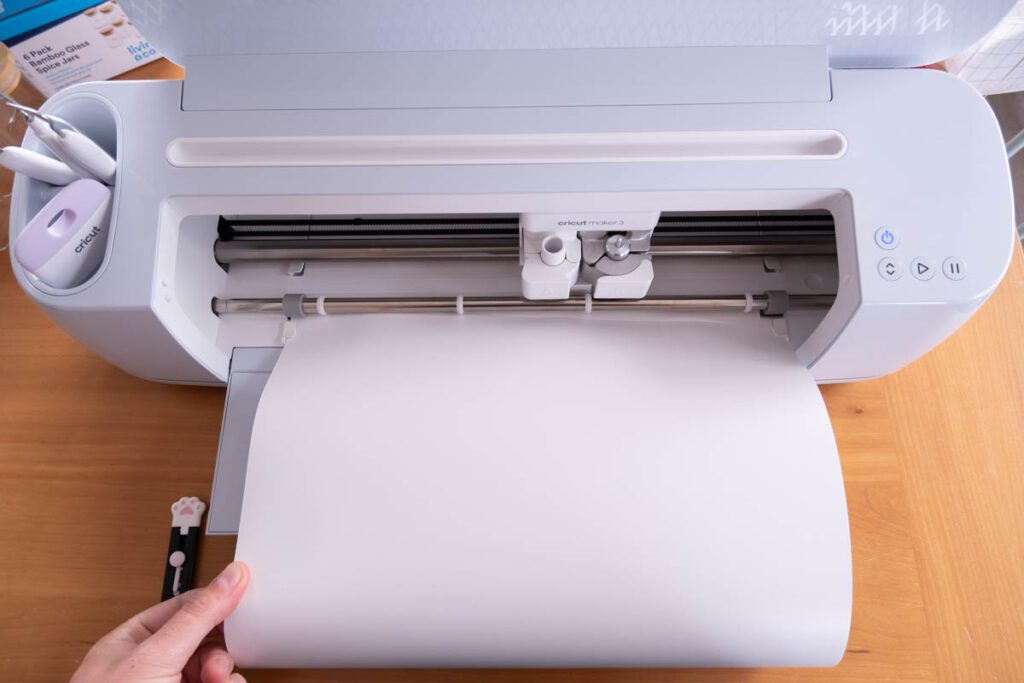
Once the material has been measured, you can press the start button on the Cricut machine. It will begin cutting out your vinyl labels.
When it’s finished cutting, push the arrow button to release the vinyl.
Step 5 – Weed your Cricut pantry labels
Now, you need to remove any excess vinyl material from the labels. This is called weeding. To weed your vinyl labels, you can use a weeding tool or a safety pin.

Start by lifting one of the vinyl corners and begin peeling the vinyl off. Be careful not to remove any of your letters from the backing.
This process can be tedious, but it’s important to take it slow so you don’t lose any letters like I’ve done many times before!
Once the outer layer is removed, remove the inner pieces from the letters like ‘e’ or ‘d’.
Step 6 – Apply the transfer tape to the vinyl labels
Once the labels are fully weeded, it’s time to apply the transfer tape. This tape helps remove the letters off the vinyl backing and onto the tape so you can stick them to your containers.
I like to keep my labels in one large piece.
Place your labels on the vinyl and cut it to the same size. Slowly peel back a corner of the transfer tape and stick it on the labels. Using the scrapper tool or a credit card, smooth the transfer tape onto the labels.

Once it’s applied, I like to flip the piece upside down and rub the scraper tool all over to help the tape stick to the vinyl letters.
Cut around each individual label as straight as you can.

Step 7 – Apply the vinyl pantry labels onto your pantry containers
Wipe down your jars or containers so they are clean and dry where you want to apply the label.
Peel the transfer tape and back away from each other so that the letters are stuck to the transfer tape. If you have trouble getting the letters to stick place the labels vinyl side up and rub them with the scrapper tool again.
Once removed, line them up onto your jars or containers where you want them placed. I just eyeball this as best I can.

You can measure and use masking tape to mark where you want the label to sit if you prefer!
Once you’re happy with the placement, you can use the scrapper tool to rub the label onto the jar so it sticks. Then peel back the transfer tape at a 45-degree angle.
And that’s it! Enjoy organising your pantry.
Now my hubby can find the ingredients easy-peasy!
Pin this project for later
