If you have just started to sew you may be wondering what a seam allowance is and how to add it to your patterns. The seam allowance is the extra space added around a sewing pattern to sew it together.
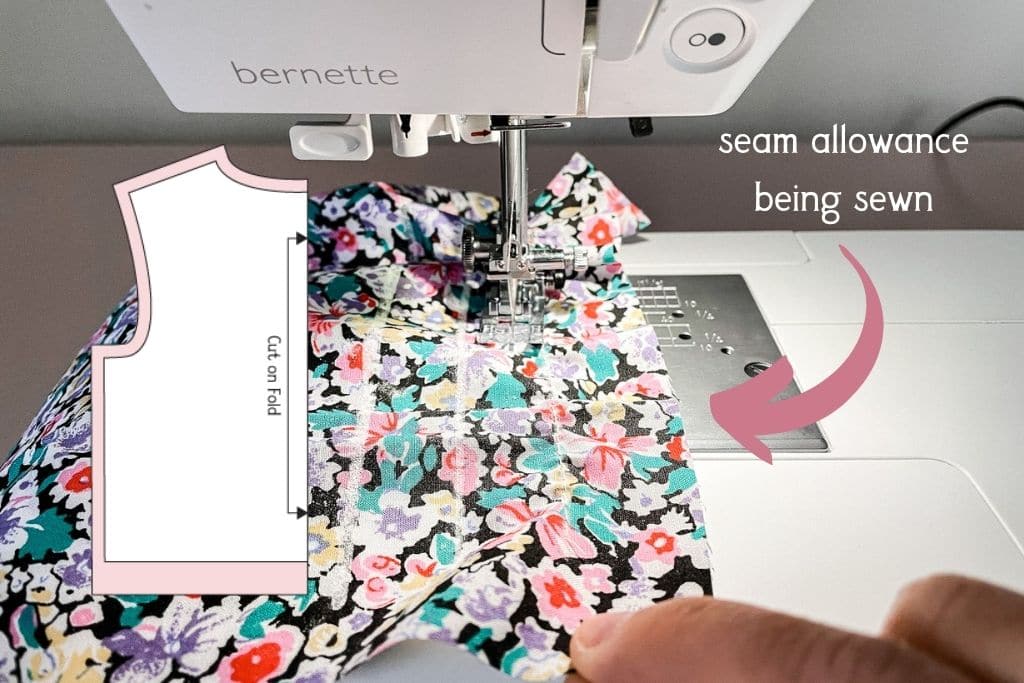
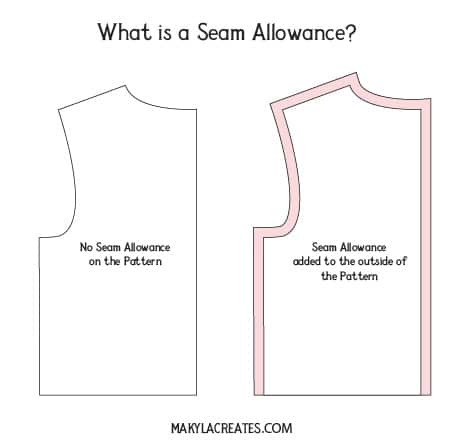
What is a Seam Allowance?
The seam allowance is the distance between the raw edge of fabric to where the line of stitching is sewn. Basically the extra fabric around the edge of a sewing pattern.
This post contains affiliate links, which means I make a small commission at no extra cost to you. You can read my full disclosure here.
The seam allowance is used to identify the seam lines without there being visible lines to sew along.
Instead you are given a measurement like 6mm, 1cm, 1.5cm, etc.
This distance is measured from the cut edge of fabric to where the sewing machine will sew the seam lines.
For example, if a pattern seam allowance is 1cm you will need to sew 1cm in from the raw edge of the fabric.
Why is the Seam Allowance Important?
The seam allowance is important because it will determine how the final garment will fit you.
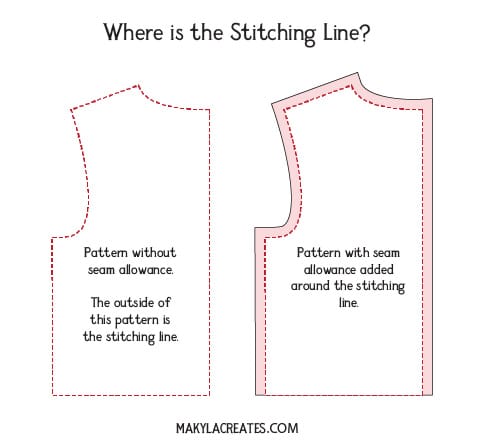
Now we understand that the seam allowance is the distance from the raw edge of the fabric to the stitching line.
It makes sense that the stitching lines reflect the size of the pattern.
Let’s say you’re making a pair of jeans and the pattern requires you to sew a seam allowance of 1.5cm, but you decided to sew the jeans with a 1cm seam allowance.
Your jeans would end up being 2cm too big.
When I am drafting a pattern I add the seam allowance last because it is not part of the size measurements.
What is a Standard Seam Allowance?
I wouldn’t say there is a standard seam allowance used across all sewing patterns but there are common measurements that are used.
My sewing patterns usually include a 1cm seam allowance, which is the main measurement I like to use. Some other seam allowances I use are 6mm and 1.2cm.
The seam allowance on some commercial sewing patterns like Simplicity, Vouge and McCall’s are usually 1.5cm to allow for fitting adjustments.
If the garment is too tight you have room to adjust the seam allowance to fit you better.
Another point to add is that pattern makers chose a seam allowance depending on how the garment will be sewn together.
If a pattern requires French seams the seam allowance would be something like 1.2cm wide.
You can learn more about French seams here but for now lets keep it simple.
What does Add a Seam Allowance mean?
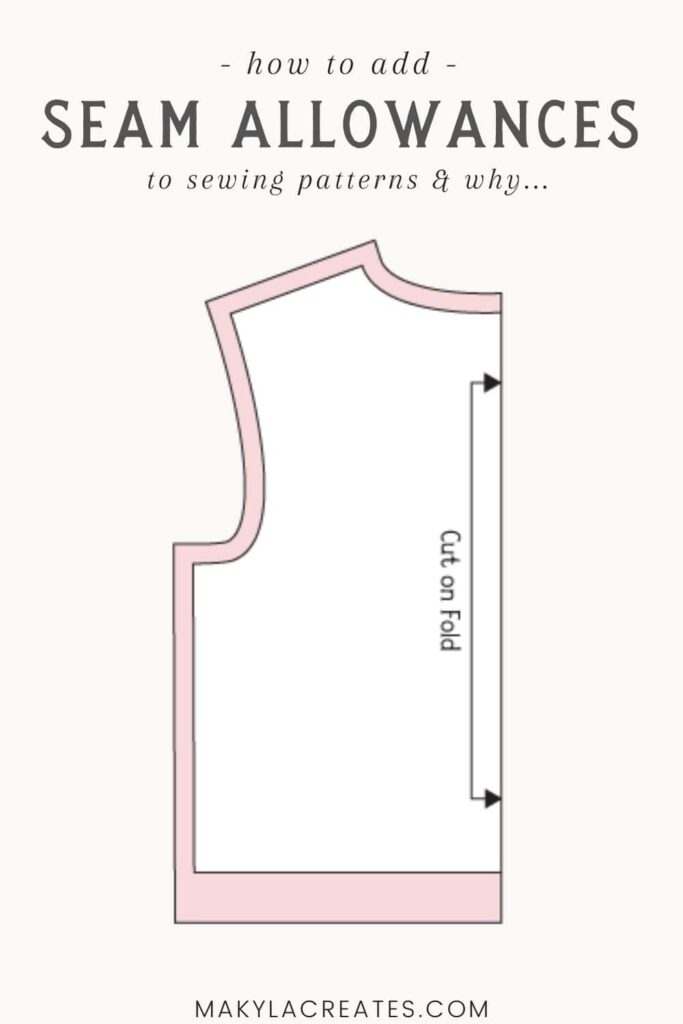
If you are using a sewing pattern that requires you to add seam allowance don’t panic!
The pattern you are using doesn’t include the seam allowance, it just needs to be added on. This sounds intimidating but I promise it’s not too bad.
I’m going to share how to add a seam allowance soon but first you should figure out what seam allowance is needed.
What Size Seam Allowance Should you use?
If you are creating your own sewing patterns like I do, you can chose what seam allowance to add.
It’s always smart to think about the way the garment will be sewn together.
I generally add a 1cm seam allowance to my sewing patterns because I like to sew plain and open seams on my garments.
Bigger seam allowances are helpful when you’re learning how to sew because you have more control over guiding your fabric through the sewing machine.
Plus there is more room for expected mistakes when you are learning, which is great.
For commercial clothing manufacturers a smaller seam allowance is better because it requires less fabric to make a garment, which equals higher profit margins.
Smaller seam allowances are used for things like collars, and cuffs because they are small areas.
If you’re adding a seam allowance to a pattern that doesn’t include one make sure to read the instructions.
How to Add Seam Allowance to Patterns
Step 1: Trace off the Pattern
Start by tracing off the pattern pieces onto tracing paper.
Tip: Make sure to leave room around each piece to add the seam allowance.
Step 2: Find the Seam Allowance Measurements
The sewing pattern instructions should share how much seam allowance you need to add on.
This is important because some sides may not need seam allowance added to them.
For example a pattern piece that is cut out on the fold won’t need a seam added at the centre front.
Step 3: Mark in the Seam Allowance
To add the seam allowance you can use special pattern making tools like a curved ruler or French curve for sleeves or armholes.
You can just use a normal ruler too.
Simply measure out your seam allowance distance from the edge of the pattern piece. Remember this is also called the stitching line like we talked about earlier.
I like to mark dashes a few cm’s apart then join these up with my ruler or French curve tool.
When you are adding seam allowance it is important to think about where a seam may be.
Places you won’t need to add a seam allowance:
- Seams marked with ‘Cut on the Fold’
- Hem lines as these usually require hem allowances
- To the outer edges of a facing
Something to note is that a seam allowance int usually added to a hem, a hem allowance is. But I will go over this in the next steps.
Step 4: How to Add a Hem Allowance
Hem allowance is the same concept as a seam allowance expect its added along the hem line.
Hems can often be 1cm, 2cm or 4cm wide. It just depends on the type of hem finishing.
Sometimes hem allowances will need to be trued depending on the angle of a pattern piece.
An example of this is the bottom of tapered pants or sleeves.
The hem edge is narrower so when adding a hem allowance it will need to be fold up to add extra width on either side as the angle is wider higher up the pattern.
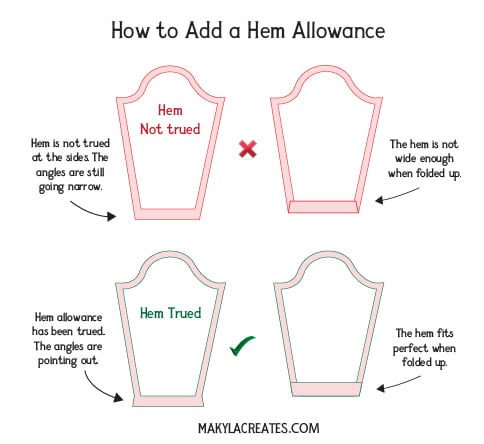
Once the seam and hem allowances have been added to the sewing patterns they can be cut out. Make sure to cut around the outer line not the original markings.
Tip: Mark the seam allowances with a coloured marker so you know what lines to cut out when you are learning.
How to Sew the Correct Seam Allowance?
On the sewing machine plate there are lots of little lines that are marked either ¼”, ½”, 1” or 10mm, 12mm 15mm.
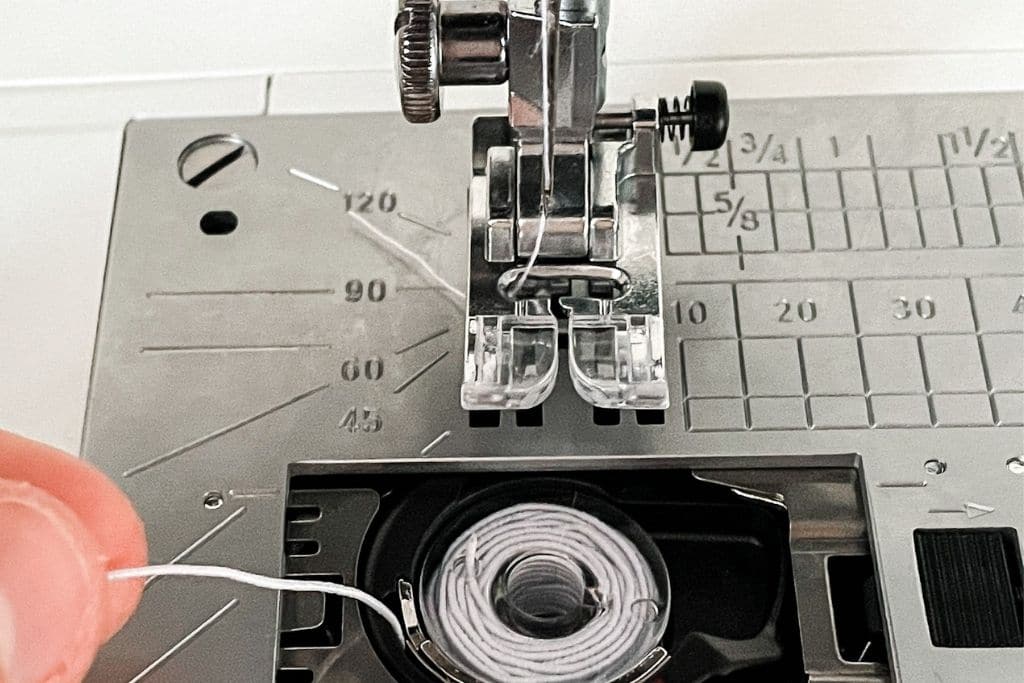
These are measurement guides so you can sew the correct seam allowance width without needing to mark the fabric.
Tip: Check the sewing machine needle is positioned in the centre and not to the side as the seam allowance won’t be the right width.
A great way to clearly see the seam allowance is to use washi or electrical tape on the machine plate. I love to do this because it’s sometimes hard to see the marked lines on the sewing machine.
Place the raw edges of the fabric against whatever seam allowance you are sewing with. This will help you sew the right seams around the entire garment.
You can buy a special tool called a seam allowance guide that magnetically sticks to the sewing machine. This helps because the fabric cant sew wider than the width of the guide.
How to Start Sewing
Now that you understand what a seam allowance is you can move onto sewing seams which is a fundamental part of sewing. A post on how to sew seams is on the way!
In the mean time you can master learning how to thread up your sewing machine and how to wind the bobbin.