Let’s talk about darts, those scary pointy things that some patterns make you sew. While they may seem intimidating at first, sewing darts is very quick and easy to sew when you know the right technique. In this blog post, I will show you how to easily sew a straight and double-pointed dart.
What is a Dart in Sewing?
A dart is a fold sewn into the fabric that shapes a garment. Darts are commonly found in areas where the body curves, like the bust, waist, or shoulders. They create shaping in the garment so it will curve or fit closer to the body. Straight darts are often used in curved areas, like the bust, waist, or hips, to create a more fitted and flattering appearance.

As an Amazon Associate, I earn from qualifying purchases. Read my full disclosure here.
New to Sewing?
If you are new to sewing and need help getting started, check out this helpful post, Learn How to Sew -Ultimate Guide to Sewing for Beginners, if you are planning to start your sewing journey, this guide provides all the steps you need to follow to make the process easier and smoother.
Sewing Darts – How to Sew a Dart
Straight Darts (Single Pointed Darts)
This first dart style is the most common and easiest dart to sew. A straight dart has two dart legs that taper to one dart point. You often find straight darts in many sewing patterns, from clothing to home décor or accessories. On clothing, they are found mostly on bodices and pants or skirt waists.
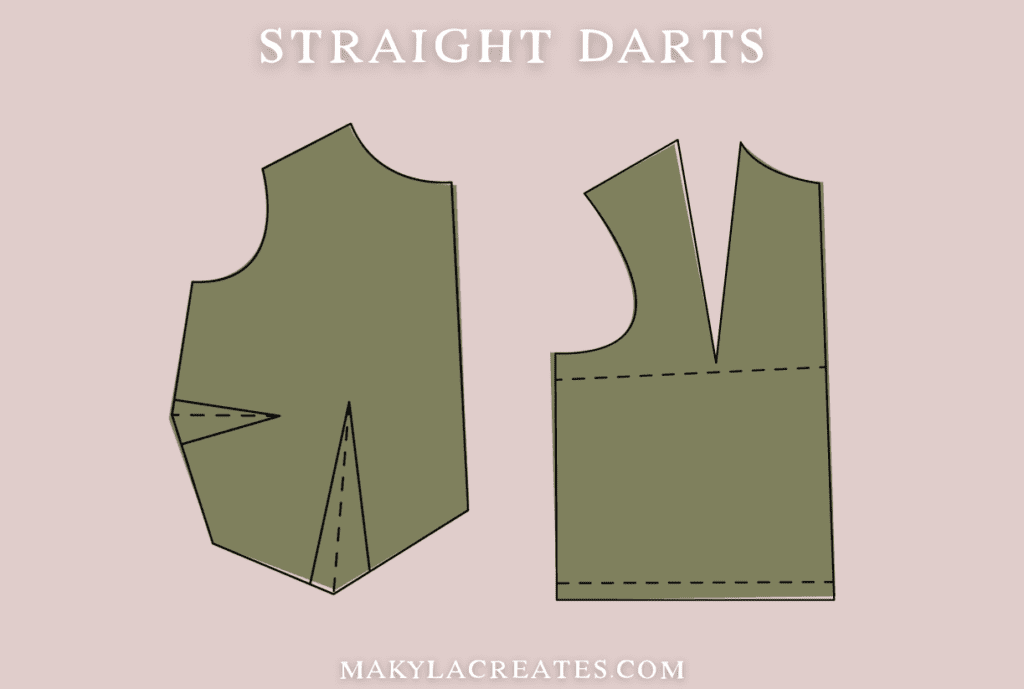
Step 1 – Mark the darts onto your fabric
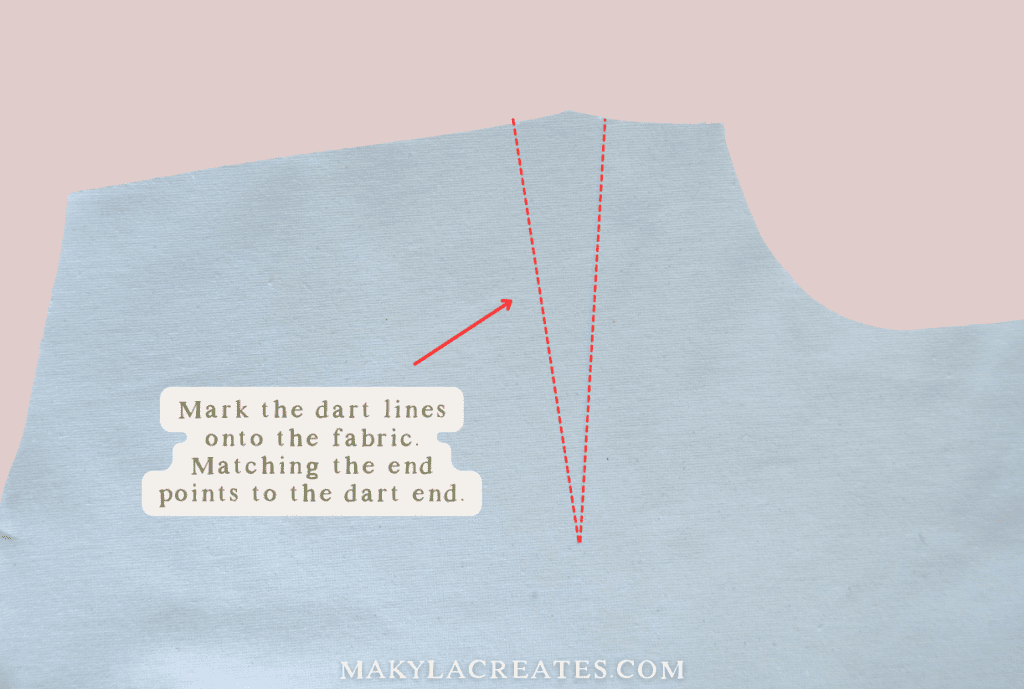
The first step to sewing straight darts is to mark them onto the wrong side of your fabric. It’s best practice to do this when cutting out your sewing pieces so the pieces don’t get distorted out of shape.

Using your fabric shears or snips, cut a 3mm-5mm nick into the fabric where the end of the dart arm is. Repeat for the other side of the dart.

Grab a pin or a fabric marking tool to mark the dart end. I like to poke my pattern-making awl through the dart endpoint to create a small hole. Then I can use my chalk pencil to mark through the sewing pattern onto the fabric without moving my pattern at all. If you prefer to use a pin, poke it through the dart end and lift the sewing pattern so you can mark where the pin is sitting.

Once the dart point and arm ends are marked, use a ruler to line the points up and draw in the dart arms.
Step 2 – Fold the dart
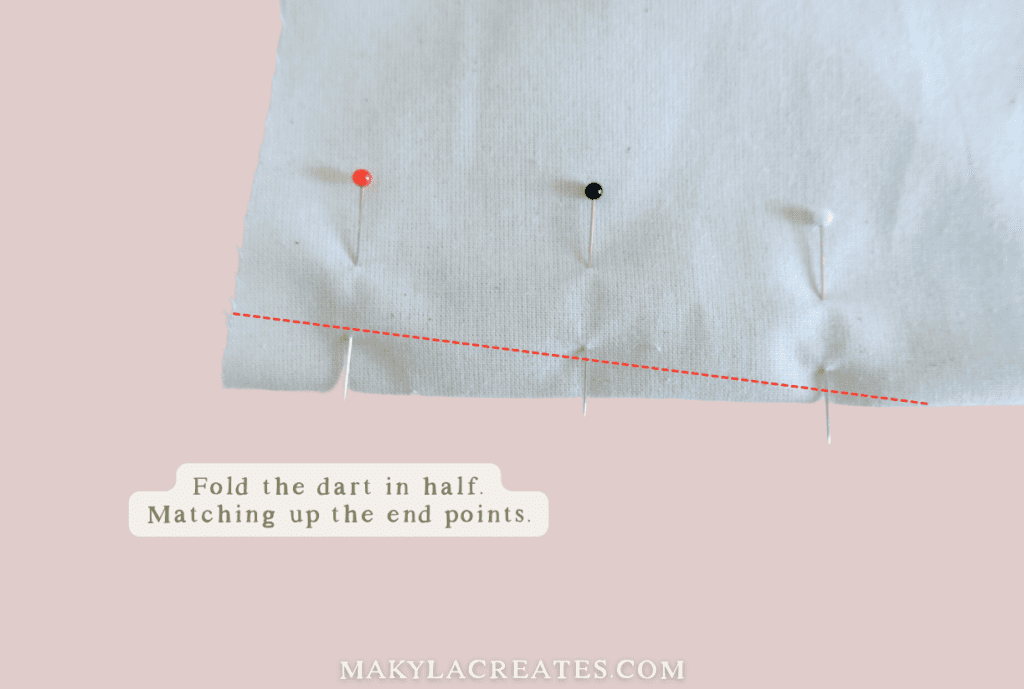
Fold the dart in half, right sides together, by matching the dart end nicks. The dart will start wider and taper into nothing at the dart point. If you need pins to hold the dart fold in place, do so.
Tip: I use my finger to press the dart fold in place depending on the fabric.
Step 3 – Sew the dart
Start sewing the dart from the fabric edge by lining the needle up with the marked dart line, backstitching at the beginning.
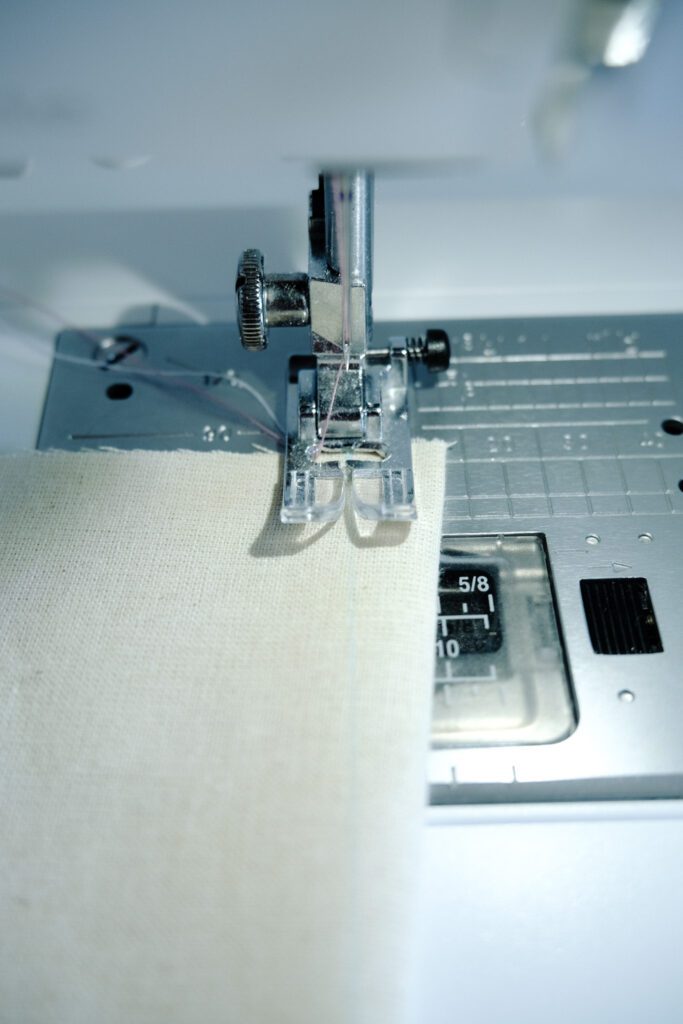
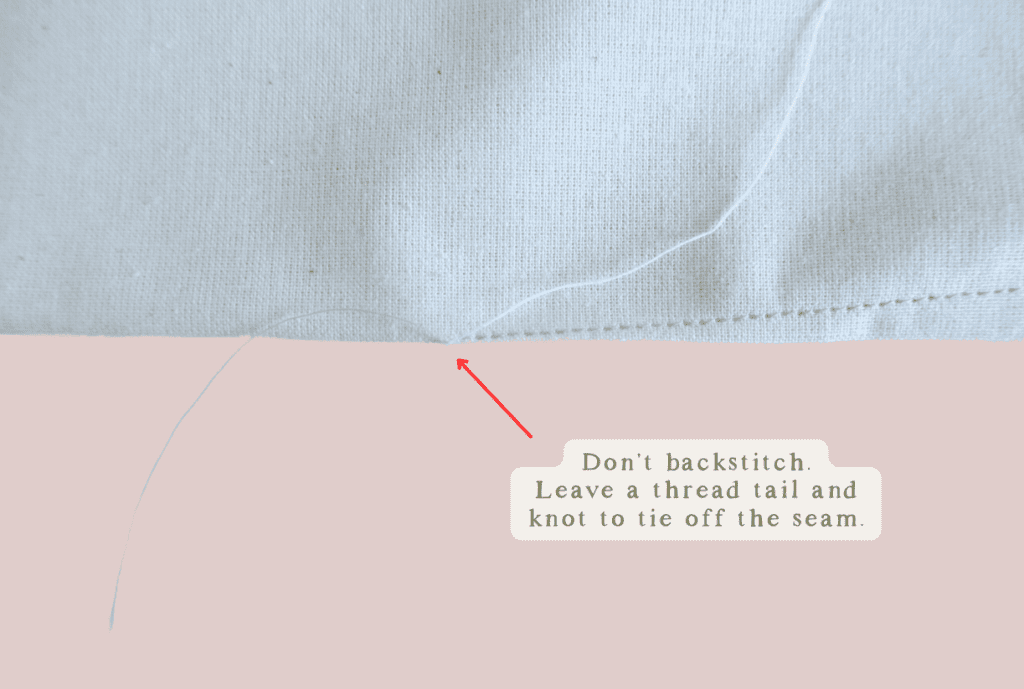
Continue to sew along the marked dart line. When you get to the end (the dart point), keep sewing off the edge of the fabric and leave a thread tail. This stops the dart points from getting distorted or pulled.
Trim the threads off.
Step 4 – Press the darts
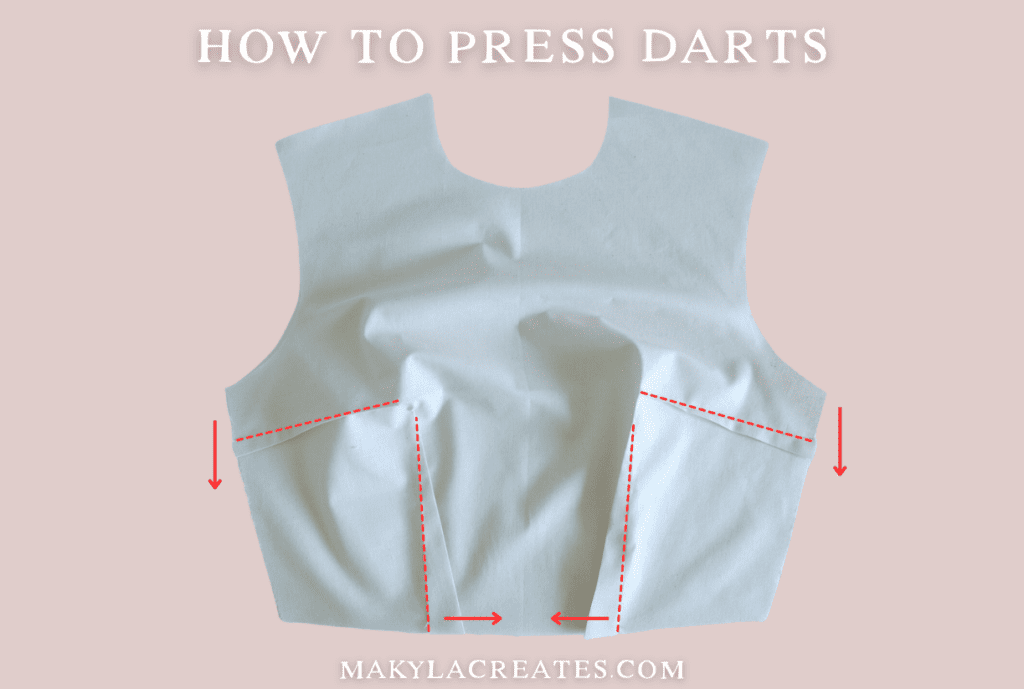
The final step is to press the darts. Depending on the sewing project or pattern, this can change, but pressing horizontal darts down and vertical darts towards the centre is common practice.
You may notice that darts sit wrong on the body if pressed incorrectly. They are designed to shape or curve with the body, not against it, so keep this in mind!
How to Sew Double-pointed Darts (Contour Darts or Diamond Darts)
Double-pointed darts, contour darts or diamond darts are all the same. A double-pointed dart is a long single dart that fits at the waistline and tapers off at both ends. This helps contour the garment at the front and back without needing a waistline seam. The front darts shape to the bust and hips, and the back darts shape to the back and hips. Two darts are needed on either side of the front pattern piece and the back to get even shaping.
You will find double-pointed darts on dresses, jackets, blazers or shirts.

Step 1 – Mark the double-pointed darts
Start by marking the double-pointed darts on the fabric. To do this, use a tracing wheel and trace through the sewing pattern on the fabric below. Another option is marking the dart points and drawing in the lines.

Step 2- Fold the dart
Fold the dart in half, right sides together, by matching the dart lines and points together. Start by matching the waist, then at both points.
This can be done by placing pins through one side and checking that they go through the other side perfectly aligned.

Step 3 – Sew the double-pointed dart
The dart is sewn in two separate steps. Starting just past the waist and stitching towards the point. Sew past the fabric and leave a thread tail to tie off later.
Repeat the process but start sewing from the waist towards the other point. Overlap the stitching lines at the waist point. Tie off both dart ends.


Step 4 – Clip the dart
Clip into the waistline 3mm from the stitching line. This will allow the fabric to curve with the waist.

Step 5 – Press the dart
To get the dart to sit nicely, press it towards the centre.
What is the difference between darts and pleats?
Both of these sewing techniques are found on garments to create shaping, but they each work in different ways. A dart is a fold sewn into the fabric to create a tapered shape, while a pleat is more like a flat fold held in place with stitching to create fullness. Darts help shape flat areas of a garment, like the bust, waist, or back, while pleats add volume to a skirt or dress.
Sewing Darts Conclusion
I hope now that you understand the basics of a dart, they shouldn’t feel too overwhelming or scary to approach. Practice makes perfect, so applying the methods above can help you improve and become confident in this sewing technique. Let me know in the comments below if you are smashing sewing darts 🙂