Discover how to cover a lampshade with fabric in less than 40 minutes with this beginner-friendly tutorial. Adding charming, fabric-covered lamps around your home is a wonderful way to add ambience and cosiness to your space.
Once I moved into my own home I discovered my passion for homemaking. There’s something deeply satisfying about creating a warm and inviting environment.
While I do appreciate the look of a well-decorated space, my goal is not to create a home that looks like it’s straight out of a magazine. I believe that a home should be lived in, with all the little imperfections that come with everyday life. That’s why I aim to add a homemade charm to my space that is both inviting and functional.

I have seen many beautiful kitchens and homes online filled with lovely lamps. From the kitchen counter, and sideboard to the bedside tables. Lamps are in and it’s easy to see why. They create a warm, comfy, and cosy environment.
So I decided to take on the project of covering my lampshade to create a charming, cute lamp for my kitchen.
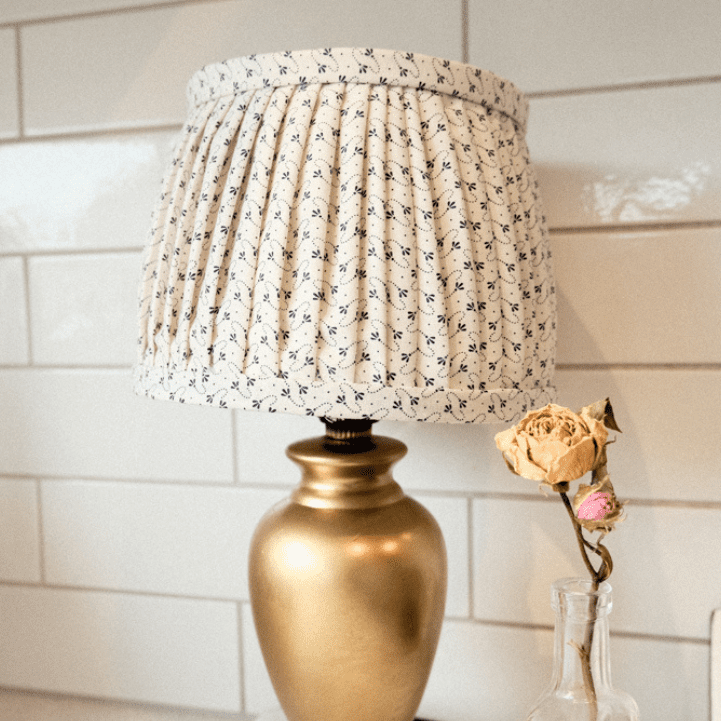
For this project, I thrifted the lamp base and lamp shade separately for a total cost of $10. The lamp base was a brown colour that didn’t match my home decor so I spray-painted it gold to freshen it up.
I want my friends and family to feel extremely comfortable when they visit, which is why I love to also make cushion covers, and pillowcases to decorate my home with.
This Post May Contain Affiliate Links. Please Read Our Disclose Policy.
Why You Will Love This Simple Lampshade Project
- An affordable way to update an old lamp
- Adds character and homemade charm to your home
- Quick and easy project that doesn’t require a sewing machine
Where Can You Add Lamps in Your Home?
Lamps are a beautiful way to add a cosy ambience to any space or home. So where should you place lamps in your home?
- Bedside – An obvious and more common spot to place your lamps is next to the bed. They could be placed on a bedside table to add a charming touch, or you could find some sconce lights to place on the walls on either side of the bed. We have pleated sconce lights in our bedroom and love the vibe they create when we are in bed at night.
- Kitchen counter – A new trend that has sparked all over Instagram and Tiktok is to place a smaller lamp on your kitchen counters to create a cosy kitchen environment. I love this idea!
- Buffet or sideboard – If you have a buffet or sideboard in your dining room or kitchen then why not pop a lamp on top? It’s charming to have a room backlit and safer than having candles burning.

Materials and Tools You Will Need:
Lamp with a lampshade (I found mine secondhand)
Cotton or Linen Fabric (4x the circumference of the lampshade)
1cm wide elastic (1 cut to the rim of the top of the lampshade & 1 cut to the rim of the bottom of the lampshade)
Hot glue gun & glue sticks
Fabric shears
The Best Fabrics to Use for a Lampshade
I recommend using fabrics made from 100% cotton or linen fibres for the best results. They can hold their structure nicely when pleated but will also be easier to work with compared to slippery silk.
It’s also safer to have a natural fibre compared to polyester, which could melt with the heat from the lamp bulb.

How To Cover a Lampshade – Pleated Lampshade
Step One: Cut the fabric
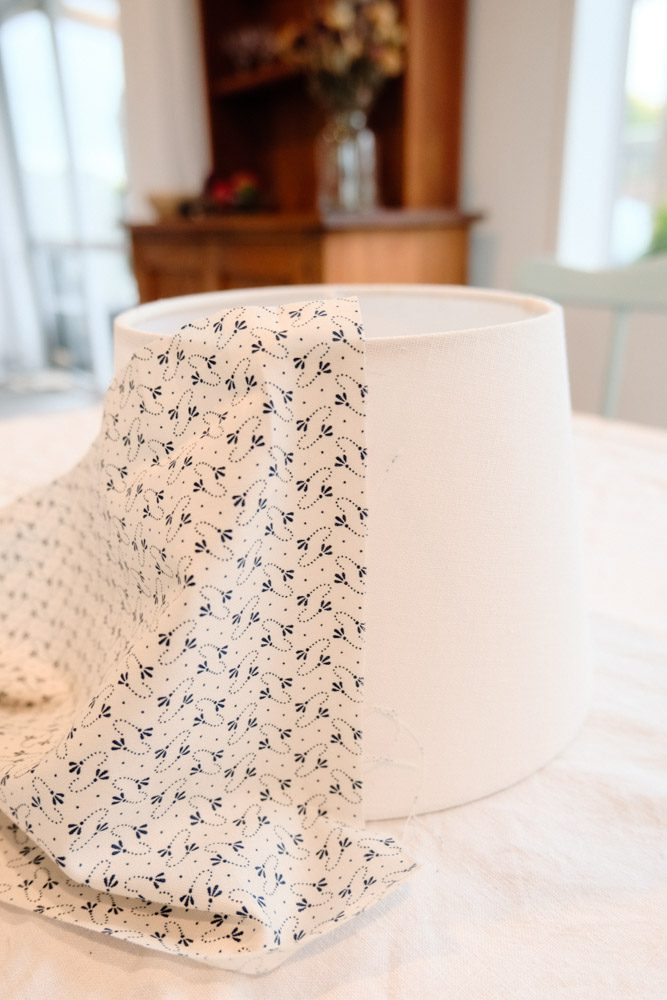
Begin by cutting out the fabric 8cm wider than the lampshade length. You want 4cm hanging over the top and bottom edges.
Step Two: Attach the fabric to the lampshade
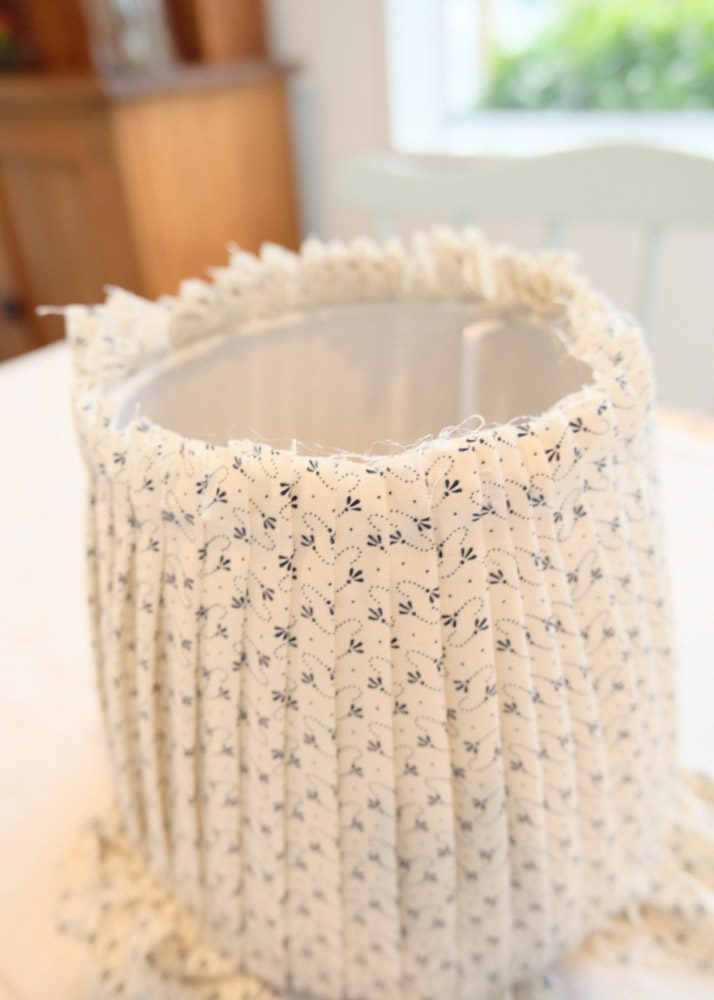
Glue the fabric to the lampshade at the centre back and begin pleating the fabric up. To make the fabric pleats, fold the fabric over itself, glue each end, and press down to help the fabric stick in place.

Continue to pleat the fabric and glue it in place. If your lampshade is wider at the bottom try folding the pleats more at the top and less at the bottom to avoid the fabric becoming uneven.


When you reach the beginning of the pleats trim the excess fabric off leaving enough to do one last pleat. Make sure to fold the last pleat with the raw edges of the fabric hidden in the fold. Glue in place to cover the start of the fabric.
Step Three: Reinforce the pleated fabric to the lampshade
Once all the pleats are completed go around the top and bottom of the fabric pleats and add extra glue in-between the fabric and lampshade to hold it in place securely.
Trim off the excess fabric around the top and bottom as close to the lampshade as possible.

Step Four: Cover elastic for binding the lampshade
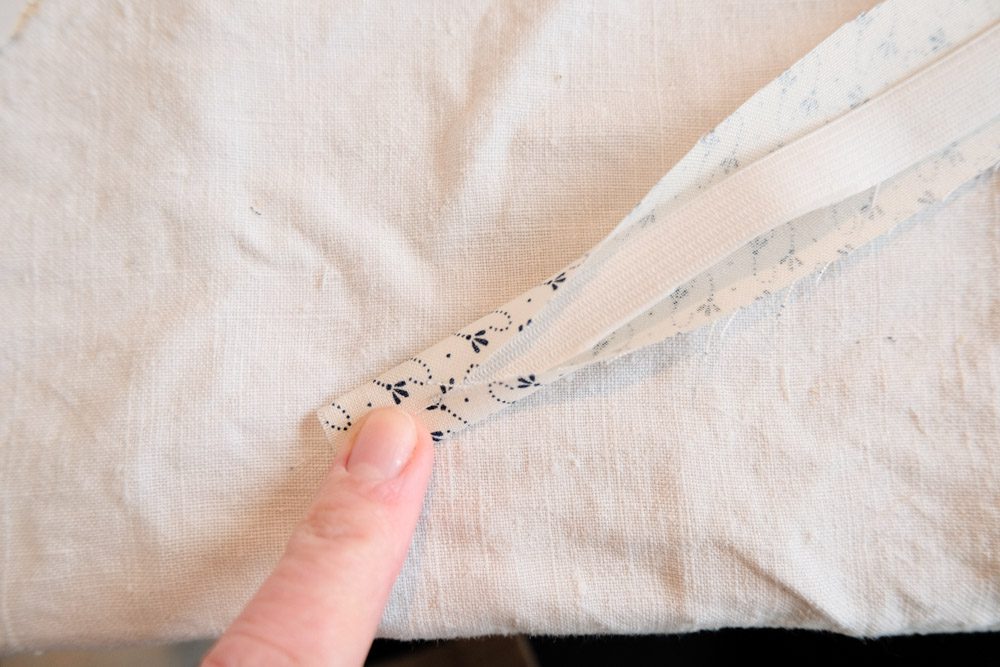
Cut two strips of fabric the length of the elastic, plus 2cm and 3cm wide.
Glue the fabric to the elastic with the elastic sitting centre of the fabric strip. One end will have an extra 2cm of fabric, leave this for later. You want the pattern or right side of the fabric to be showing.
Add some glue down the centre of the elastic and fold the fabric sides up on top of each other to cover the elastic completely.

Step Five: Attach the binding to the lampshade
Slowly add hot glue along the top edge of the lampshade and begin attaching the top cover elastic piece.
Once you get to the end fold the 2cm extra fabric over and cover the beginning of the elastic binding.

Repeat for the bottom edge.
That’s it! Attach the lampshade back onto your lamp and it’s good to go.
More Home Projects You Will Love:
- How to Make Pot Holders with No Pattern
- How to Make a Drawstring Bag
- Reusable Paper Towels DIY (Unpaper Towels)
How to Cover a Lampshade

Discover how to cover a lampshade with fabric in less than 40 minutes with this beginner-friendly tutorial. Adding charming, fabric-covered lamps around your home is a wonderful way to add ambience and cosiness to your space.
Materials
- Lamp with a lampshade (I found mine secondhand)
- Cotton or Linen Fabric (4x the circumference of the lampshade)
- 1cm wide elastic (1 cut to the circumference of the top of the lampshade & 1 cut to the circumference of the bottom of the lampshade)
Instructions
- Begin by cutting out the fabric 8cm wider than the lampshade length. You want 4cm hanging over the top and bottom edges.
- Glue the fabric to the lampshade at the centre back and begin pleating the fabric up. To make the fabric pleats fold the fabric over itself and glue each end and press down to help the fabric stick in place.
Continue to pleat the fabric and glue it in place. If your lampshade is wider at the bottom try folding the pleats more at the top and less at the bottom to avoid the fabric becoming uneven.
When you reach the beginning of the pleats trim the excess fabric off leaving enough to do one last pleat. Make sure to fold the last pleat with the raw edges of the fabric hidden in the fold. Glue in place to cover the start of the fabric. - Once all the pleats are completed go around the top and bottom of the fabric pleats and add extra glue in-between the fabric and lampshade to hold it in place securely. Trim off the excess fabric around the top and bottom as close to the lampshade as possible.
- Cut two strips of fabric the length of the elastic, plus 2cm and 3cm wide. Glue the fabric to the elastic with the elastic sitting centre of the fabric strip. One end will have an extra 2cm of fabric, leave this for later. You want the pattern or right side of the fabric to be showing. Add some glue down the centre of the elastic and fold the fabric sides up on top of each other to cover the elastic completely.
- Slowly add hot glue along the top edge of the lampshade and begin attaching the top cover elastic piece. Once you get to the end fold the 2cm extra fabric over and cover the beginning of the elastic binding. Repeat for the bottom edge.
That’s it! Attach the lampshade back onto your lamp and it’s good to go.
Notes
I recommend using fabrics made from 100% cotton or linen fibres for the best results. They can hold their structure nicely when pleated but will also be easier to work with compared to slippery silk. It’s also safer to have a natural fibre compared to polyester, which could melt with the heat from the lamp bulb.