
This easy, beginner-friendly sewing tutorial teaches how to make a handy drawstring bag in less than 15 minutes. These drawstring bags are a great way to use up any fabric scraps you have lying around into something useful.
Drawstring bags have so many uses. They can hold fruit and vegetables in your weekly shop. If you have children, these are handy for carrying snacks or essentials. If you make homemade gifts like these 15 handmade gift ideas, you could wrap them in these lovely drawstring bags, a thoughtful and reusable wrapping solution!
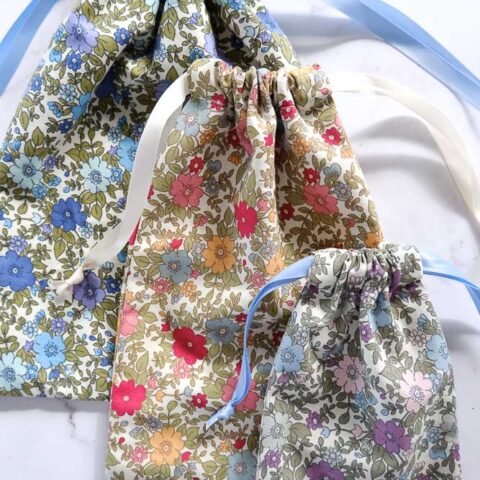
This tutorial includes three handy sizes, 22cm, 26cm and 30cm to choose from.

Why You Will Love These Drawstring Bags
- Quick to sew together in under 15 minutes
- A functional way to use up scrap fabrics
- It has many uses, from storing fruit to being a gift wrap
- This beginner-friendly tutorial is an excellent first-sewing project
What can you use these drawstring bags for?
These drawstring bags have many uses, so it’s worth sewing them.
- Produce Bags – Ditch the single-use plastic produce bags at the supermarket and use these instead. They can be made from natural, undyed cheesecloth or calico. I love using mine for grocery shopping – they are easy to take in my bag and fit everything I need to pick up.
- Gift Wrapping – If you have a gift to give, homemade or store-bought, these bags are a nice way to wrap them. It’s an extra present that is more useful and prettier than wrapping paper.
- For organising – If you have lots of beauty products or knickknacks, pop them into these bags to keep things organised. You could add little tags, so you know what each bag contains.
- In your purse – Keep small bits together in your purse, like lipsticks, tampons, hair ties and bobby pins. These essentials are always in my handbag, but they get thrown around or lost unless kept in my drawstring bag.
- To hold craft supplies – If you love making things, these drawstring bags are perfect for keeping supplies together in one place. I’m notorious for working on multiple projects at once, so this keeps me from losing anything.
- In luggage – If you travel, you can place small items like socks, underwear, makeup, chargers, or other essentials. This is the best way to keep your suitcase from becoming a stressful mess.

Materials and Tools You Will Need:
Fabric (as cutting guide below)
Ribbon, binding, or drawstring cord (as cutting guide below)
Thread
Sewing machine
Cutting tools like fabric shears or a rotary cutter
Iron
The Best Fabrics and Drawstrings to Use
I recommend using fabrics with a sturdier structure for these drawstring bags. Materials like cotton poplin, quilting cotton, cotton drill, linen, and calico are all suitable. They are easy fabrics to sew and care for and will be durable.
Use a cord, ribbon, or bias binding for the bag drawstrings. A pretty cotton lace would also be lovely.

How To Make a Drawstring Bag
Step One: Cut out the drawstring bag pieces
Begin by cutting out the fabric to size. You will need a pair to make 1 bag.
Small bag (Finished size: 12 x 22cm) = Cut 2 rectangles of fabric 15 x 29.5cm and 2 drawstrings 36cm long.
Medium bag (Finished size: 16 x 26cm) = Cut 2 rectangles of fabric 19 x 33.5cm and 2 drawstrings 48cm long.
Large bag (Finished size: 21 x 30cm) = Cut 2 rectangles of fabric 24 x 37.5cm and 2 drawstrings 60cm long.

Step Two: Mark in drawstring casing
Mark in the casing by measuring 6cm down from the top edge of the bag. These are the notch points.
The notch points are the starting and finishing point of the side seams.

Step Three: Begin sewing the French seams
With the wrong sides of the fabric touching, begin sewing a 5mm seam at the first notch. Stop when you get to the second notch. Trim the corners

Snip into the seam at the notch point – be careful not to cut the stitching line.

Turn the bag out so the right sides are touching. Press the bag flat to make the seams crisp.
Sew the second seam with a 1cm seam allowance, starting at the notch point again. Stop when you reach the second notch.

Step Four: Press the casing sides
Turn the bag inside out so the print or right side faces outwards. The top of the bag will have four raw edges. Press these in by folding under 5mm, then 1cm.

Fold down the top edges of the bag 1cm and press to crease.

Fold the top of the bag once more (keeping the 1cm folded) down to the notch point. Edge stitch the casings closed.

Step Five: Thread the drawstring
Next, thread the first drawstring through one side and around and out the other end. Tie the ends together.

Thread the second drawstring starting at the no-tie end and back around, tying the ends together.

And that’s it!
More Sewing Project Tutorials You Will Love:
- Reusable Paper Towels DIY (Unpaper Towels)
- DIY Ruffle Check Cushions {Heather Taylor Inspired}
- How To Make Pot Holders
- How To Make A Apron
- How To Make Coasters From Fabric
How to Make a Drawstring Bag
This easy, beginner-friendly sewing tutorial teaches how to make a handy drawstring bag in less than 15 minutes. These drawstring bags are a great way to use up any fabric scraps you have lying around into something useful. Drawstring
bags have so many uses. They can hold fruit and vegetables in your weekly shop. If you have children, these are handy for carrying snacks or essentials. If you make homemade gifts like these 15 handmade gift ideas, you could wrap them in these lovely drawstring bags, a thoughtful and reusable wrapping solution! This
tutorial includes three handy sizes, 30cm, 26cm, and 22cm, to choose from.
Materials
- Fabric (cutting guide in instructions below)
- Ribbon, drawstring or binding (cutting guide in instructions below)
Tools
- Thread
- Sewing machine
- Fabric shears or rotary cutter
- Pins
- Safety pin
Instructions
- Cut out the drawstring bag pieces
Begin by cutting out the fabric to size. You will need a pair to make 1 bag.
Small bag (Finished size: 12 x 22cm) = Cut 2 rectangles of fabric 15 x 29.5cm and 2 drawstrings 36cm long.
Medium bag (Finished size: 16 x 26cm) = Cut 2 rectangles of fabric 19 x 33.5cm and 2 drawstrings 48cm long.
Large bag (Finished size: 21 x 30cm) = Cut 2 rectangles of fabric 24 x 37.5cm and 2 drawstrings 60cm long. - Mark in drawstring casing
Mark in the casing by measuring 6cm down from the top edge of the bag. These are the notch points. The notch points are the starting and finishing point of the side seams. - Begin sewing the French seams
With the wrong sides of the fabric touching, begin sewing a 5mm seam at the first notch. Stop when you get to the second notch. Trim the corners and snip into the seam at the notch point – be careful not to cut the stitching line. Turn the bag out so the right sides are touching. Press the bag flat to make the seams crisp. Sew the second seam with a 1cm seam allowance, starting at the notch point again. Stop when you reach the second notch. - Press the casing sides
Turn the bag inside out so the print or right side faces outwards. The top of the bag
will have four raw edges. Press these in by folding under 5mm, then 1cm. Fold down
the top edges of the bag 1cm and press to crease. Fold the top of the bag once more (keeping the 1cm folded) down to the notch point. Edge stitch the casings closed. - Thread the drawstrings
Next, using a safety pin thread the first drawstring through one side and around and out the other end. Tie the ends together. Thread the second drawstring starting at the no-tie end and back around, tying the ends together.
And that’s it!
Notes
- I recommend using fabrics with a sturdier structure for these drawstring bags. Materials like
cotton poplin, quilting cotton, cotton drill, linen, and calico are all
suitable. They are easy fabrics to sew and care for and will be durable. - Use a cord, ribbon, or bias binding for the bag drawstrings. A pretty cotton lace would also be lovely.
- The seam allowance is 1.5cm wide.


I think you got the measurements of cut fabric size to fisnished bag size a little mixed up in the directions.
You’re right I have muddled them up, thanks for pointing this out to me David! I have amended the instructions.
Here are the correct measurements:
Small bag (Finished size: 12 x 22cm) = Cut 2 rectangles of fabric 15 x 29.5cm and 2 drawstrings 36cm long.
Medium bag (Finished size: 16 x 26cm) = Cut 2 rectangles of fabric 19 x 33.5cm and 2 drawstrings 48cm long.
Large bag (Finished size: 21 x 30cm) = Cut 2 rectangles of fabric 24 x 37.5cm and 2 drawstrings 60cm long.